
Hey you guys! I know what you are thinking. More stripes, Sarah? Yep, More. Stripes. I really just can't get my obsession under control. I'm okay with it though... so I have been wanting some bookends forever and I spotted some at West Elm that I loved but they were so expensive and I knew I could definitely make something similar myself. I used scrap wood from my garage, a little bondo and lots of painter's tape to create these bookends. My husband helped me, but it's easy enough for anyone to do! Here is the full how-to:
Materials Needed:
- Wood glue
- 1x5 board
- Bondo or wood filler
- Clamps
- White paint
- Black paint
Instructions:
- Measure and cut board into 6 equal triangles - mine are 5 inches long and 7 inches high at 90 degree angles.
Tip: if you don't have a saw, you can have boards cut at Home Depot - they will do 5 cuts for free and then you pay per cut after that! - Use wood glue to attach three triangles together, then clamp them and let it dry for an hour. Repeat this step again for the second bookend.
- Use bondo or wood filler to smooth over the surface and fill in cracks between boards. Let dry.
- Sand as necessary.
 Once your bookends are assembled and sanded, it's time to paint, tape and paint some more. If you are going to paint yours striped like mine, you will want to start by painting the whole thing the lightest color, in my case it was white. In these pictures I taped before painting - that was a mistake and I ended up having to re-tape them after painting, so don't be like me! Paint your bookends one solid color first, let it dry for at least 12 hours, then tape stripes as you see below.
 This is the most time-consuming part of this project. You will want your stripes to be symmetrical and even on both bookends, so you want to be meticulous about it. Instead of using a measuring tape or ruler, I just taped each side entirely, making sure to keep the lines as straight as possible, and then removed every other piece of tape.
 Once your bookends are assembled and sanded, it's time to paint,
 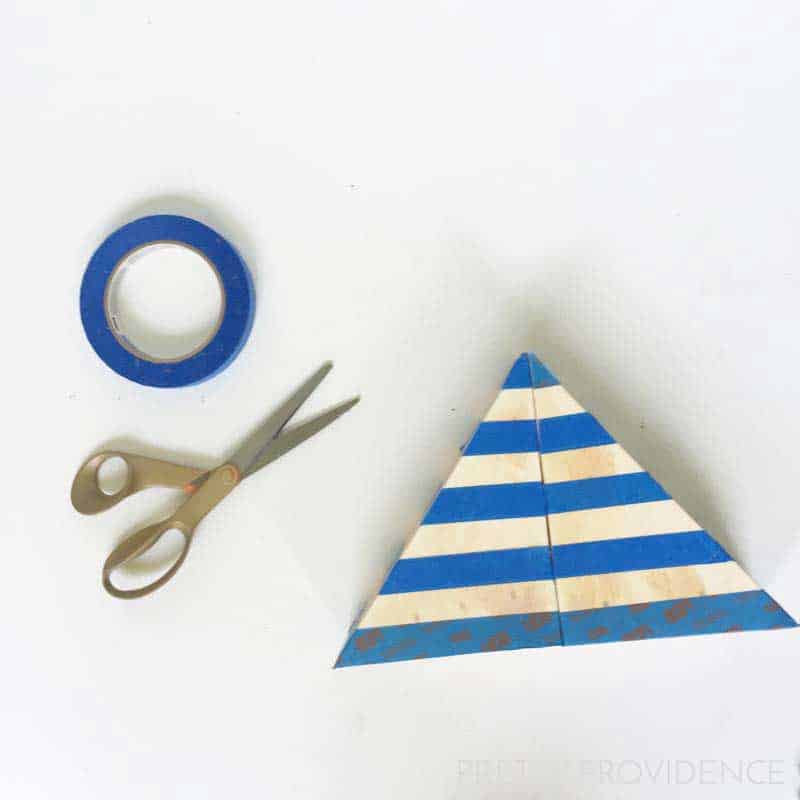 This is the most time-consuming part of this project. You will want your stripes to be symmetrical and even on both bookends, so you want to be meticulous about it. Instead of using a measuring tape or ruler, I just taped each side entirely, making sure to keep the lines as straight as possible, and then removed every other piece of tape.
Once you are done taping, paint two coats of black paint (or the color of your choice.) Wait 'til it's dry to the touch, then remove painter's tape and place books in between them.

 |
 |
 |
 |


I'm super happy with the result and I have been getting lots of compliments on them! So I hope you will give this one a try.

If you like this definitely check out my other black and white DIY's!
 |
 |
 |


Aimee
So in DOING This, a 1x5 doesn't exist. I had to get a 1x6.
Also home depot no longer cuts angled things.
They Gave me one that was damaged on one end. I got it for 70% off and it works fine.
Jessica
Awesome that you got a deal though!
Aimee
So in doing This, I went to home depot And a 1X5 doesn't exist. They gave me a 2x6.
They also gave me one that's been damaged where it was just one end that was. I paid 50 cents for a 2x6.
Jessica
Ugh I'm so sorry! They totally had them at my store! I bet 1x5 would still look cute though.