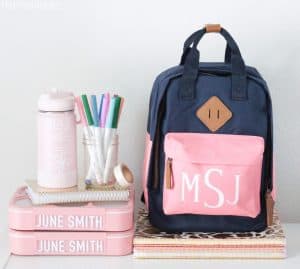
DIY Monogrammed Backpack
It's so easy to make a DIY monogrammed backpack with Cricut vinyl (HTV.)
Makes 1 backpack
Cost $25
Equipment
- StandardGrip Mats
- EasyPress Mini or Iron
- Cricut Maker (or any Cricut Machine)
Supplies
- Backpack
- Everyday Iron-On
Instructions
DESIGN
- First, create a monogram in Design Space.
- This font is called ‘High Jump’ and it is one of my favorite Cricut fonts to use for monograms. More monogram font ideas in this post.
- Once the monogram is sized and spaced how you want it on your Design Space canvas, click ‘group’ and then ‘attach.’
- Make sure to measure the surface of your backpack that you want the monogram to fit on and size the design accordingly.
CUT IRON-ON
- Cut a piece of iron-on to size and place it shiny side down on a StandardGrip mat.
- Click ‘Make it’ and then you will see this screen. Select ‘Mirror’
- Load mat into the Cricut and when the little Cricut icon flashes, click it to begin cutting.
- Remove iron-on from the mat and weed.
APPLY IRON ON TO BACKPACK
- First, heat an EasyPress Mini to 315 degrees (or an iron to its hottest setting) while you weed the design.
- If you’re using an iron, make sure steam is turned off.
- Now, cover the backpack with a thin fabric, like a tea towel. Now you can press the design with heat for about 60 seconds. Check under the towel as you go to make sure you aren’t melting anything.
- Wait for it to cool a little bit, just til it’s warm and then peel it.
Notes
- Cricut has a StrongBond™ Guarantee. If you use their Iron-On as directed, you’ll be completely satisfied with the results. If not, they’ll replace it for free!
- This backpack is made of a Polyester Cotton blend. You have to be careful (with anything polyester) not to melt it with the heat press.
- Cotton and canvas backpacks are ideal for iron-on projects. I chose the Poly blend bag because it is easier to clean!