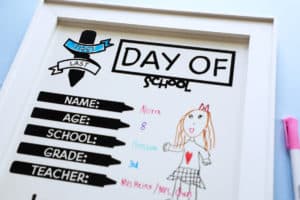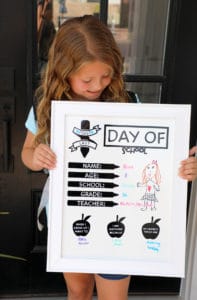
Cute DIY back to school photoshoot board!
Perfect to re-use each year on the first and last days of school.
Makes 1
Cost $20
Equipment
- Cricut Machine
Supplies
- Permanant Vinyl Any Color
- Weeding Tool
- Scissors
- Transfer Tape
- Whiteboard
- Dry Erase Markers
Instructions
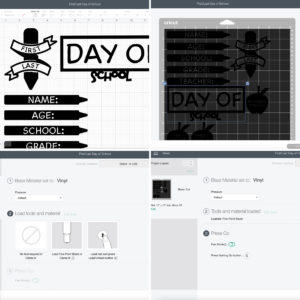
- Open up my design in design space (or feel free to design your own). Here is the link. You can customize your sizing to fit whatever size board you bought. I found my cute framed board at Michaels. When you are ready click "make it." This will show you what your project will look like on the mat. Make sure the correct mat size is selected on the left hand side and click continue. Set your base material to vinyl, apply your vinyl to your mat (I used permanent shiny black), and load your materials onto your machine. Turn on fast mode if your machine has that capability and press go!
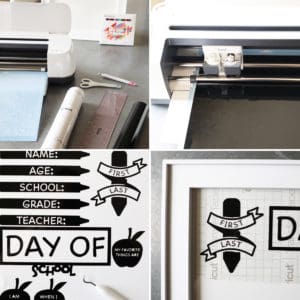
- Gather all the needed supplies. Allow your machine to cut the design. Carefully weed out all excess vinyl. Apply weeded designs to transfer tape. Plan out where you want each piece to lay, and adhere them to the surface of your whiteboard. Remove transfer tape.
- Have your little ones fill out their information and get their smiles on for a fun photoshoot!