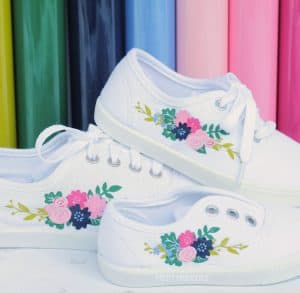
Iron-On Shoes
These floral sneakers are a fun Cricut project to make with canvas shoes. Personalize shoes any way you like with this tutorial!
Cost $30
Equipment
- Cricut Explore Air 2 or Cricut Maker
- StandardGrip Mat
- Weeding Tool
- EasyPress Mini
- Iron-on protective sheet
- Dish Towel
Supplies
- Canvas Shoes
- Everyday Iron-On Colors: Avocado Kelly, Petal, Raspberry, Blush, Navy, Ocean
Instructions
How to Cut Iron-On for Shoes
- Open the floral design in Design Space, or pull up your own design.
- To make two shoes, duplicate the design and size it to how you want it to fit your shoe. Measure the space on your shoe with a ruler. For my Keds style shoe I sized it just over an inch from top to bottom. For my little girls' shoes, it was a little bit less than an inch.
- I also grouped and attached four of the leafy green pieces together on the canvas so that it would cut out exactly how I wanted them on the shoe. The rest I cut individually, because they are all different colors.
- The instructions say to prepare 8 mats. Since I was cutting such small pieces, I actually only used two mats. To do it this way, first you will prepare your mats. Add a piece of iron-on, shiny side down in each color onto the mat.
- Drag each item you're cutting to the area on the digital mat where the corresponding color of Iron-On is on the physical mat. Do this for all the pieces before you start any cuts.
- After cutting each part of the design, you will weed. I find weeding relaxing, especially if I listen to an audiobook or podcast while I do it.
How to Apply Iron On to Shoes with EasyPress Mini
- Heat EasyPress Mini to the hottest setting. Check that your design will fit on the shoe how you want it to, and keep the design on your screen or take a picture of it arranged how you like it so that you can reference it as you iron each piece on.
- Roll up a hand towel and stuff it into the shoe as far as you can. The goal here is to keep the outside of the shoe flat, and to give you something to hold on to while you are applying Iron-On to the shoe.
- This probably goes without saying, but be careful. The EasyPress Mini is very hot and the Iron-On protective sheet gets hot too.
- Apply the pieces one by one, using the protective Iron-On sheet each time. Wait til each layer cools down from hot to warm, and peel off the plastic layer. Repeat until the design is all ironed on.
Notes
I think if I do more projects like this I will get some finger protectors.