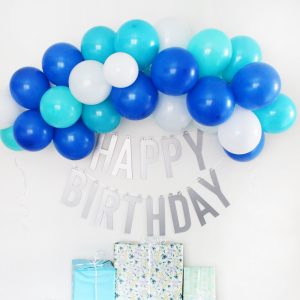
DIY Happy Birthday Banner
This DIY Happy Birthday Banner made with the Cricut knife blade and chipboard is a super fun project to make with Cricut Maker. This banner is beautiful and sturdy so you can use it again and again!
Active Time 5 hours hours
Total Time 3 hours hours
Author Pretty Providence
Cost $20
Equipment
- Strong Grip Mat
- Scissors
- Scraper Tool
- Painters Tape or Masking Tape
Supplies
- Chipboard
- Permanent Vinyl
Instructions
Open Cricut Design Space
- Open the Happy Birthday Banner file Cricut Design Space.
- Once the file is open click "make it."
- Because chipboard is only 11 inches wide you need to change your material size to 11'' x 11''. Once you do this, design space should automatically sort your cuts so that nothing goes over 11 inches on the mat
Add Permanent Vinyl (optional)
- Apply a sheet of permanent vinyl to each piece of chipboard before cutting it out.
- Use a scraper tool to get out any bumps or bubbles, and then trim off the excess vinyl with scissors. This part doesn't need to be perfect, since your letter cuts aren't going to reach the edges of your chipboard anyway- you just don't want the vinyl getting in the way of the machine on the sides.
- Be sure to use a strong grip mat and load chipboard with vinyl side up.
- Secure chipboard to the mat with painters tape or masking tape on all four sides, just to be sure the board doesn't shift during cutting.
Load Machine and Cut Birthday Banner
- Next select your first cut and click continue. What the knife blade can do is totally amazing, but the downside is that it is definitely time consuming. Each can take about 20 minutes, and there are 13 letters to cut, so it takes a couple of hours to cut out all the letters for the sign.
- Once all of the letters are cut, string the happy birthday banner together with some ribbon and get ready to party!
Notes
Pro Tips:
While the machine is cutting you can be doing other things, but make sure your computer sleep timer is turned off so that it doesn't stop your cut when you are not in the room!
The post DIY Happy Birthday Banner was originally published on https://prettyprovidence.com/happy-birthday-banner-diy/ March 13, 2019