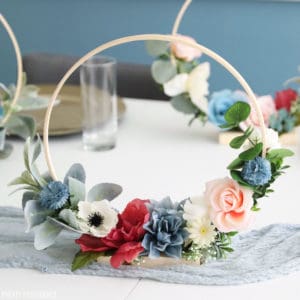
DIY Wedding Centerpieces
Looking for DIY wedding centerpieces you can make ahead of time? These floral hoop centerpieces are beautiful and budget-friendly!
Supplies
- Faux floral
- Faux greenery
- 1 1 in. x 4 in. x 8 ft. lumber
Instructions
- You will begin by preparing your embroidery hoops and wood blocks. Take the embroidery hoops apart so that you have two separate hoops.
- Cut wood to blocks about 1 in. by 4 in. by 3 in. and sand well. *see notes
- Use pliers to remove the extra metal piece that sticks up from the embroidery hoop.
- Draw three small marks on the embroidery hoop and center it on the block.
- Place tiny nails where you want to nail them down.
- Use a hammer to fasten the embroidery hoop to the wood block. Repeat this with each hoop until you have made all the bases you need.
- Next, you will add greenery and flowers to your DIY wedding centerpieces.
- Prepare the flowers by removing any stickers or tags. Cut the stems off of them leaving just the flower part.
- Heat up your glue gun and if you have finger protectors, use them!
- Start by adding greenery to the base. Use floral wire to add bigger pieces, and then secure them with hot glue.
- Fill the rest in with flowers on both sides of the hoop. Centerpieces should look full on both sides since these will be in the center of your tables.
Video
Notes
We use a miter saw to cut the wood blocks. If you don't have one, a hand saw would work or you can ask the hardware store to make cuts for you.