DIY Wedding Centerpieces

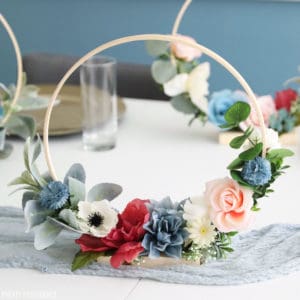
Looking for DIY wedding centerpieces you can make ahead of time? These floral hoop centerpieces are beautiful and budget-friendly!

Last Spring, my friend asked me if I could help her out with her son's wedding reception. She had already bought some faux flowers from Dollar Tree and asked if I could make some centerpieces with what she had. I was excited about the challenge! We decided to keep the budget low, but they didn't need to look like typical cheap wedding centerpieces. I had helped make some floral hoop bouquets for another wedding a few weeks before and thought I could do the same thing but make it a centerpiece. These floral hoop centerpieces are what came out of it.
Making budget-friendly decor for parties and weddings is a hobby of mine. If you want to check out more of our wedding ideas, check out these Getting to Know You Centerpieces, Free Printable Bridal Showe Bingo, and don't miss my tips for How to Decorate a Wedding for Cheap!
*This post contains affiliate links.
How to make DIY wedding centerpieces:
Materials Needed:
- Faux floral (I got most of them at Dollar Tree, a few at Walmart and Michaels)
- Faux greenery
- 1 in. x 4 in. x 8 ft. lumber
Tools and Craft Supplies Needed:
- Glue gun
- Floral wire
- Floral scissors
- Hammer
- Mini nails
- Wire cutter
- Miter saw (optional)
- Finger protectors (optional)
How to make hoop centerpiece bases:
You will begin by preparing your embroidery hoops and wood blocks. Take the embroidery hoops apart so that you have two separate hoops. Cut wood to blocks about 1 in. by 4 in. by 3 in. and sand well.
We use a miter saw to cut the wood blocks. If you don't have one, a hand saw would work or you can ask the hardware store to make cuts for you.
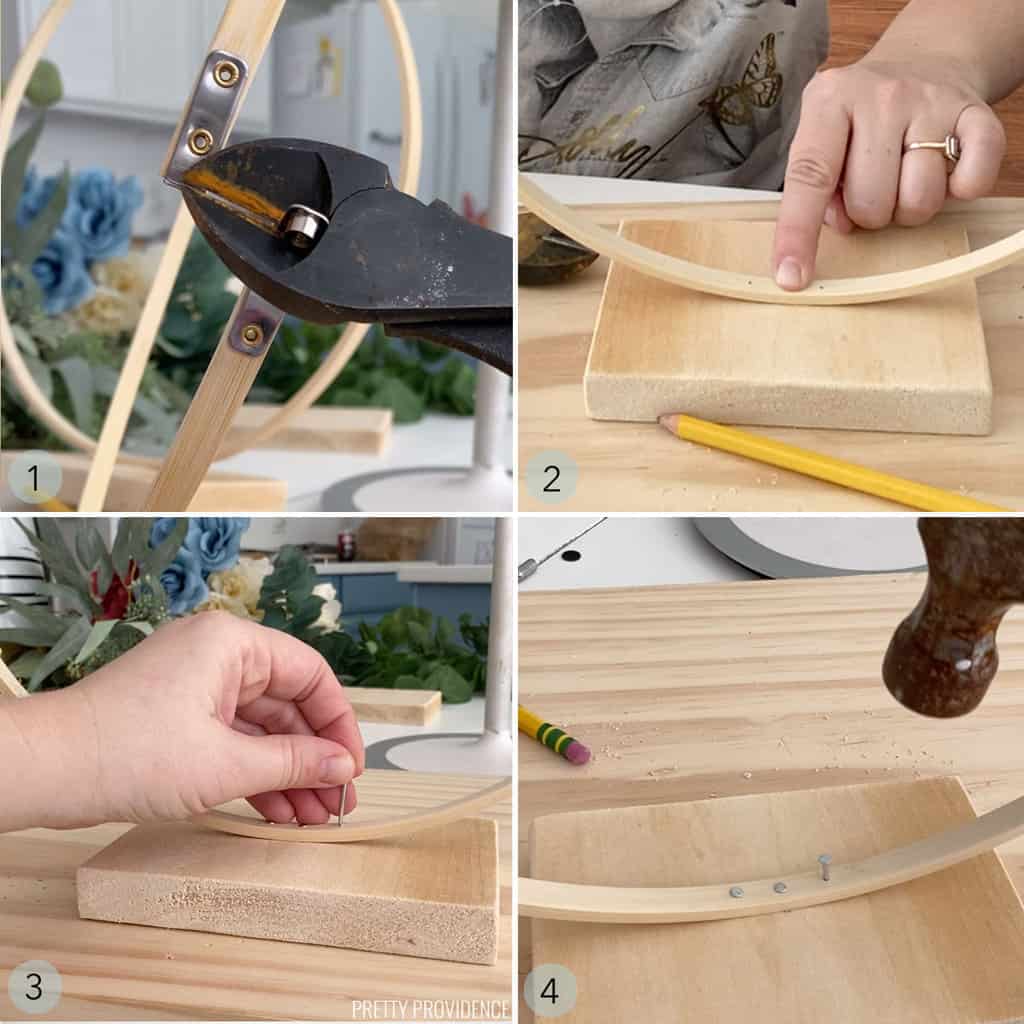
- Use pliers to remove the extra metal piece that sticks up from the embroidery hoop.
- Draw three small marks on the embroidery hoop and center it on the block.
- Place tiny nails where you want to nail them down.
- Use a hammer to fasten the embroidery hoop to the wood block. Repeat this with each hoop until you have made all the bases you need.
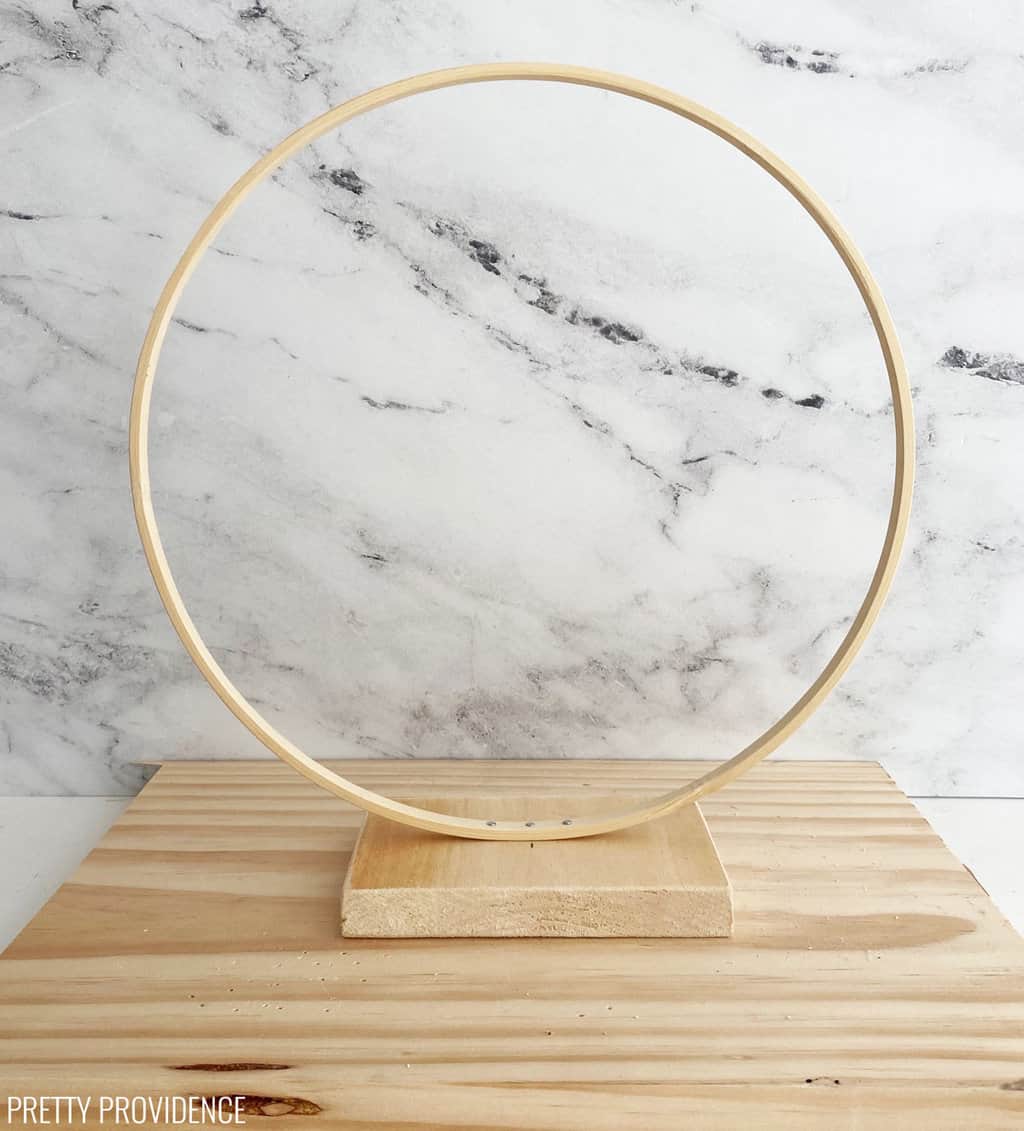
Next, you will add greenery and flowers to your DIY wedding centerpieces.
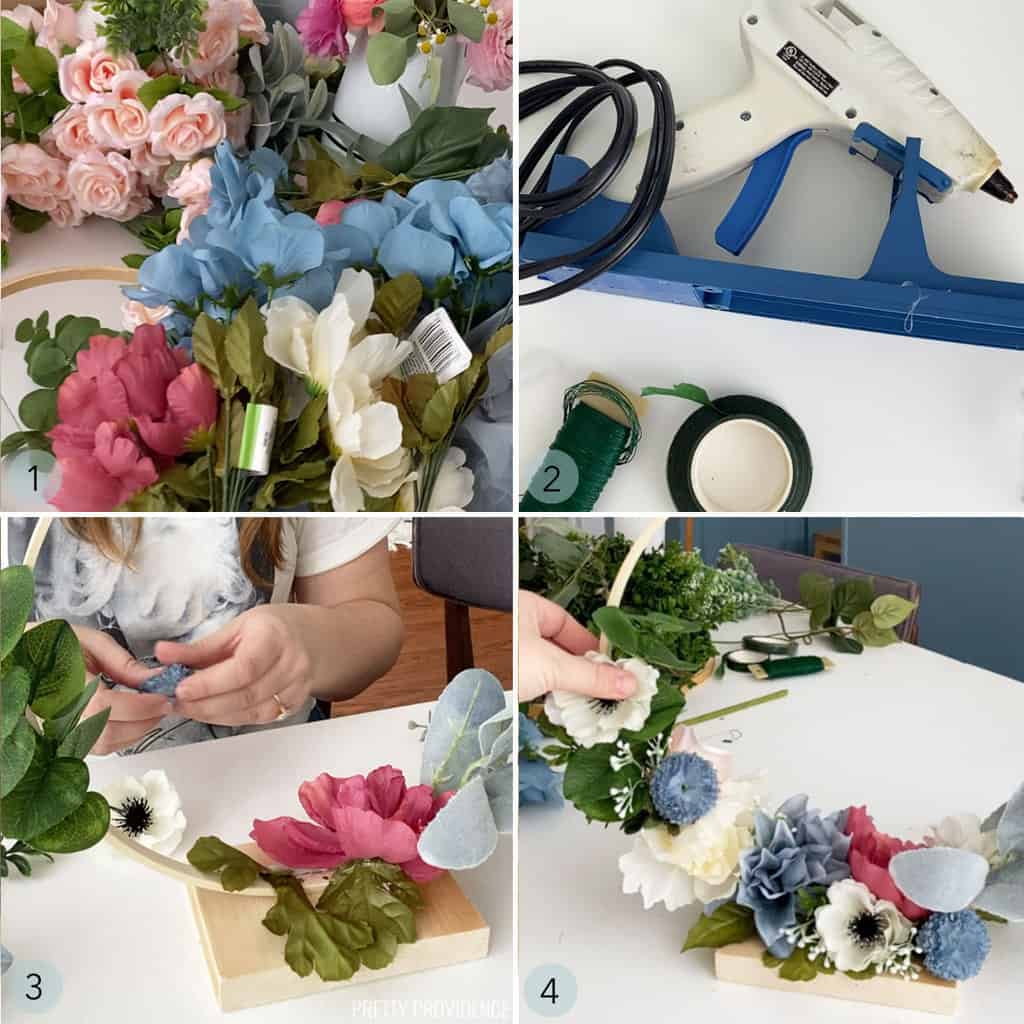
- Prepare the flowers by removing any stickers or tags. Cut the stems off of them leaving just the flower part.
- Heat up your glue gun and if you have finger protectors, use them! (I burned myself a few too many times doing this project.)
- Start by adding greenery to the base. Use floral wire to add bigger pieces, and then secure them with hot glue.
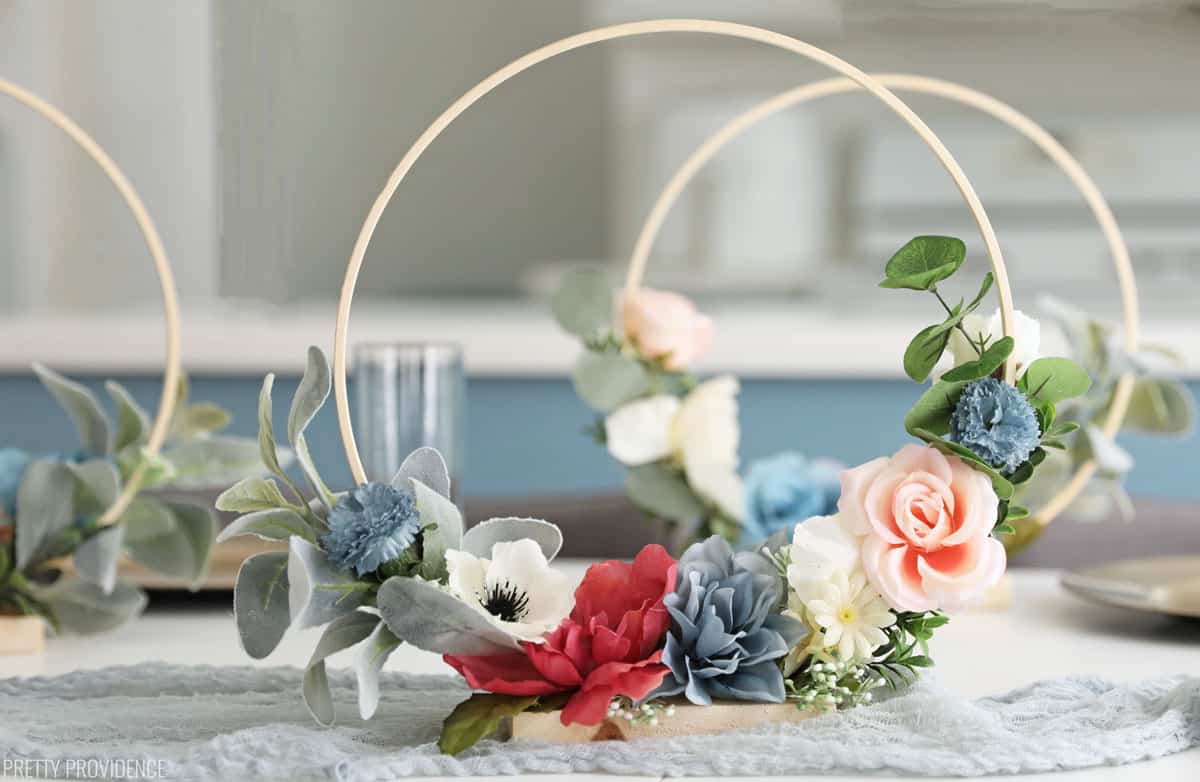
- Fill the rest in with flowers on both sides of the hoop. Centerpieces should look full on both sides since these will be in the center of your tables.
Dollar Tree DIY Wedding Centerpieces
I loved how these turned out and I think the family I made them for was happy too! They definitely fit within the budget and I had fun making them. I was honestly very pleased with the selection of faux flowers at my Dollar Tree. I did get a few accent flowers at Walmart and Michael's, but most of these are from the good ol' dollar store.
If you make these DIY wedding centerpieces, please leave a comment and a positive review! We appreciate them so much!
DIY Wedding Centerpieces
Video
Materials
- Faux floral
- Faux greenery
- 1 1 in. x 4 in. x 8 ft. lumber
Instructions
- You will begin by preparing your embroidery hoops and wood blocks. Take the embroidery hoops apart so that you have two separate hoops.
- Cut wood to blocks about 1 in. by 4 in. by 3 in. and sand well. *see notes
- Use pliers to remove the extra metal piece that sticks up from the embroidery hoop.
- Draw three small marks on the embroidery hoop and center it on the block.
- Place tiny nails where you want to nail them down.
- Use a hammer to fasten the embroidery hoop to the wood block. Repeat this with each hoop until you have made all the bases you need.
- Next, you will add greenery and flowers to your DIY wedding centerpieces.
- Prepare the flowers by removing any stickers or tags. Cut the stems off of them leaving just the flower part.
- Heat up your glue gun and if you have finger protectors, use them!
- Start by adding greenery to the base. Use floral wire to add bigger pieces, and then secure them with hot glue.
- Fill the rest in with flowers on both sides of the hoop. Centerpieces should look full on both sides since these will be in the center of your tables.
Notes


I am swooning over these centerpieces! They are absolutely beautiful!
What a beautiful idea for centerpieces. We will try this for Mother's day with our sisters!
These are so pretty!! Thanks for sharing this. Looks easy & would make any reception more beautiful!!