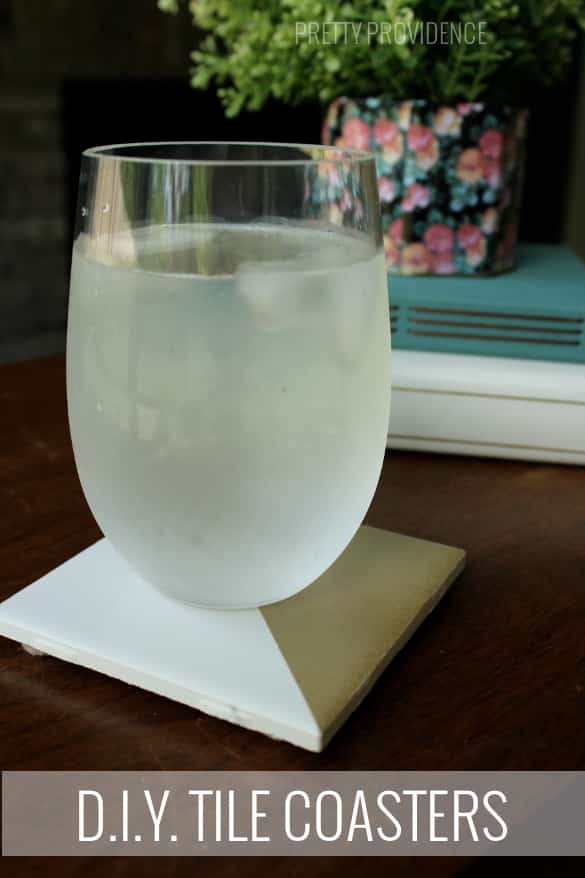
• Skip to primary navigation
  • Skip to main content
  • Skip to primary sidebar
  • Skip to footer

Pretty Providence

  • Home
    • Newest Blog Posts
  • About
  • Recipes
    • Appetizers
    • Beverages
    • Breakfast
    • Dessert
      • Cookies
    • Dinner
    • Salads
    • Side Dishes
  • DIY & Crafts
    • Cricut
    • T-Shirts
    • Crafts
    • Decor
    • DIY Projects
  • Holidays
    • Halloween
    • Thanksgiving
    • Christmas
    • New Years Eve
    • Valentine’s Day
    • St. Patrick’s Day
    • Easter
    • Mother’s Day
    • Father’s Day
    • 4th of July
  • TIPS
    • Tips
    • Organization
    • Family Life
      • Baby
      • Fun
      • Family
    • Travel
  • OCCASIONS
    • Gifts
    • Parties
  • Navigation Menu: Social Icons

    • Facebook
    • Instagram
    • Pinterest
    • YouTube

DIY Tile Coasters

Home » Decor » DIY Tile Coasters

Published May 22, 2014 Last Updated June 10, 2019 / By Sarah 2 Comments

Tweet
Pin811
Share
Email
811 Shares

You guys, I realized about a month ago that I didn’t have any coasters, and I had never noticed that before. We honestly don’t have much furniture that isn’t already beat up, so I guess we were never that concerned about protecting it. I decided we needed some though, because I keep noticing I have nowhere to put my drink and using, like, receipts and stuff as coasters and that just won’t do. So I headed over to the hardware store and the plain white tiles were only 13 cents each! Here’s how I made these cuties:

DIY Tile Coasters - This was so easy and plain white tiles cost 13 cents each at the hardware store!

Items needed:

Plain white tiles
Acrylic paint or spray paint in pretty colors
Painters tape
Paint brushes
Clear coat spray finish
Self-adhesive felt pads (the kind you put on the bottom of chairs and stuff)

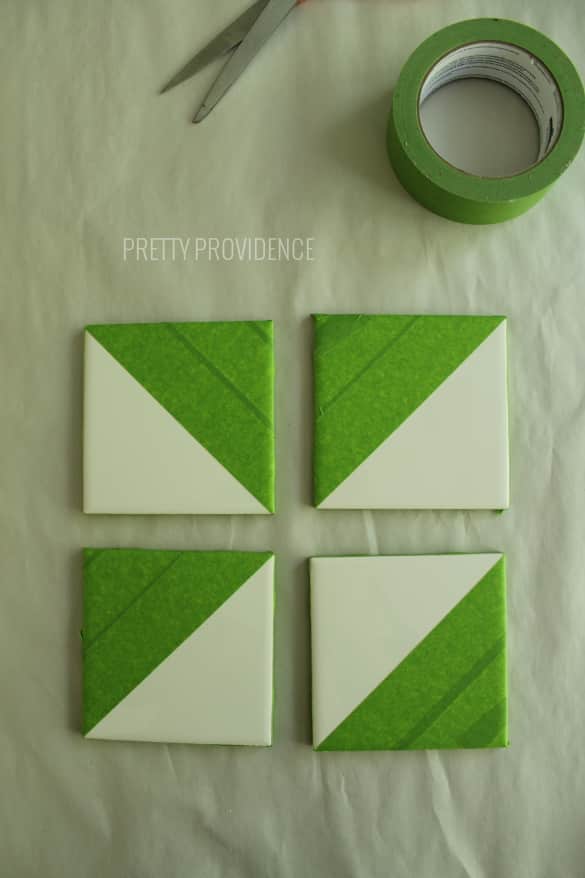
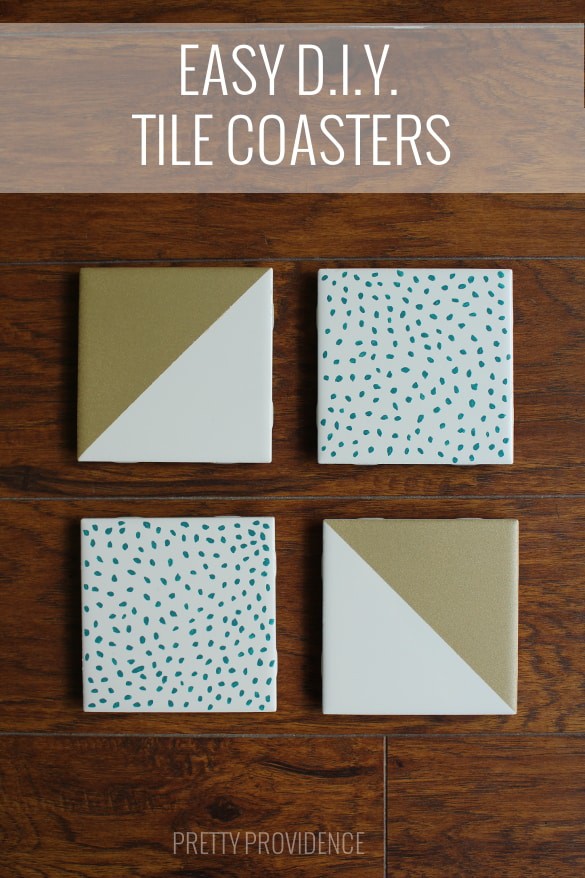
First I put four little felt pads on the bottom of the tiles – this is to protect your furniture from scratches. Without these the tile coasters will hurt more than help! Then I just started messing around  with the paint – I bought plenty of tiles since they were so cheap, so I could afford some trial and error. I settled on this teal color and painted little dots all over a couple of the tiles. Then I decided I wanted some even simpler geometric style ones.

DIY Tile Coasters

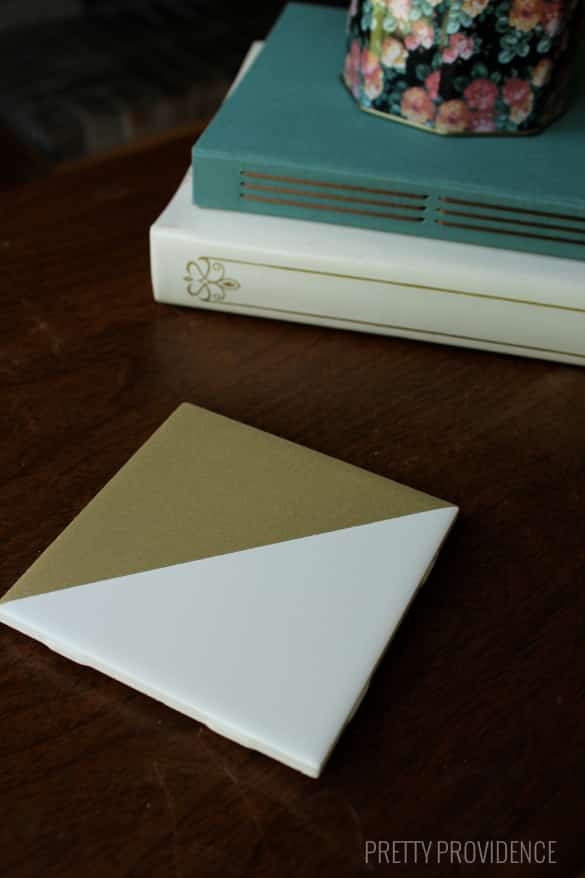
I simply taped off one half of the tile, as well as the sides so the lines would stay clean and not get overspray.

DIY Tile Coasters

I took them outside to spray paint them gold, let them all dry for about an hour, and gave them a couple layers of clear spray finish. Tada!

DIY Tile Coasters

I am so happy with how these turned out, and can’t believe they were so cheap. I think this would be a fun craft night to do with friends, just painting & messing around. It costs way less than going to one of those “paint your own ceramic” places but you’re doing the exact same thing!

DIY Tile Coasters - This was so easy and plain white tiles cost 13 cents each at the hardware store!

So there you go. Who wants to come over and paint more coasters with me?!

sar-sig


Tweet
Pin811
Share
Email
811 Shares

Reader Interactions

Comments

  1. Lynnette

    May 23, 2014 at 3:06 pm

    Those are so cute, and so easy! I’m always looking for coasters, but I hate to spend too much on them.

    Reply
  2. Kelli B

    May 22, 2014 at 2:30 pm

    I loooove this! Thank you so much for the tutorial! I’ve been needing some cute coasters so I’m totally going to do this :)

    Reply

Leave a Reply Cancel reply

Your email address will not be published. Required fields are marked *

Recipe Rating


Primary Sidebar

about-pretty-providence  

Hey! We're Sarah and Jessica. We're BFF's and have known each other since we were 5 years old. This blog is our place to share all of our best recipes, tips, crafts and DIY projects.

You can read more about us on our about page and find us on instagram! We love making new friends.

  • Email
  • Facebook
  • Instagram
  • Pinterest
  • TikTok
  • YouTube

Most Popular

Breakfast casserole with sausage, eggs, cheese and bell peppers on a white plate

World’s Best Breakfast Casserole

DIY desk made from two storage cube bookshelves and IKEA desk top with marble look

DIY IKEA Desk Hack

Iron-on t-shirt with Cricut collage of supplies needed, iron-on cut and weeded, and then the final shirt that says "#tired" in gold iron-on letters

How to Make a Shirt with Cricut

The Office birthday party table with decorations, food, balloons and "it is your birthday" sign

The Office Birthday Party

Teepee style blanket fort made with bedsheets and clothesline hung from a light fixture.

How To Build The Best Blanket Fort

German Pancakes just out of the oven, dusted with powdered sugar in a glass baking dish.

German Pancakes

Organization

a habit tracker with pink squares next to a rose gold pen

Free Printable Habit Tracker

collage image of four different laundry hacks to make laundry easier

The Best Laundry Hacks

art supplies organized and labeled on a white IKEA kallax shelf

School and Art Supply Organization

Weekly cleaning checklist and routine, and checklist for kids too with pictures and check boxes!

Weekly Cleaning Routine + Checklist

Laundry Care Symbols Explained

pantry organization at it's finest! great tips and tricks in this post!

Home Organization Ideas

CRICUT

Light blue Cricut Maker 3 with an assortment of colors of vinyl and iron-on vinyl fanned out under it and behind it.

The Best Iron On and Vinyl to Use with a Cricut

custom hats with cricut iron-on, baseball cap style

How to Make Custom Hats with Cricut

light blue Cricut maker 3 next to vinyl and art on shelves

Cricut Materials – Everything You Need to Know

cute first/last day of school whiteboard on a light blue background

Back to School Photoshoot Board

DIY tote bag canvas with a rainbow and the words 'I'll walk with you' in gold iron-on vinyl

Rainbow DIY Tote Bag

DIY Custom Napkins

Footer

Copyright © 2012-2019 Pretty Providence | Contact Us | Privacy Policy | Disclosures