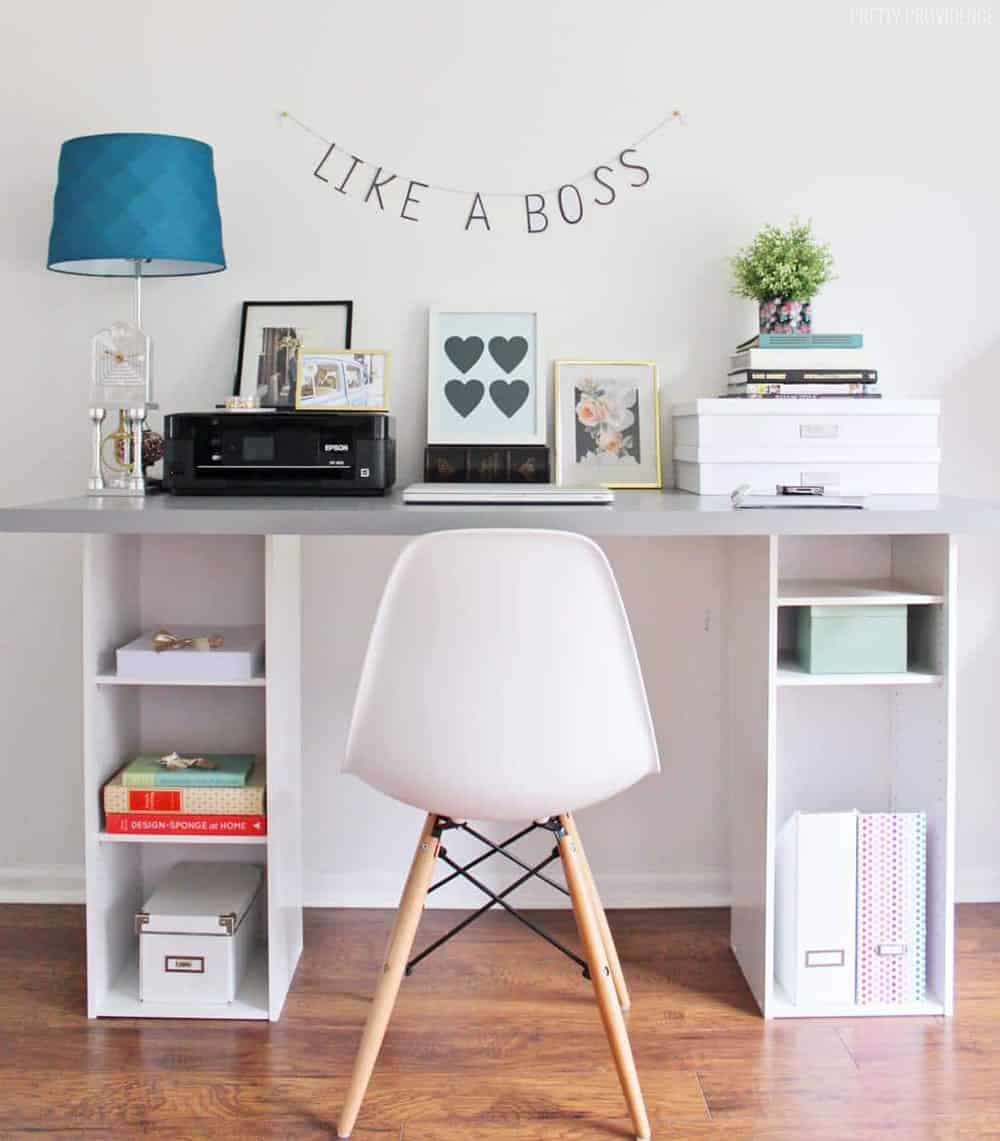
DIY IKEA Desk Hack

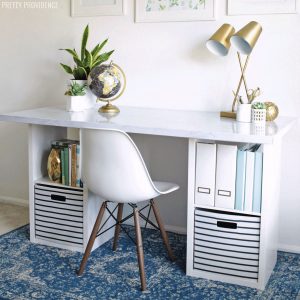
This IKEA hack desk is easy to make with a cheap IKEA desk top and two cube storage shelves. It's perfect for a home office, virtual learning, or crafting. The storage makes this desk perfect for a small workspace!

After we moved into our house, we needed a cheap desk as soon as possible, and this beautiful IKEA desk hack for under $60* was born. I shared this DIY desk tutorial on the blog almost seven years ago, and it has remained very popular. Recently, with the entire world all of a sudden working or learning from home, even more people have been making the desk!
We love DIY projects and making old things new again. This particular desktop has had three lives; a craft desk, a headboard for our guest room, and now it's my desk again but with a shiny, new look!
*This post contains affiliate links.
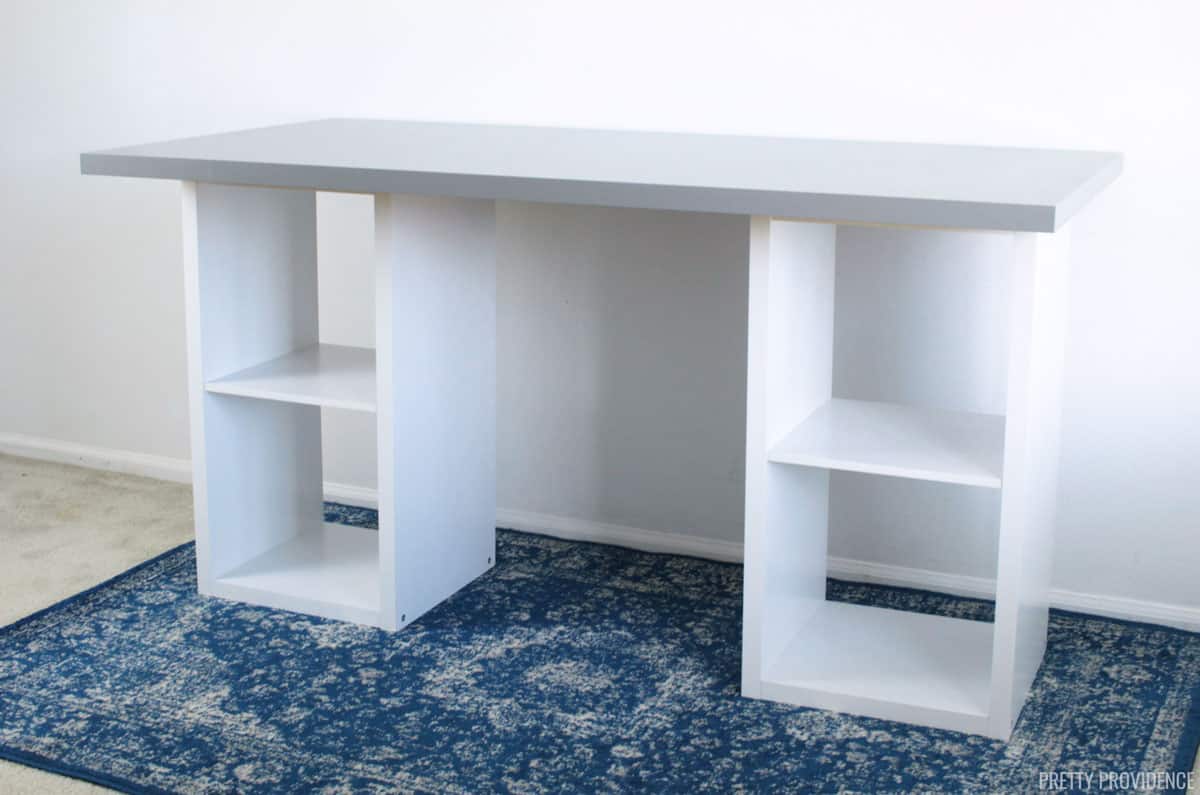
Above is what the desk looked like after I made it in 2013.
IKEA DESK HACK
Back story: after looking at all of the small IKEA desk options I had some ideas but didn't feel that they were all worth the money, at the time. It's funny because they weren't expensive, but I felt I could do something cheaper with the same amount of elbow grease.
*The Desk UNDER $60
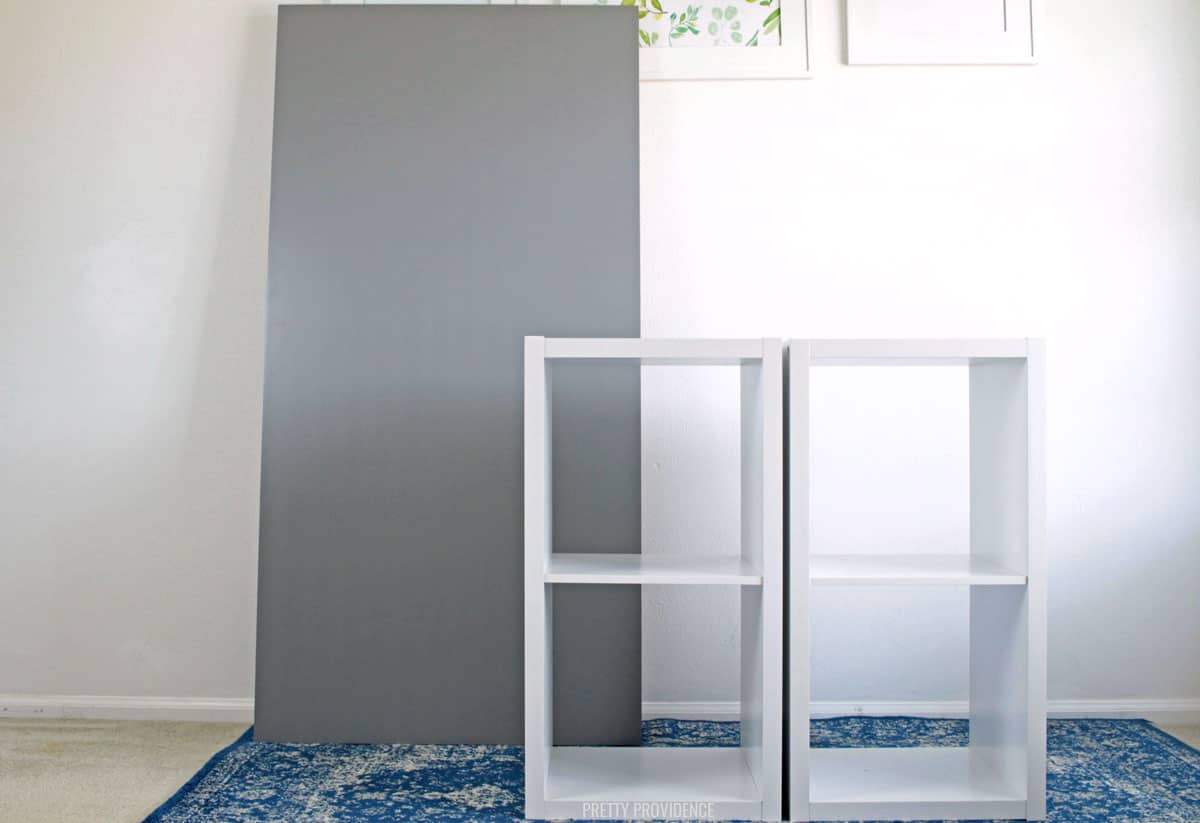
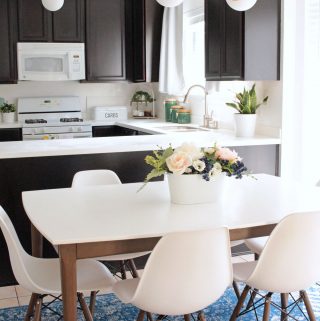
What I ended up deciding was to get two cube storage shelves (these, which at the time were about $18 each) and an IKEA desktop. I never truly loved the gray LINNMON desktop, it just happened to be the one they had in stock and it cost less than $20 so I went with it.
*UPDATE ON THE LINNMON DESKTOP: The desktop I used is 59" x 29.5" x 2". IKEA may not currently sell the Linnmon in the size shown here.
This desk can cost under $100, $60, or even under $50- if you find the right deals on the storage cubes and the desktop! However, prices tend to go up and down.
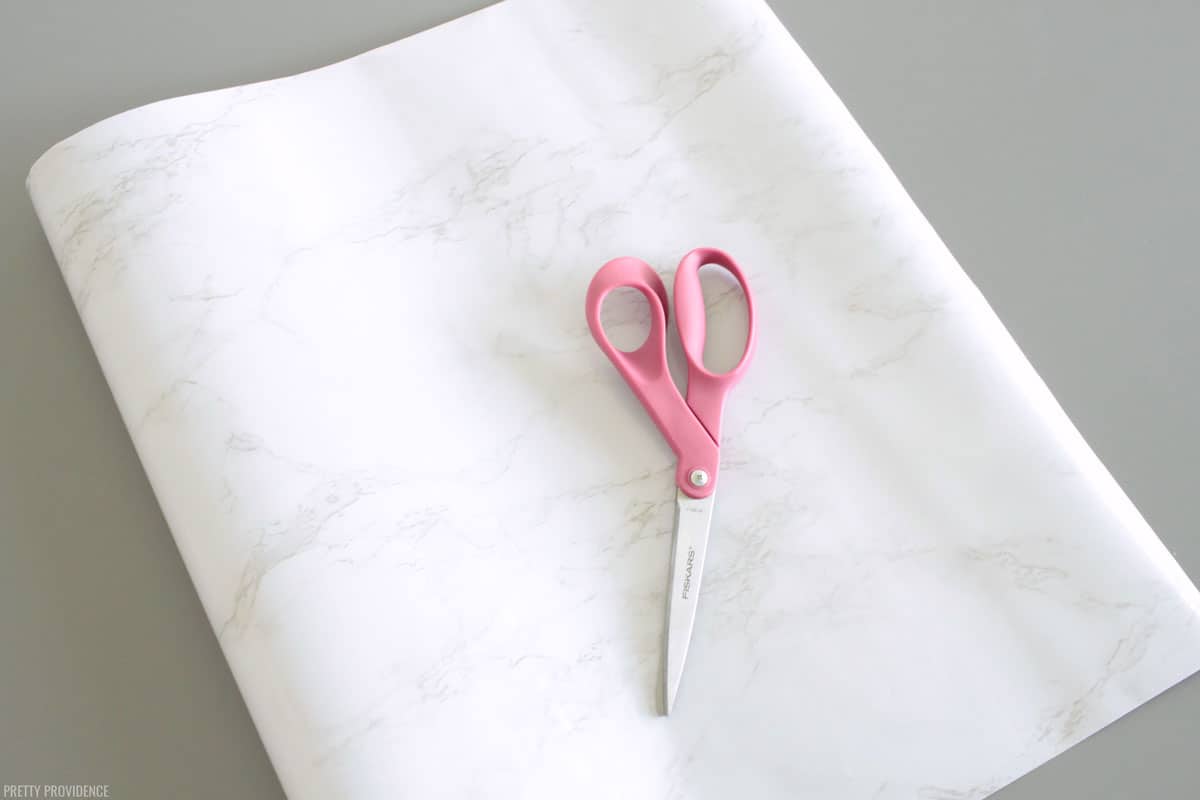
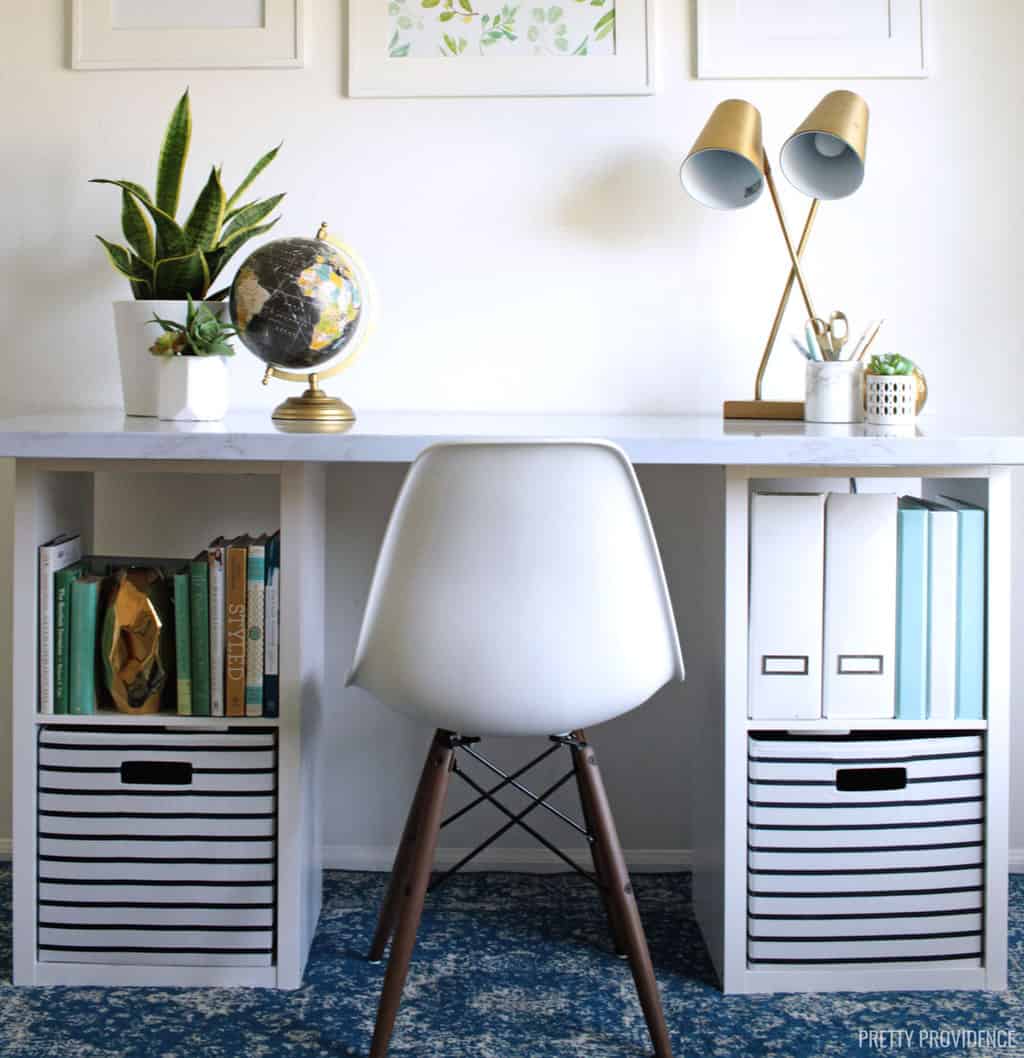
I re-created the desk in 2020. I found storage cube shelves that I thought looked better (which at the time were $30 each) from Target. Then I decided to use marble contact paper on the desktop which cost $11. The total cost of the new desk: about $90.
I could have done this myself, it was that easy, but in full disclosure, my husband did help me. We like to do projects together.
HOW TO MAKE THIS IKEA HACK DESK
1. Put the desktop face down on the floor
2. Measure where you want the bookshelves to be and make sure they are even.
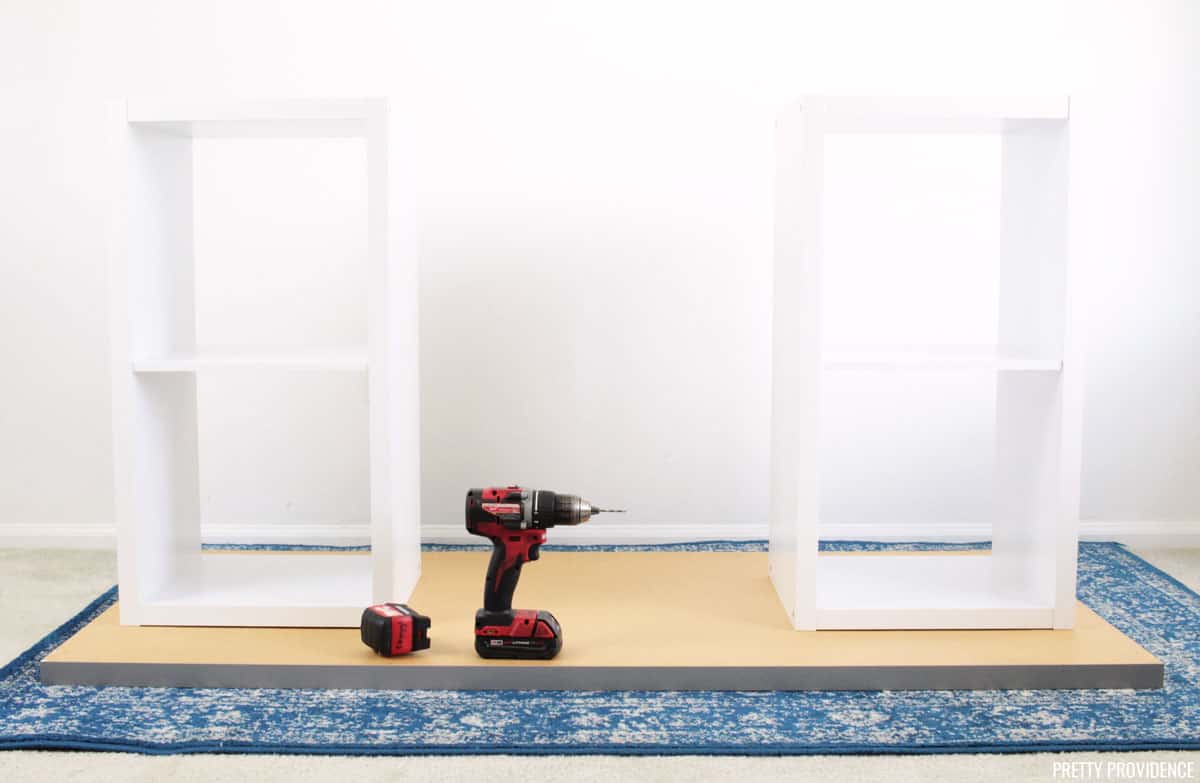
Place the tops of the bookshelves on the bottom of the desktop.
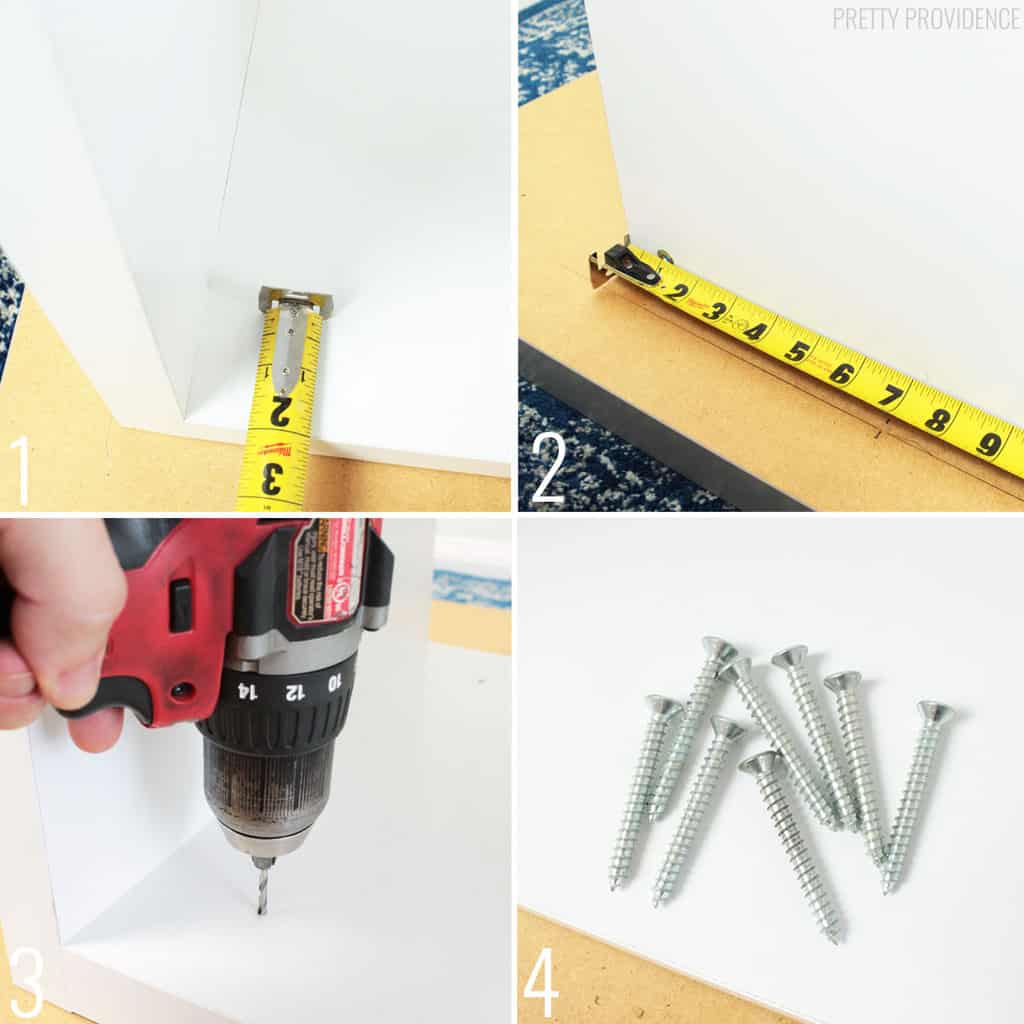
- Measure and mark four spots on the inside of the shelf where you will drill.
- Center your shelves in the middle of the desktop; measure the sides of your desktop and your shelf to find the centers of each, and mark them. Then line the two centers up.
- Drill pilot holes into the shelves.
- Use a screwdriver to screw the shelves into the desktop.
Carefully flip the desk over.
If you want to, add marble contact paper to the desktop - follow directions on the package.
Style! Add a lamp, bins, books, and office storage items. You now have a great DIY desk with storage to work with!
PRO TIPS
- Choose heavy screws that will be long enough to go through the top of shelves but NOT all the way through the desktop. If you use the exact items we have used, then 2" wood screws or similar will work.
- This desk is great and sturdy to work on. If you plan to move it, we recommend disassembling it. The desktop and shelves are not solid wood and screws can come loose from them.
I've gotten a lot of questions since sharing this tutorial. Here are some of the most common questions and answers.
How tall is this desk?
It depends on the height of the shelf you use. This desk is about 32" tall after it is assembled. The bookshelves I used are 3o" tall and the IKEA desktop is 1 ⅜".
SOURCES:
Cube Storage Shelves:
I have used both white shelves (#1 and #2) to do this desk. I also gathered up a few other colors that are available in this type of shelf. *These are affiliate links.
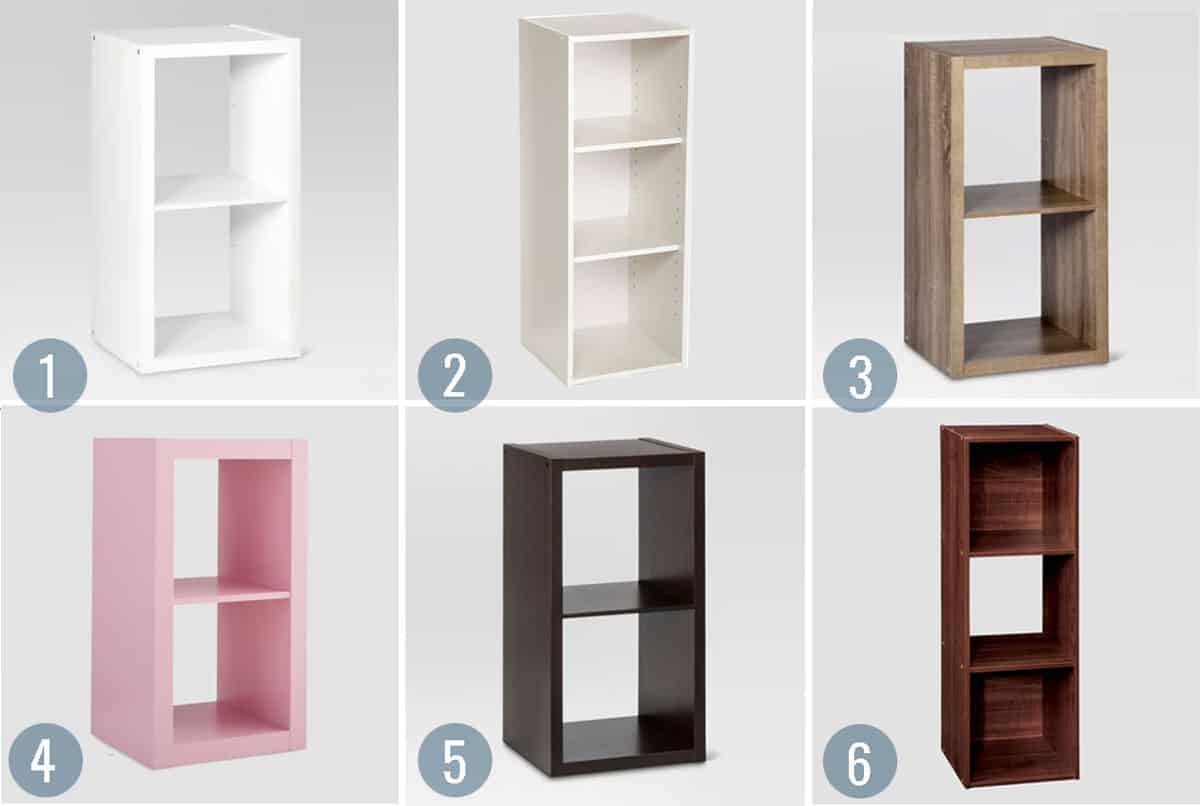
- White 2 Shelf Cube Storage
- White 3 Shelf Cube Organizer
- Weathered Gray 2 Shelf Cube Storage
- Pink 2 Shelf Cube Storage
- Espresso 2 Shelf Cube Storage
- Cherry 3 Shelf Cube Storage
- White 3 Shelf Organizer (Not Pictured)
Linnmon Desk Top, Accessories & Storage:
- IKEA Linnmon*
- Marble Look Contact Paper
- Globe
- 13" Fabric Storage Bin
- Brass Lamp (Similar)
**UPDATE ON THE LINNMON DESKTOP: The desktop I used is 59" x 29.5" x 2". IKEA may not currently sell the Linnmon in the size shown here.
If you make this desk PLEASE share it with us! Leave a comment and positive review, and tag us on instagram @prettyprovidenceblog so we can see your work!!
DIY IKEA Desk with Storage
Video
Equipment
- Drill
- Drill Bit
- Measuring Tape
- Pencil
Materials
- 8 2" Heavy Wood Screws *read notes about size below
- 1 IKEA Linnmon Desk Top
- 2 Storage Cubes / Shelves shelves between 30"-32" tall are ideal
- 1 roll Marble Contact Paper optional
Instructions
- Assemble the two storage cubes according to instructions.
- Place desk top face down on the floor.
- Measure the width (short side) of the desk and mark the center.
- Measure the width of one side of cube shelf and mark the center.
- Place cube shelf upside down on top of the desk top (which is also upside down) and line up the center markings.
- Measure and mark four spots where you will screw the desk together on each cube shelf. Markings should be evenly spaced around the inside top of each cube shelf.
- Drill pilot holes into each spot, being careful to only drill through the shelf and not the desk top.
- Next, drill wood screws where the pilot holes are. The screw should be flush with the surface of the cube shelf.
- Carefully flip the desk over.
- Apply marble contact paper according to package directions if you have opted to do that.
Notes

Thank you. Do you think one could put another cube storage on top also to add more shelves?
That is an option, I'm sure!