We had so much fun participating in Fish Extenders on our recent Disney Cruise! Gather your fish extender DIY supplies and create Disney Cruise Fish Extender everyone will be talking about!
If you have never heard of a fish extender don't fret, you are not alone! When we instagrammed our recent Disney Cruise some of our most commonly asked questions were about fish extenders! We had so much fun participating in this program. If you are going on a Disney Cruise, I highly recommend it! Of course I had to make a Fish Extender DIY to use while on the ship, and I'm excited to share that tutorial with you today!
Fish Extender DIY
If you just heard something about fish extenders but have no idea what they are or what I am talking about, check out our recent post Everything You Need to Know About Fish Extenders or check out all our Disney Cruising Tips and Tricks!
Disney Fish Extender
What if I don't want to make my own fish extender?! That's no problem! There are some really cute and affordable options you can buy and customize if you want to. Here are a few of our favorites that you can buy on Amazon and have shipped to your house in two days!
*This post contains affiliate links.
- Simple Three Pocket Nautical Fish Extender
- Natural Cotton Four Pocket Fish Extender
- Navy Polka Dotted Four Pocket Fish Extender
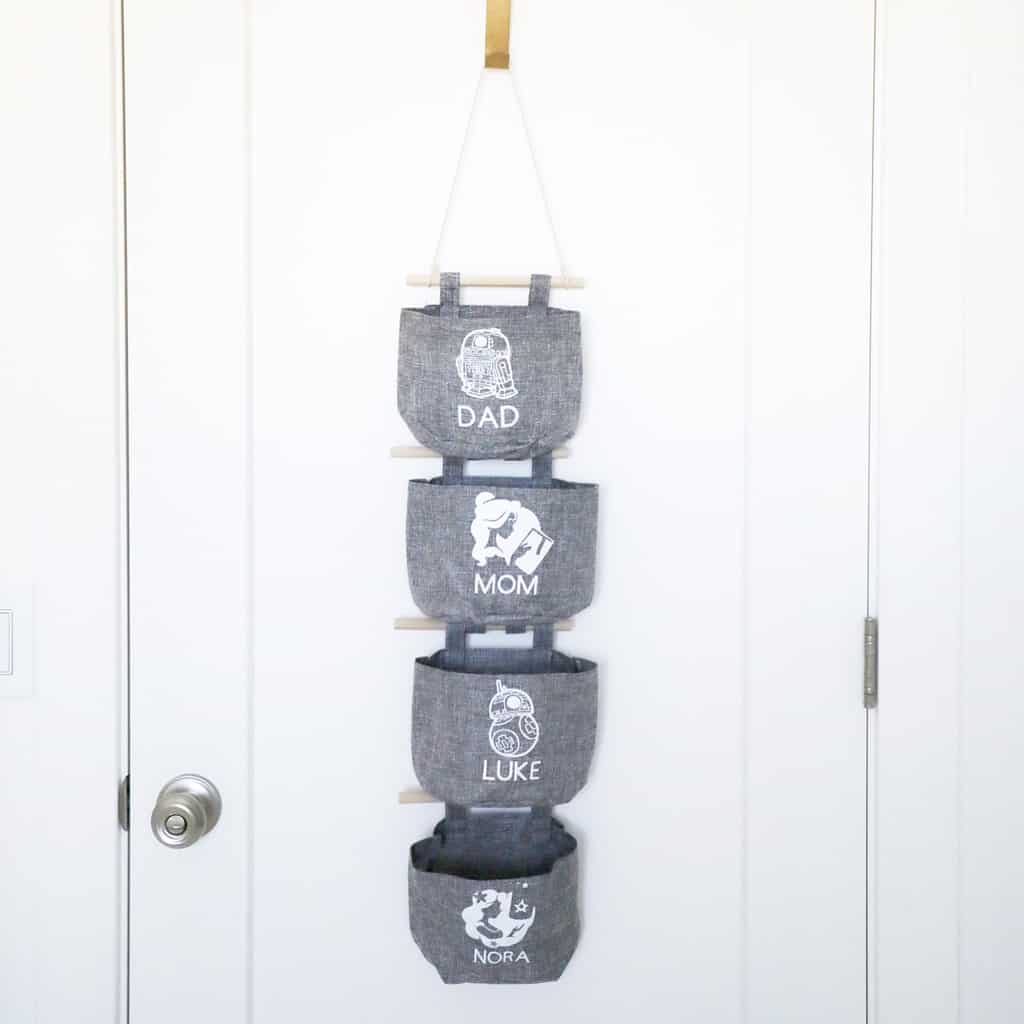
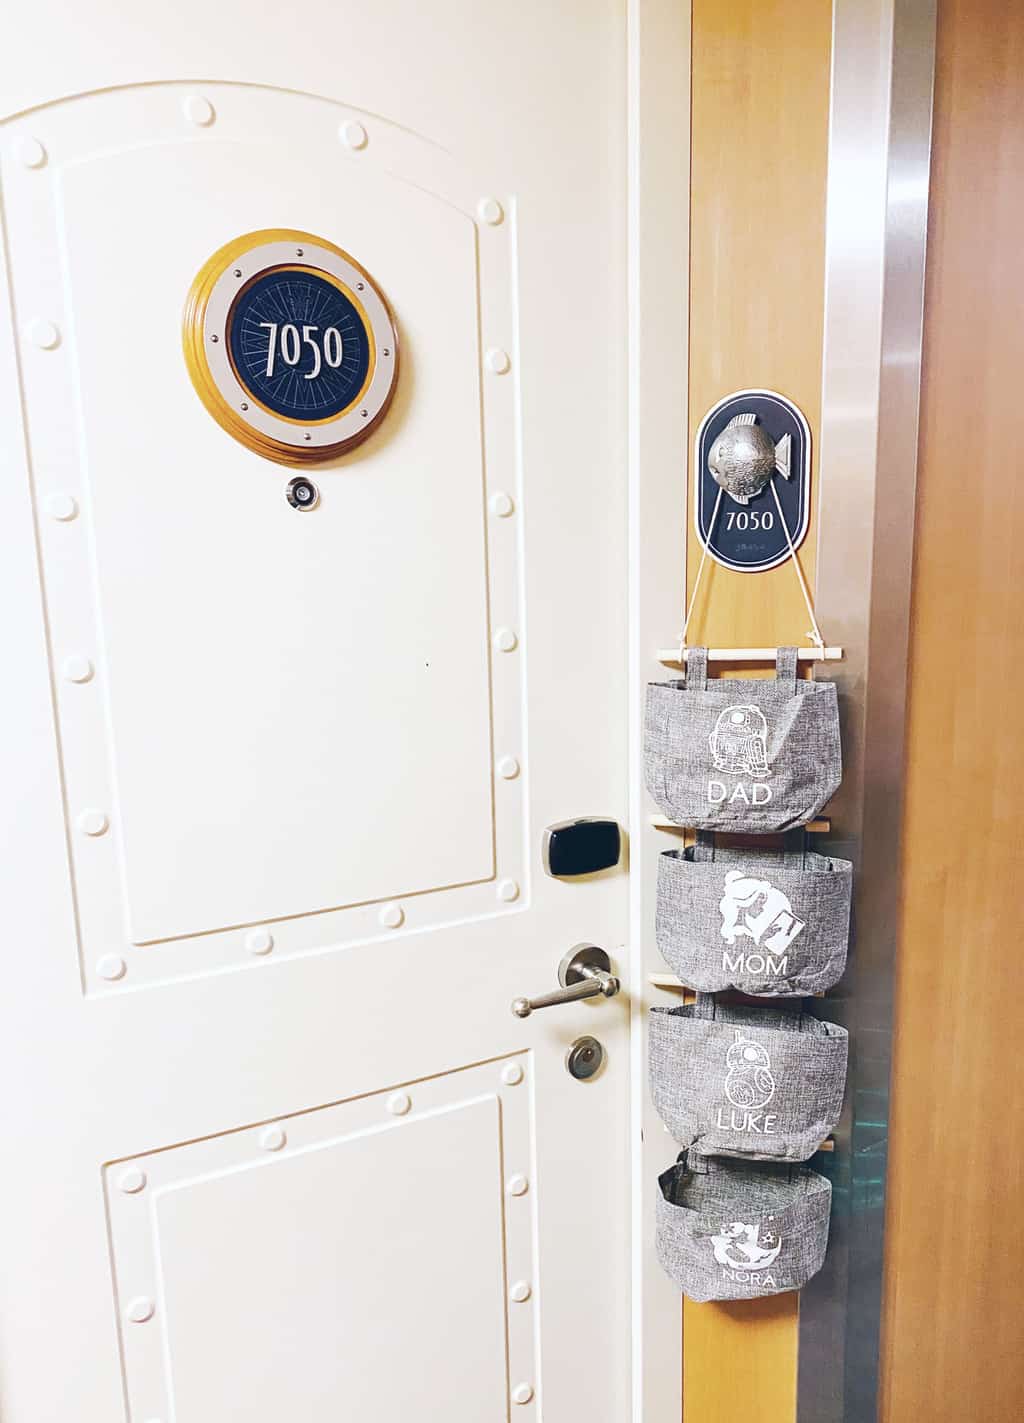
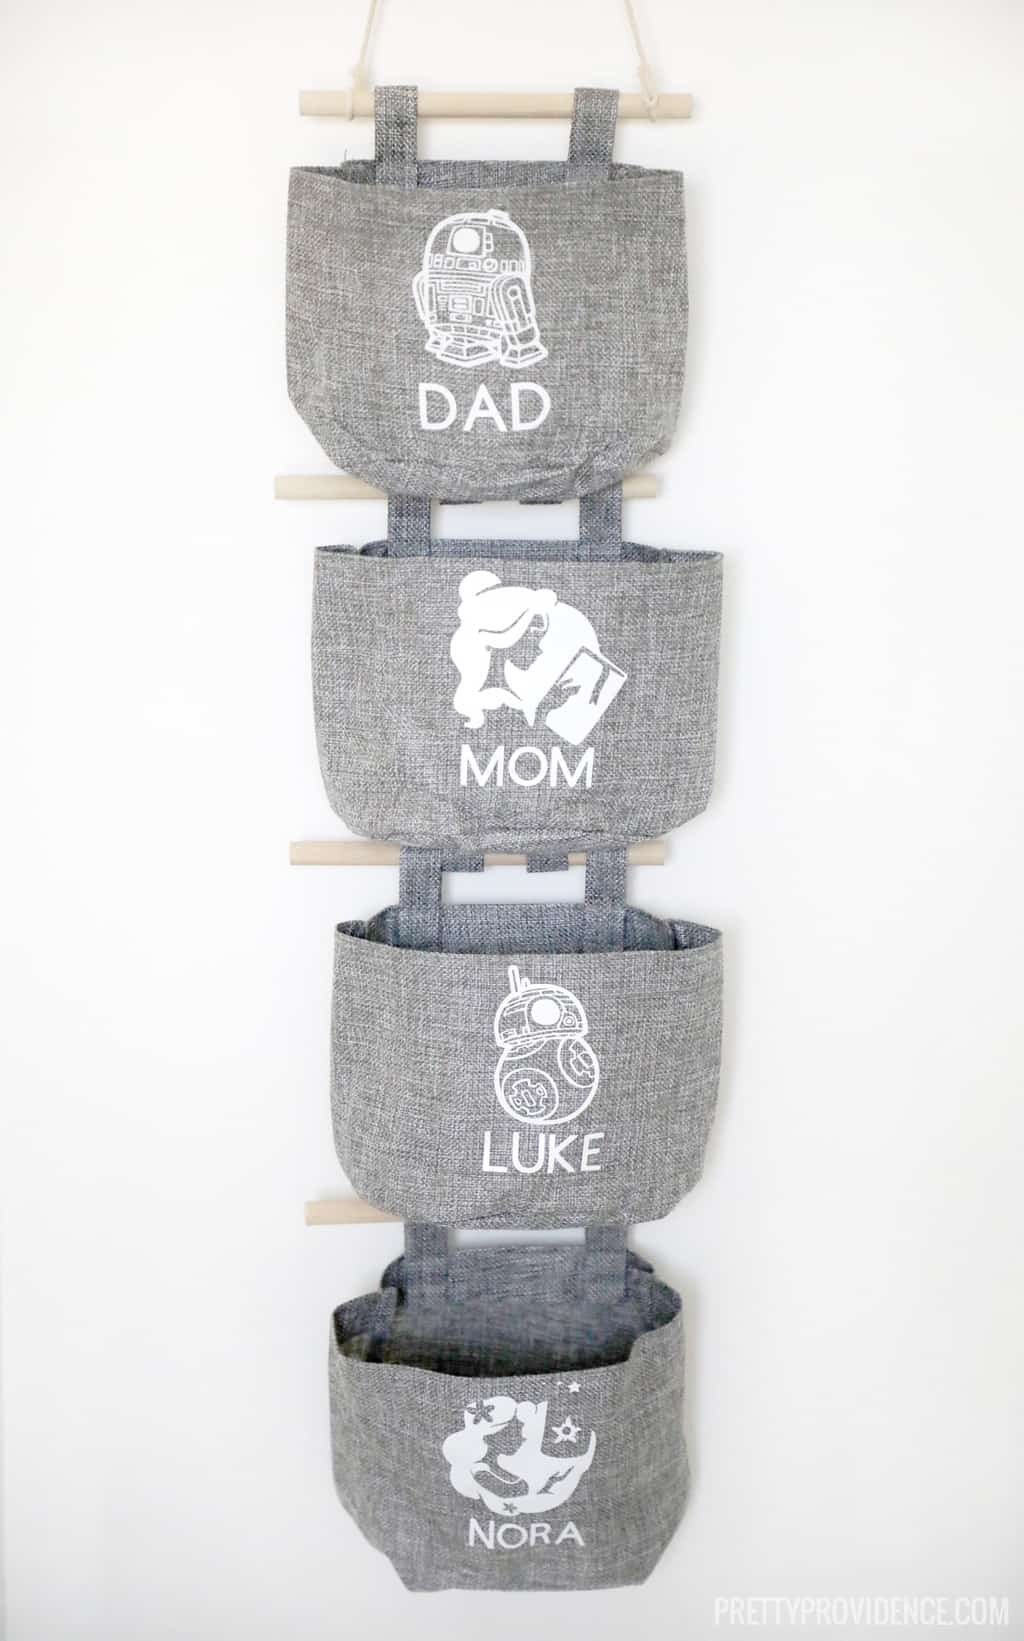
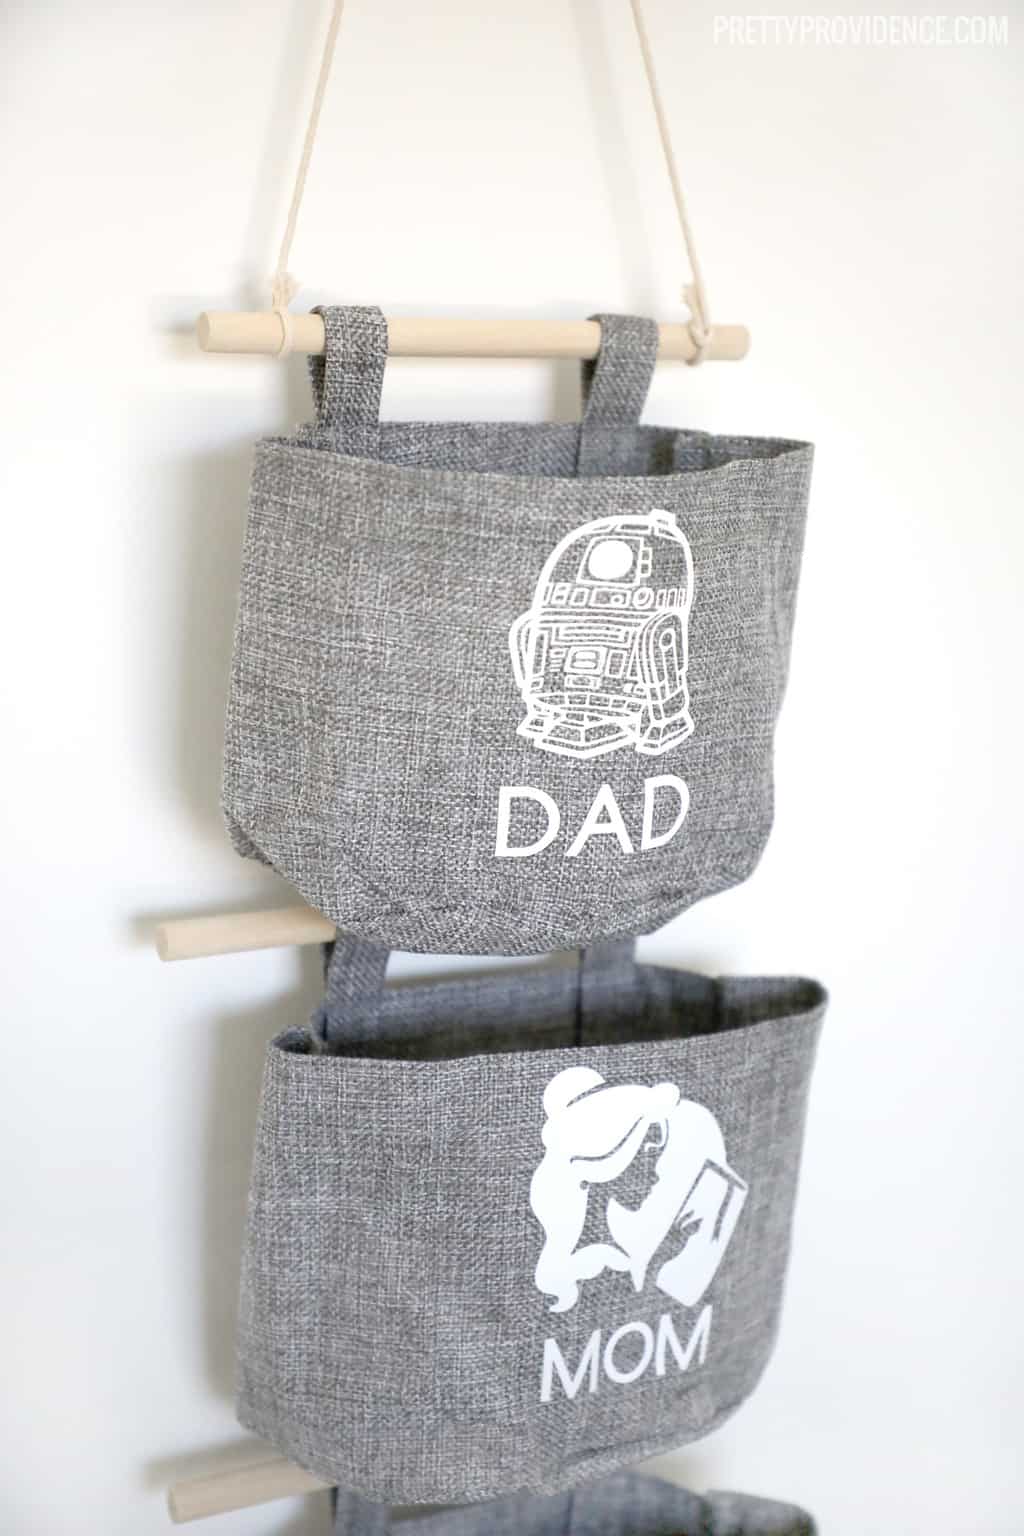
If you are a DIY'er though, making your own can be so fun! Here is a close up look at the one that I made (I made one for Sarah's family, too). I used each person's favorite Disney character and their name to make them personal and fun, and I love how they turned out!
Belle forever ;)! Okay are you ready to learn how to make your own fish extender DIY?
How to make your own DIY fish extender:
Materials Needed:
- Fish Extender Pouches
- Cricut Joy or other cutting machine
- Iron-On Vinyl in preferred color
- Scissors
- Weeding Tool
- EasyPress 2 or Iron
Design Your Files in Design Space
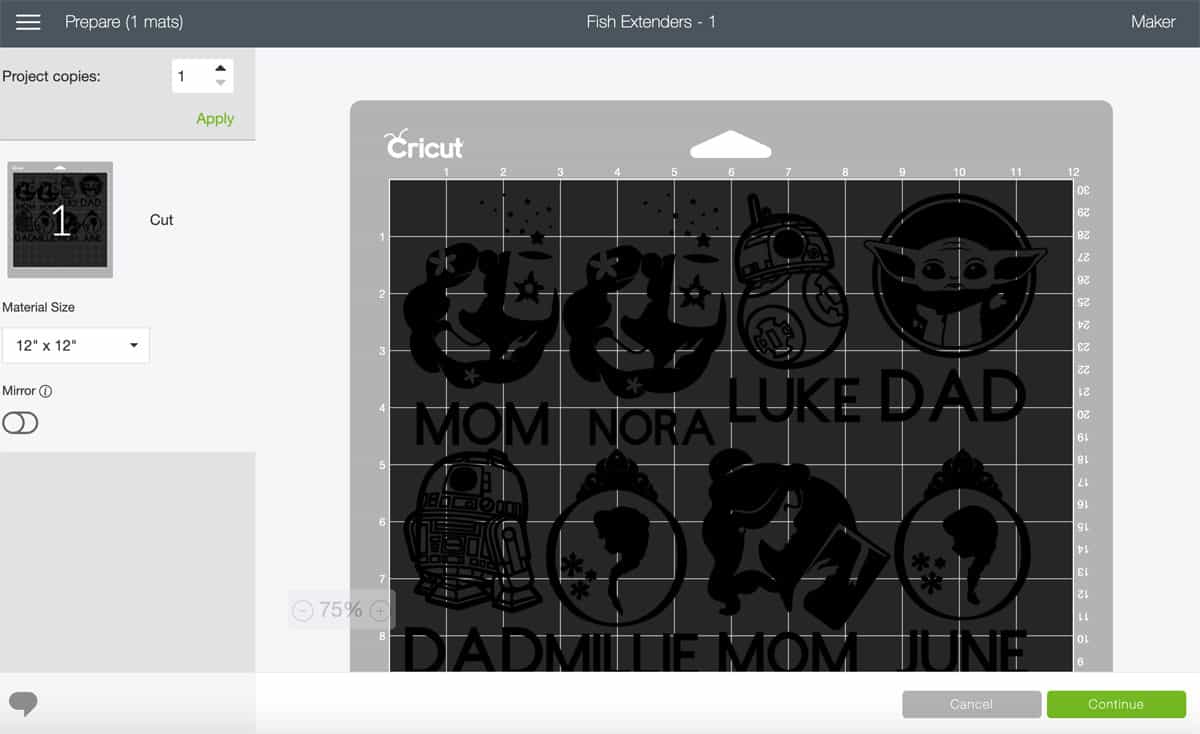
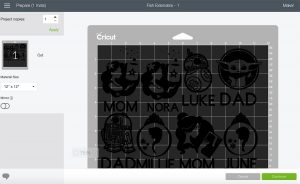
I started by searching for each person's favorite characters in design space. Once I had a few that I liked I aimed to find others of the same general shape so that they would look nice and uniform. You can find the images that I used in this design space file.
Once you have your characters on your canvas you can add names underneath, if you'd like! I used the font "Cricut Sans" in all caps. Once you have your name added underneath your character, highlight the character and the name and click "weld." Repeat for each person's name and character.
Once you have this done click "Make It" in the bottom right corner. An image of your files should show up like this.
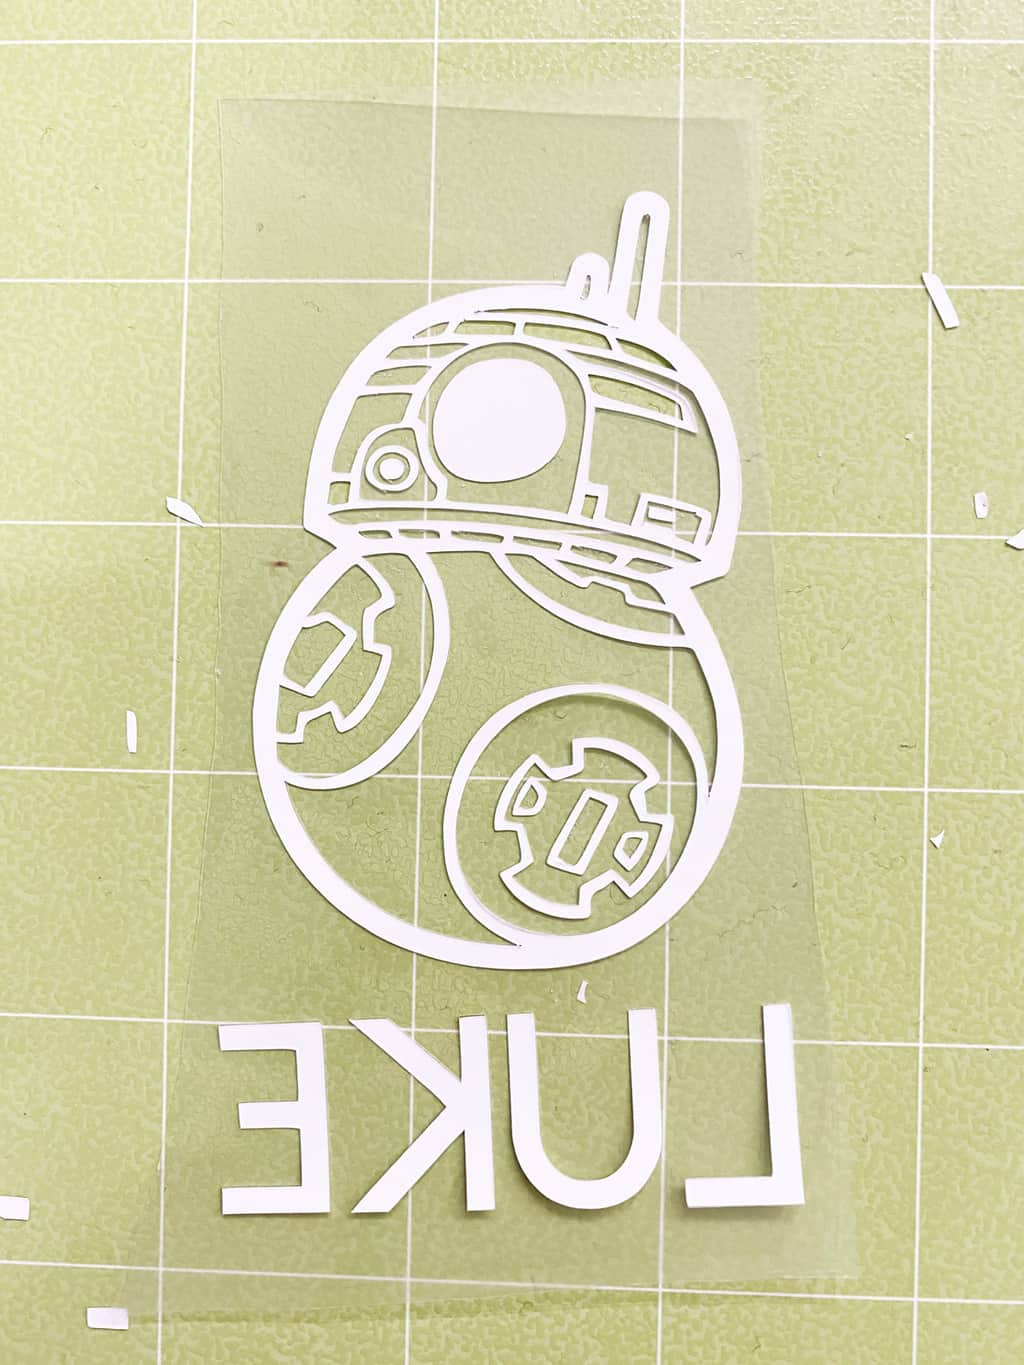
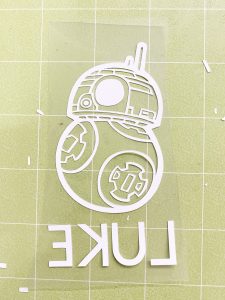
Cut Your Iron-On and Weed Your Designs
Make sure that you turn your mirror to on and that it turns green, then click continue! I cut mine on fast mode so it didn't take as long! Once the images are finished cutting, I used my scissors to cut them apart so I could weed them all one at a time! This makes it easier to weed out small pieces without accidentally pulling up something you don't want to!
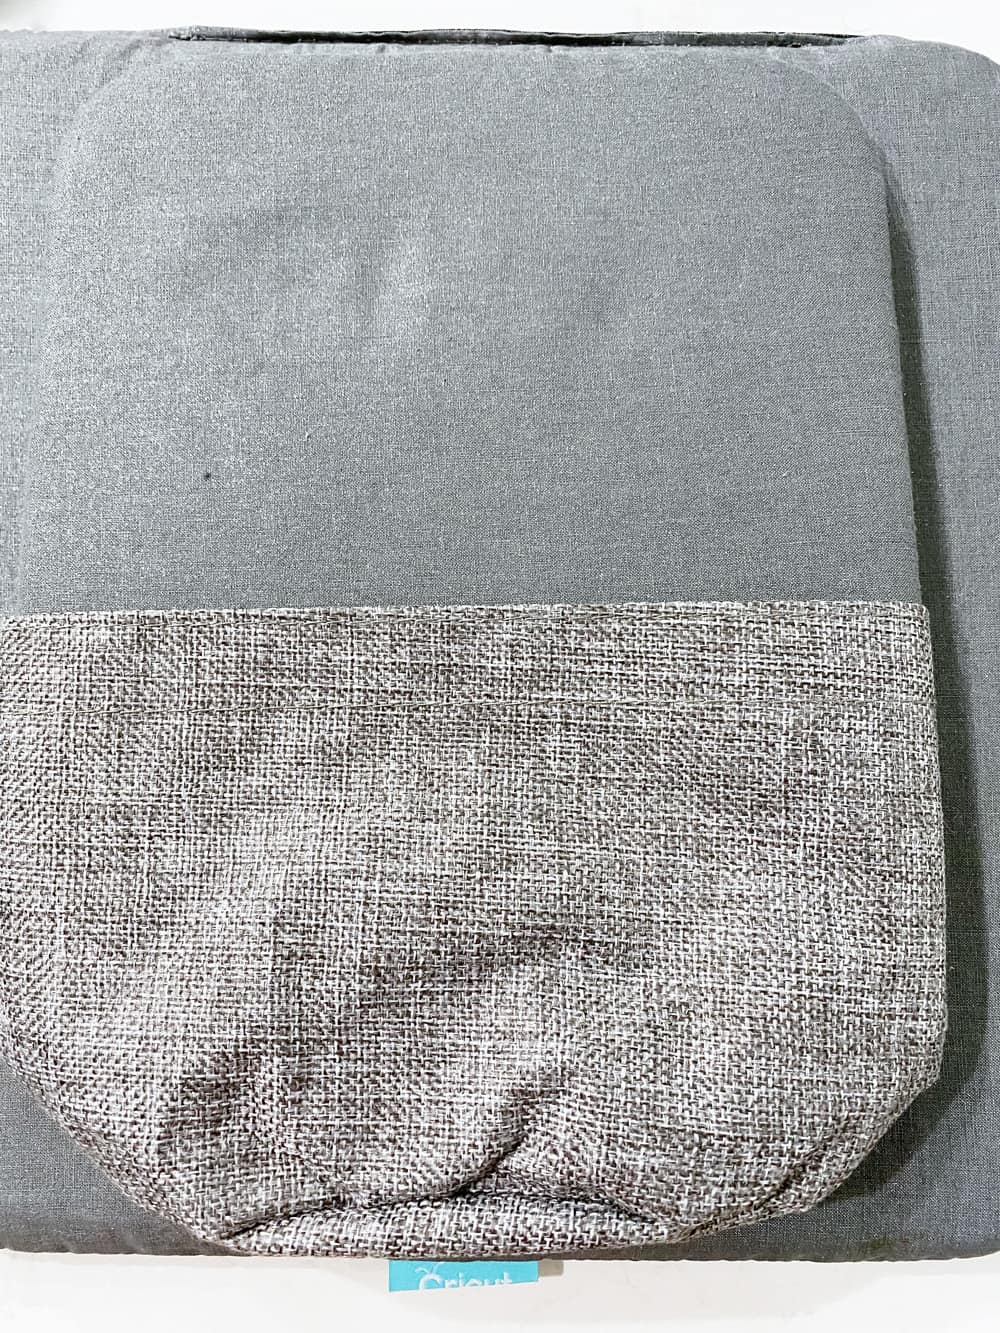
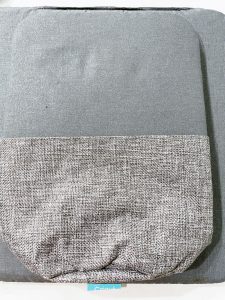
Prepare Your Pouches
If you are using the same pouches I did, make sure that you place the EasyPress Mat or parchment paper or a towel or something in between the two sides of your bag so they don't melt together!
After you've placed something inside your pouch to keep the sides from melting together, preheat it for five seconds with your iron or EasyPress2. Then, place your design where you want it in preparation to iron-on.
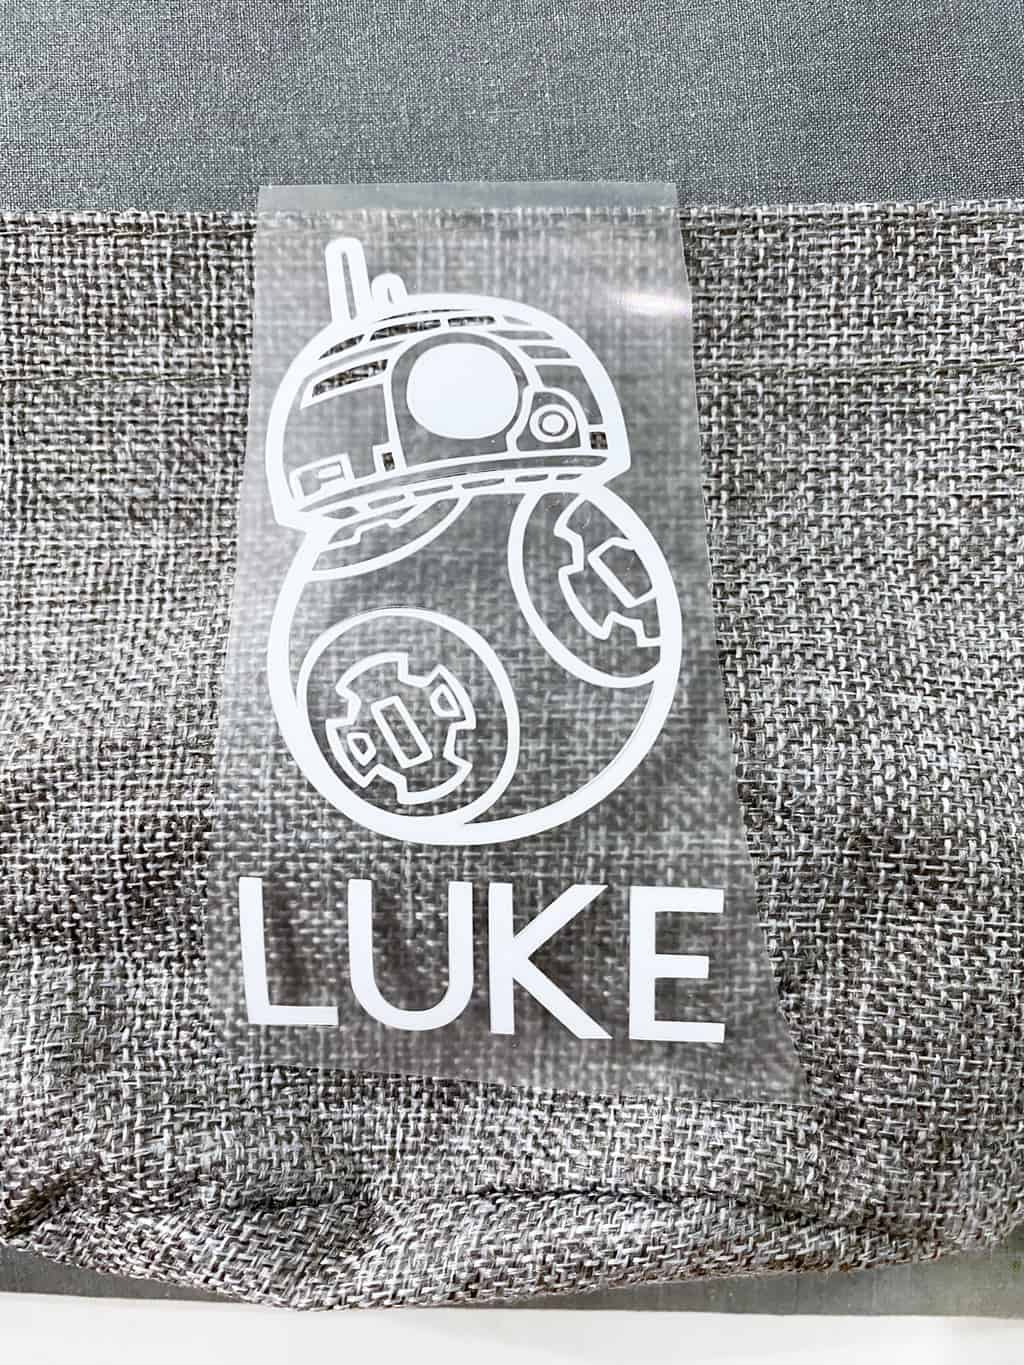
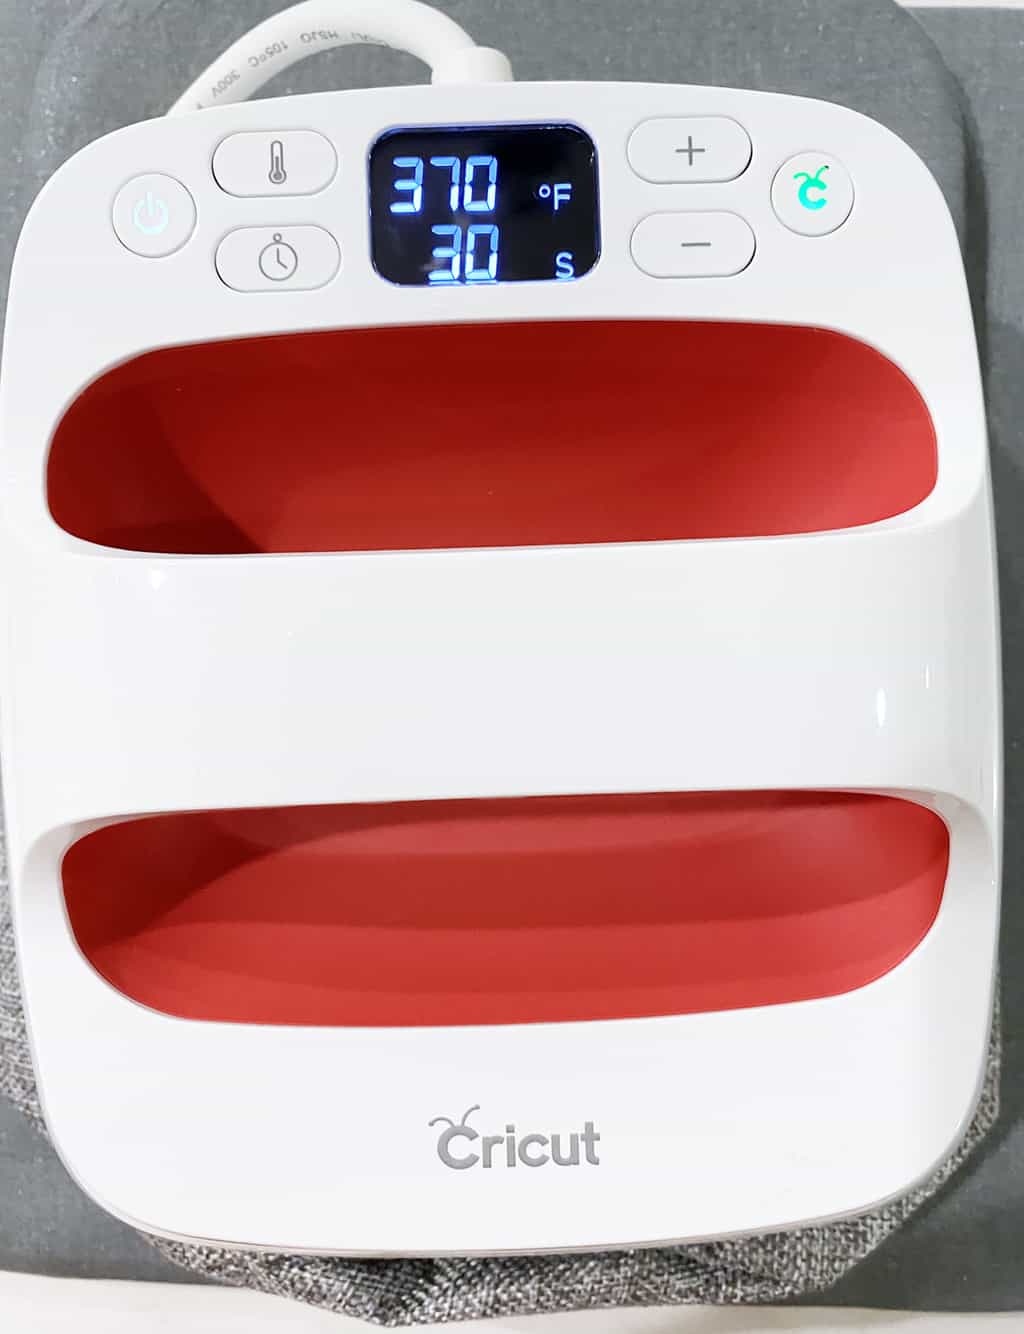
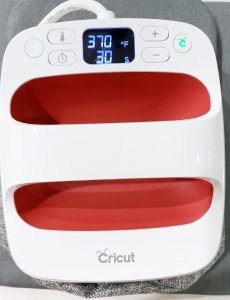
Find Heat Settings and Iron-On Design
Find your heat guide settings here and adjust your EasyPress or Iron temperature accordingly, then press your design for the designated amount of time.
Peel up a small corner first to make sure your design is sticking, and then carefully remove the outer plastic sheet. Repeat process with each individual pouch and voila! You're done!
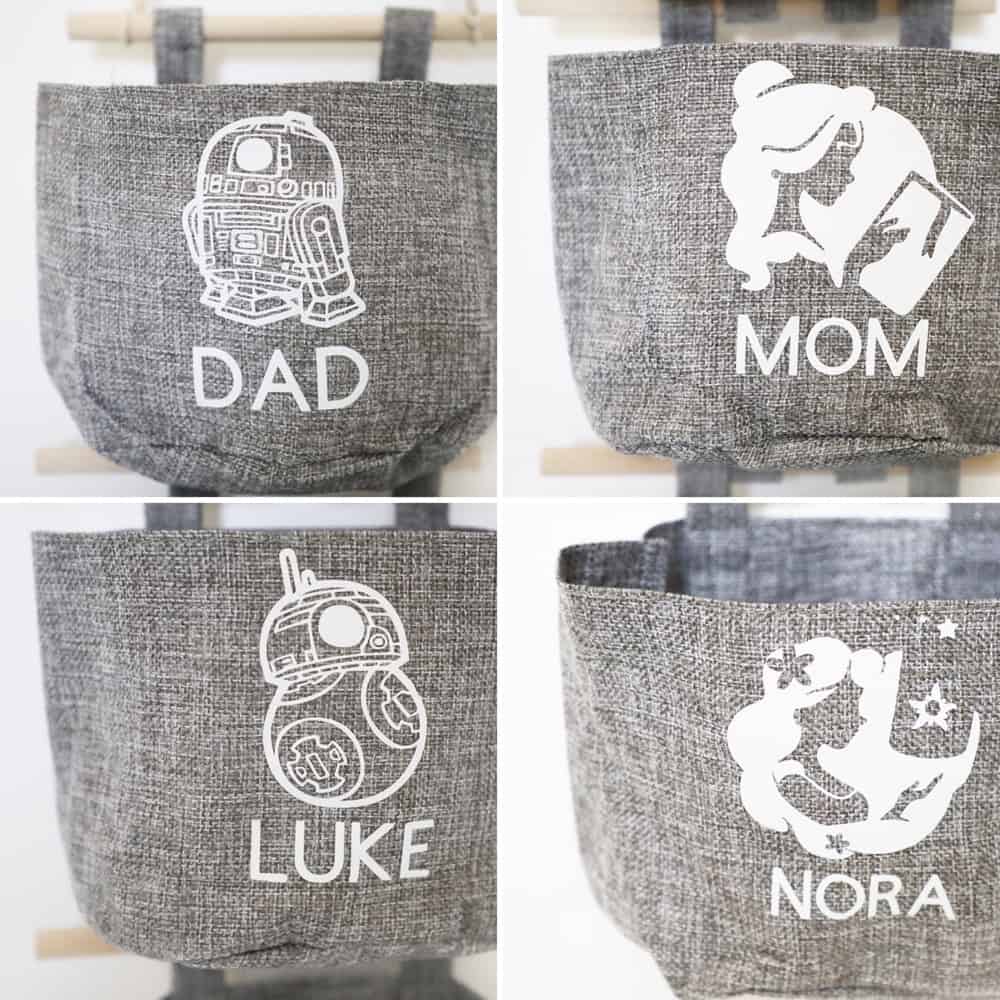
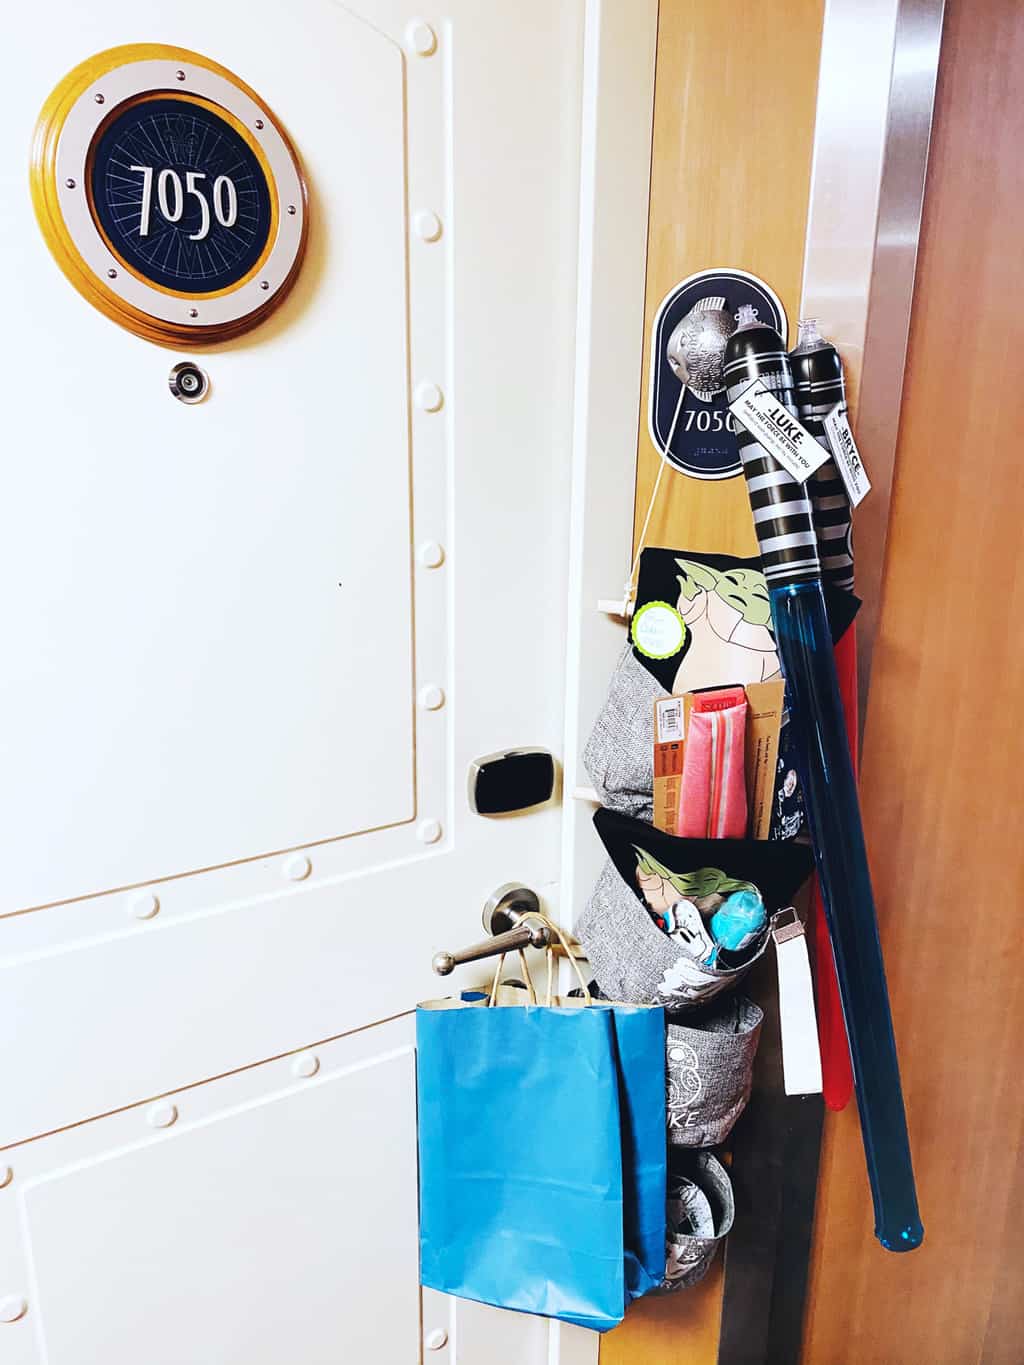
Which of our four pouches is your favorite?
If you want to print these instructions, use the printable form below! Also, be sure to check out the video there to hear all about our first fish extender experience and to get some ideas for fun fish extender gifts!
DIY Fish Extender
Video
Equipment
- Heat Press or Iron
- Cutting Machine
Materials
- 1 Fish Extender Pouch Per Person
- Iron-On Vinyl in Desired Color
- Scissors
- Weeding Tool
- Mat or Towel
Instructions
- Design Your Files in Design SpaceI started by searching for each person's favorite characters in design space. Once I had a few that I liked I aimed to find others of the same general shape so that they would look nice and uniform. You can find the images that I used in this design space file.Once you have your characters on your canvas you can add names underneath, if you'd like! I used the font "Cricut Sans" in all caps. Once you have your name added underneath your character, highlight the character and the name and click "weld." Repeat for each person's name and character. Once you have this done click "Make It" in the bottom right corner. An image of your files should show up like this.

- Cut Your Iron-On and Weed Your DesignsMake sure that you turn your mirror to on and that it turns green, then click continue! I cut mine on fast mode so it didn't take as long! Once the images are finished cutting, I used my scissors to cut them apart so I could weed them all one at a time! This makes it easier to weed out small pieces without accidentally pulling up something you don't want to!

- Prepare Your Pouches If you are using the same pouches I did, make sure that you place the EasyPress Mat or parchment paper or a towel or something in between the two sides of your bag so they don't melt together!
- After you've placed something inside your pouch to keep the sides from melting together, preheat it for five seconds with your iron or EasyPress2. Then, place your design where you want it in preparation to iron-on.
- Find Heat Settings and Iron-On DesignFind your heat guide settings here and adjust your EasyPress or Iron temperature accordingly, then press your design for the designated amount of time.

- Peel up a small corner first to make sure your design is sticking, and then carefully remove the outer plastic sheet. Repeat process with each individual pouch and voila! You're done!


Notes
Good luck on your fish extenders friends, and HAPPY CRUISING!!!
xo,


Leave a Reply