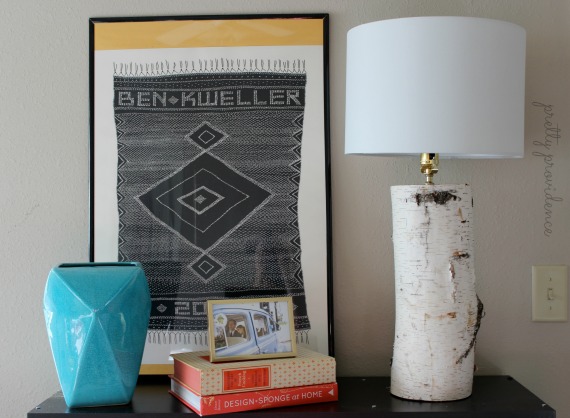
You guys, I have such a fun DIY for you today from an unlikely guest... my Father-In-Law! I'm pretty sure this is his first blog post ever... he made me this gorgeous lamp base from an Aspen tree and I wanted to share it with you all, but I knew that everyone would want to know how it was done. Since I didn't make it I couldn't very well do the tutorial so I asked him if he was up for it. Being the very kind person that he is, he obliged and I think he did a better job than I have ever done on a tutorial! Enjoy!
My wife saw a lamp in a Park City, Utah boutique that she really liked. The base was made from an aspen tree. She later saw a similar lamp in a West Elm catalog. She showed the picture to me and, of course, being the handy man that I am and not wanting to spend the money ($350.00), I said, “I could make one of those”. And that’s how it all began. I have now made 4 of them, 2 for my wife, 1 for my daughter and 1 for my daughter-in-law, who has a blog. It’s called Pretty Providence. It’s the one you are reading. She suggested I share my process of making the lamp. So here goes….

Picture 1 First you need to find the right chunk of aspen tree. Mine were about 6-8 inches in diameter and about 14-16 inches tall, but it really is a personal preference. We were lucky, a short distance from our home some large aspens had been cut down to make way for a new home, so we asked the property owners if we could have some of the wood.
You will need a chain saw to cut the length you want. Rough cut a length of the lamp base longer than your end result so you have some room to level the top and bottom. Once you have the length of tree, draw a line around the circumference of the lamp on the top and bottom about 14-16 inches apart. The line acts as a guide for your final cuts to square the top and bottom.
Picture 2 Drill a 5/16” hole through the middle of the base. You will need to buy (or borrow) an 18”- 5/16” drill bit. You can find them at Lowes or Home Depot for a cost of about $13.00.
Picture 3 Decide what you want as the front of your lamp. You want the lamp to be interesting so pick wisely. Cut a trough on the bottom of the lamp from the middle hole to the outside edge opposite of your carefully selected front. This is to route your cord out the back. I used a router but you could use a saw or chisel. It doesn’t have to be perfect because you are going to cover it up.
Picture 4 Screw into the top of the lamp base a threaded lamp rod. It should screw nicely into the 5/16” hole. You may need to use a pair of pliers but be careful not to damage the threads. Route your cord through the hole in the bottom of the lamp base through the threaded rod on the top. Use a staple to secure the cord in the trough on the bottom of the lamp.
Picture 5 You can buy a lamp assembly at Lowes or Home Depot for about $10.00. Assemble your lamp parts onto the threaded lamp rod as described on the package.
Picture 6 Optional: Cut a circle of felt and use spray adhesive to attach it to the bottom of the lamp base.


Final Find a lamp shade that matches the style and color of your lamp base. My wife bought a shade online for $50.00. So there you have it, an Aspen Tree Lamp for under $80.
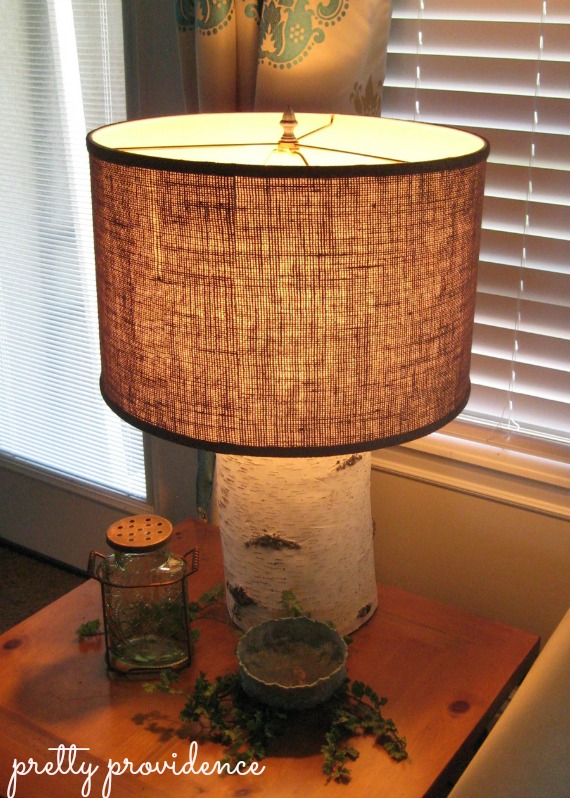
Sarah again. I would like to submit that my shade cost me a mere $6.00 at Hobby Lobby on clearance! It is plain but I like it for now and I'm planning on covering it with something but I haven't found a fabric I'm crazy about just yet. My sis-in-law got hers from Target and it looks strikingly similar to the one shown above, I think it was $20. A huge THANK YOU to my FIL for writing up the tutorial and taking those amazing photos. Everyone leave him some compliments! :)
This post may be linked up to one of these parties.


Christina
Thank you! I’ve been wanting to make a lamp just like this. This is awesome direction again thank you.
Michelle
do you have to treat the base with anything to keep it looking nice?
Jessica @ Pretty Providence
I didn't, and three years later it is still looking good!
[image: Facebook] [image: Twitter] [image: Google Plus Page] [image: pinterest] [image: Instagram]
HNotgrass
this is awesome!! props to your FIL!