DIY Fringe Christmas Trees
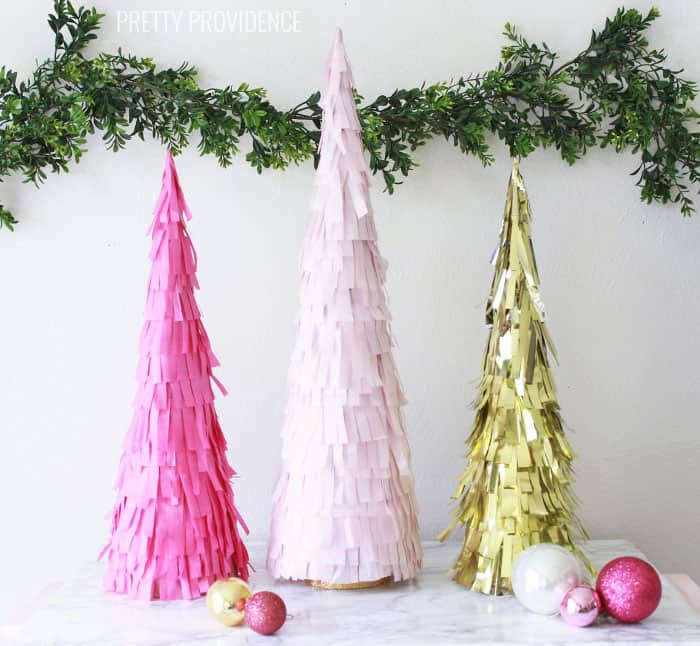
You guys! Hi! Let me introduce y'all to my new favorite Christmas decorations; DIY fringe trees! I want to fringe all the things lately, so this is just my fringe obsession extending into Christmas. They look so pretty on my mantel and cost next to nothing - $6 for the biggest cone and $3-$4 for the smaller ones. I already had the tissue paper and mylar but that only costs about $1 at the craft store! ALSO, you can make them in any color, so the possibilities are literally endless. Here's how to make your own:
Materials:
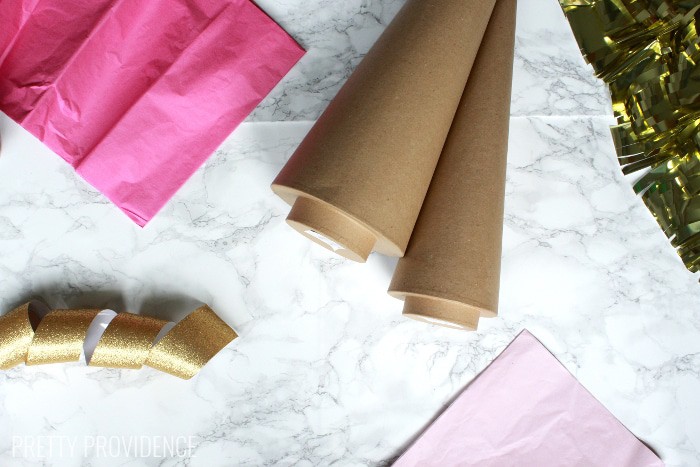
Paper maché cone
Tissue paper in your choice of colors
Gold mylar sheets (found near tissue paper at Hobby Lobby or Michaels)
Glue Gun
Scissors
Directions:
- Start by cutting strips of tissue paper about three inches tall. You cut 7 or 8 sheets at a time by leaving them stacked (like they usually are straight out of the package.) Do the same with mylar if you are using that.
- Fringe the tissue paper or mylar by cutting slits every ¼ inch or so (thickness is personal preference) leaving about ½ inch of space untouched.

- Use a glue gun to glue your fringe to the paper maché cone. Start at the bottom and add layers all the way up to the top. I added a new layer every ¾ to 1 inch above them, so that by the end it was a thick fringe. Again, however you want to do this is personal preference!

- You are done! So easy, right? I added some glitter tape to the tree stems but you honestly can't see it. That is an option, though if you leave your fringe shorter at the bottom.


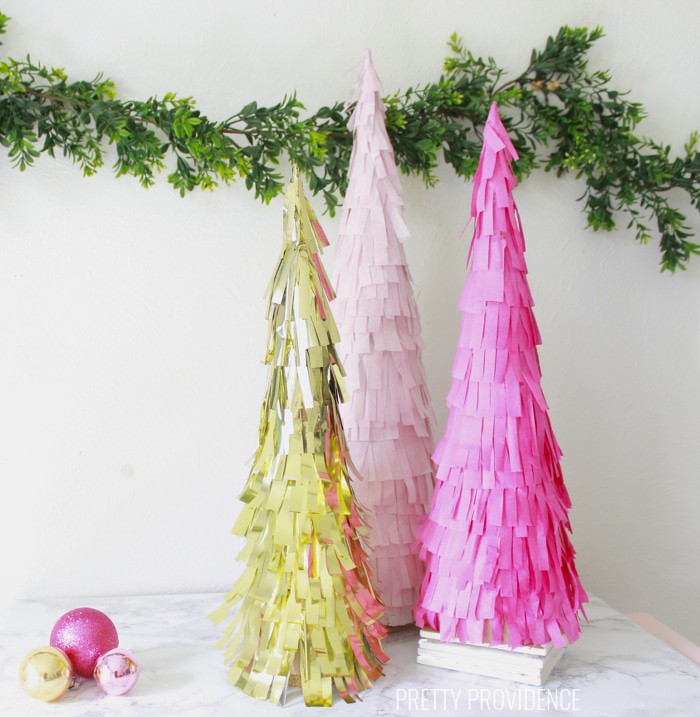
Aren't they so cute!? I am going to be using a lot of pink in our Christmas decor this year... follow us on instagram to see more glimpses of that!

If you like this you should probably check out these too:
 |
 |
 |