• Skip to primary navigation
  • Skip to main content
  • Skip to primary sidebar
  • Skip to footer

Pretty Providence

  • Home
    • Newest Blog Posts
  • About
  • Recipes
    • Appetizers
    • Beverages
    • Breakfast
    • Dessert
      • Cookies
    • Dinner
    • Salads
    • Side Dishes
  • DIY & Crafts
    • Cricut
    • T-Shirts
    • Crafts
    • Decor
    • DIY Projects
  • Holidays
    • Halloween
    • Thanksgiving
    • Christmas
    • New Years Eve
    • Valentine’s Day
    • St. Patrick’s Day
    • Easter
    • Mother’s Day
    • Father’s Day
    • 4th of July
  • TIPS
    • Tips
    • Organization
    • Family Life
      • Baby
      • Fun
      • Family
    • Travel
  • OCCASIONS
    • Gifts
    • Parties
  • Navigation Menu: Social Icons

    • Facebook
    • Instagram
    • Pinterest
    • YouTube

Easy DIY Tinted Chapstick

Home » All » Easy DIY Tinted Chapstick

Published April 25, 2017 Last Updated June 10, 2019 / By Pretty Providence 1 Comment

Tweet
Pin409
Share
Email
409 Shares

Chapstick is one of those things that you just always buy not even thinking about the fact that you could make your own exactly how you like it! We are so picky around our house about chapstick. It’s too greasy, not greasy enough, doesn’t smell quite right, isn’t tinted exactly how I like, the list goes on and on. Well I’m here to tell you how easy it is to make your own and make it exactly how you want it!

Making your own tinted chapstick is so simple. You'll wonder why you hadn't done it sooner!

I’m bouncing over from my regular blog at Practical and Pretty to share this tutorial with you! Make sure to check out some more of my beauty DIYs here.

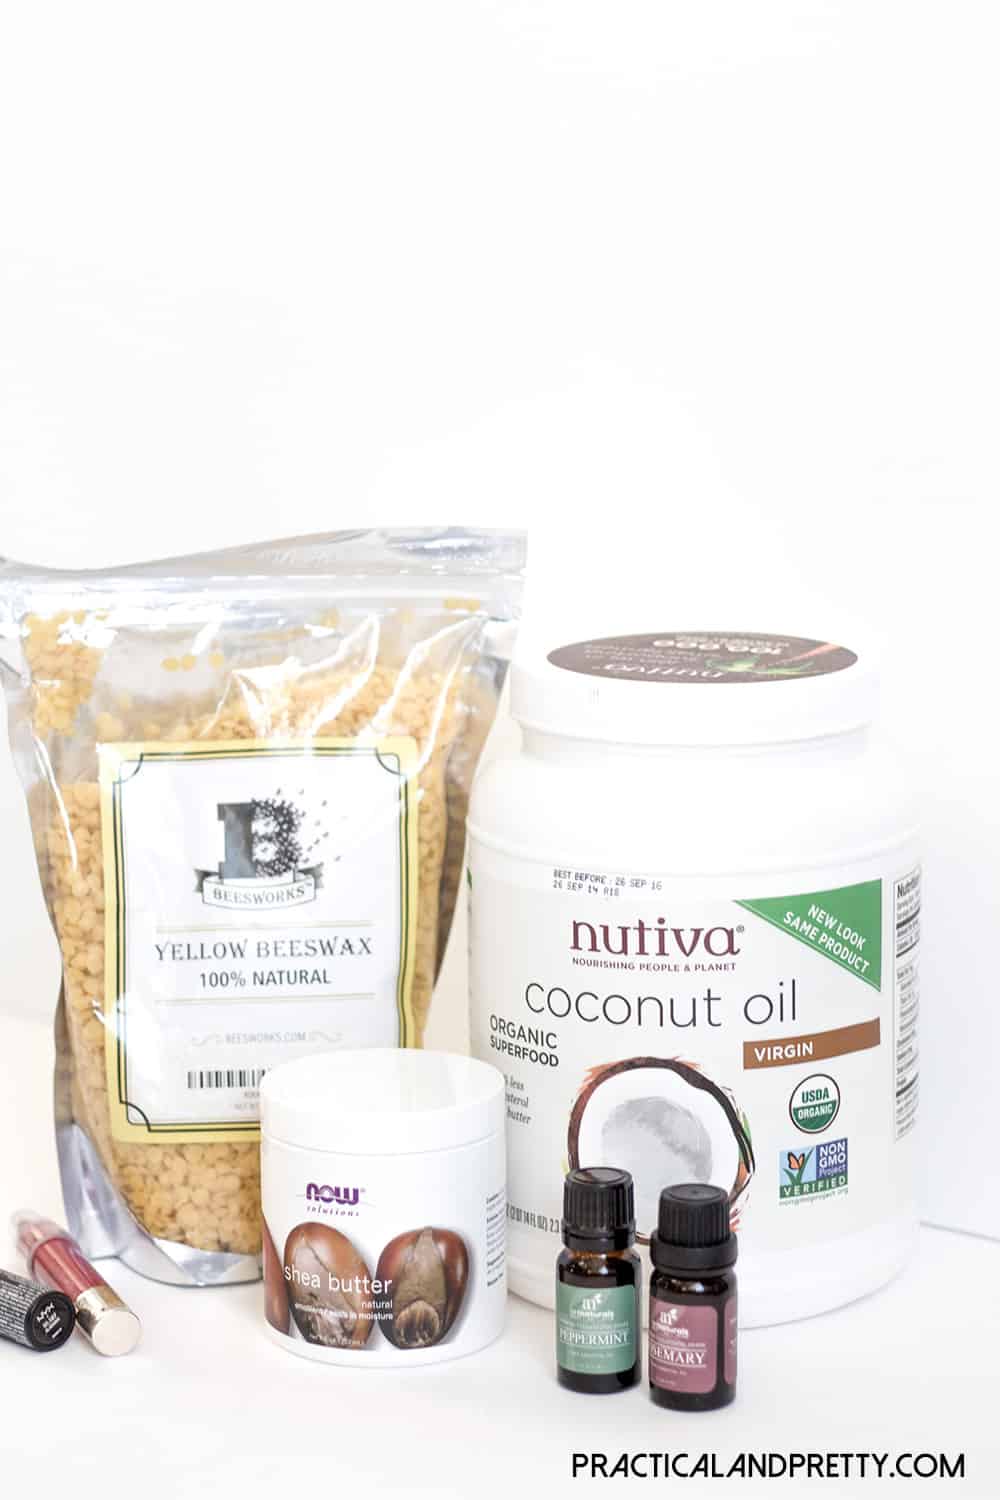
This DIY requires very few ingredients and you may already have a few laying around your house already! I decided to use Rosemary and  Peppermint essential oils in the one’s I made my husband and just peppermint in the tinted ones for myself. They turned out perfect.

What you need for your DIY Chapstick:

  • 2 tablespoons Shea Butter
  • 3 tablespoons Bees Wax
  • 4 tablespoons Coconut Oil
  • Chapstick tubes (or lip balm containers!)
  • 10-20 drops Essential Oil (Optional)
  • Lipstick (optional if you’d like tinted chapstick)  Making your own chapstick is so simple. You'll wonder why you hadn't done it sooner!

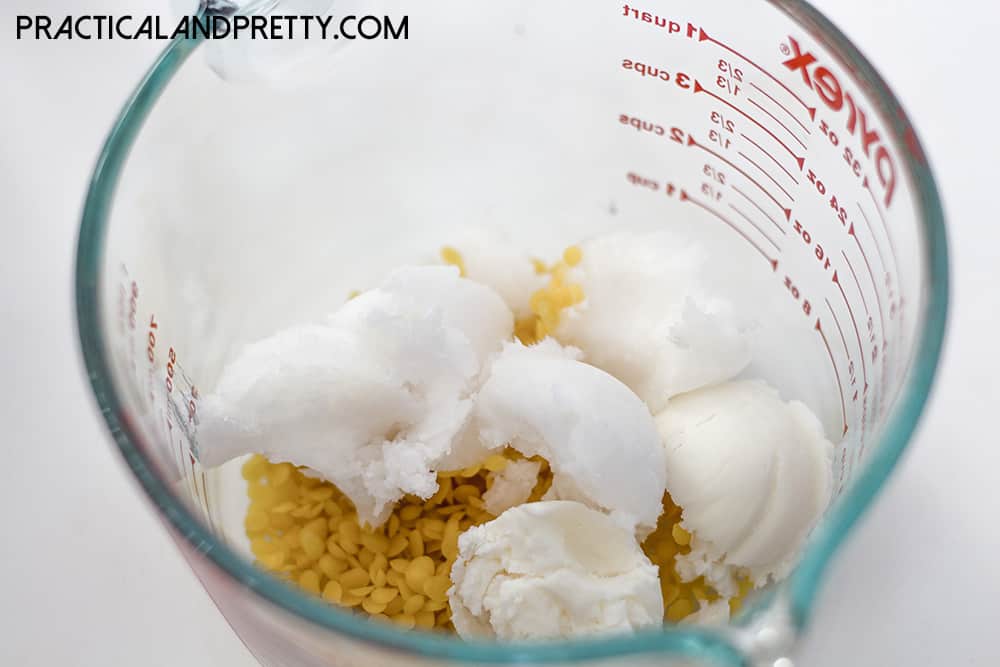
Start by measuring out your shea butter, bees wax and coconut oil. Microwave these ingredients 30 seconds at a time until fully melted. I did this about 4-5 times.

Making your own chapstick is so simple. You'll wonder why you hadn't done it sooner!

Making your own chapstick is so simple. You'll wonder why you hadn't done it sooner!

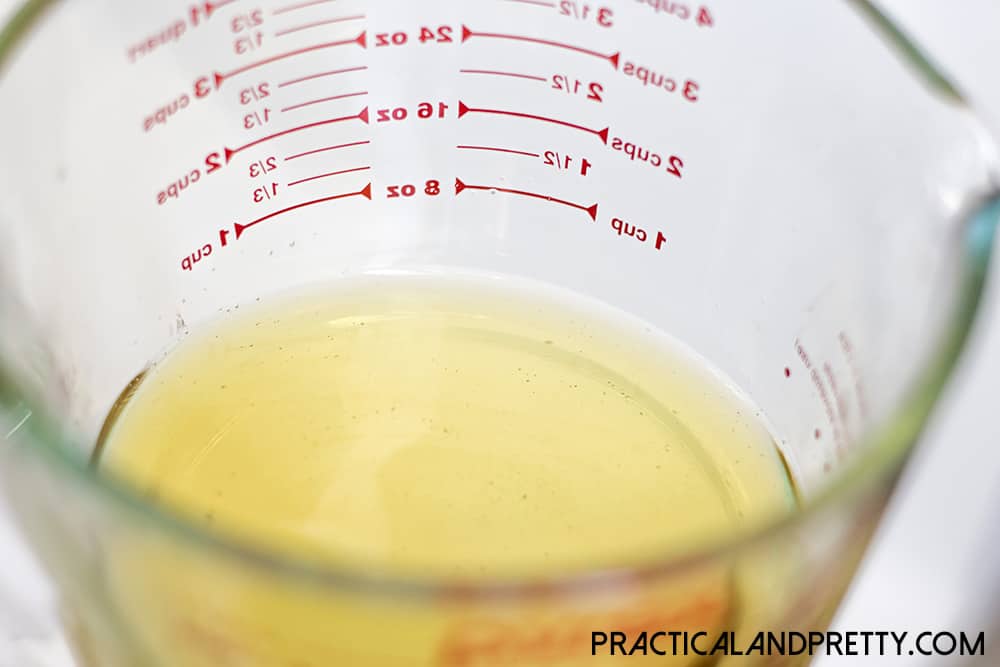
If you would like your chapstick tinted then cut a little piece off of your lipstick with a butterknife and stir it into the mixture. It doesn’t take much!

Now is the time to add your scent! I did 10 drops of rosemary and 10 drops of peppermint in one batch. In another I did about 15 drops of just peppermint.

Carefully pour the mixture into the chapstick tubes. They make funnels for this specific purpose but I thought I could do it on my own. It made a pretty big mess, but it wasn’t too hard to clean up!

Making your own chapstick is so simple. You'll wonder why you hadn't done it sooner!

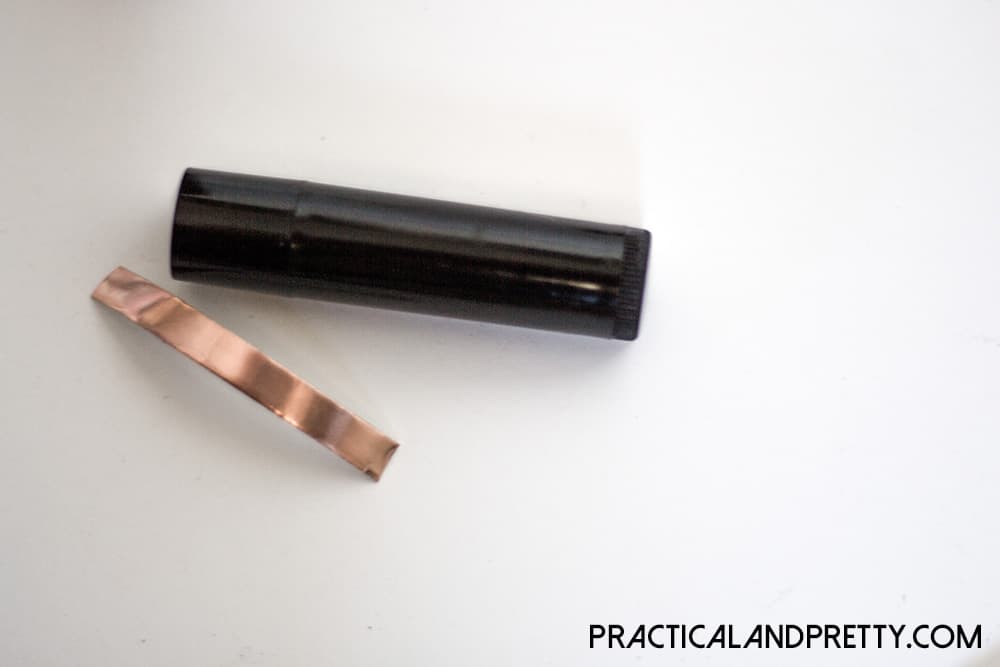
I decided to add a little copper tape around my tinted tubes so my husband knew whose were whose! I use copper tape for everything. (Want to see how else I’ve used copper tape: copper frame, art deco planter, Ikea side table, bookmarks, and kitchen canisters. Seriously you need some of this in your life!)
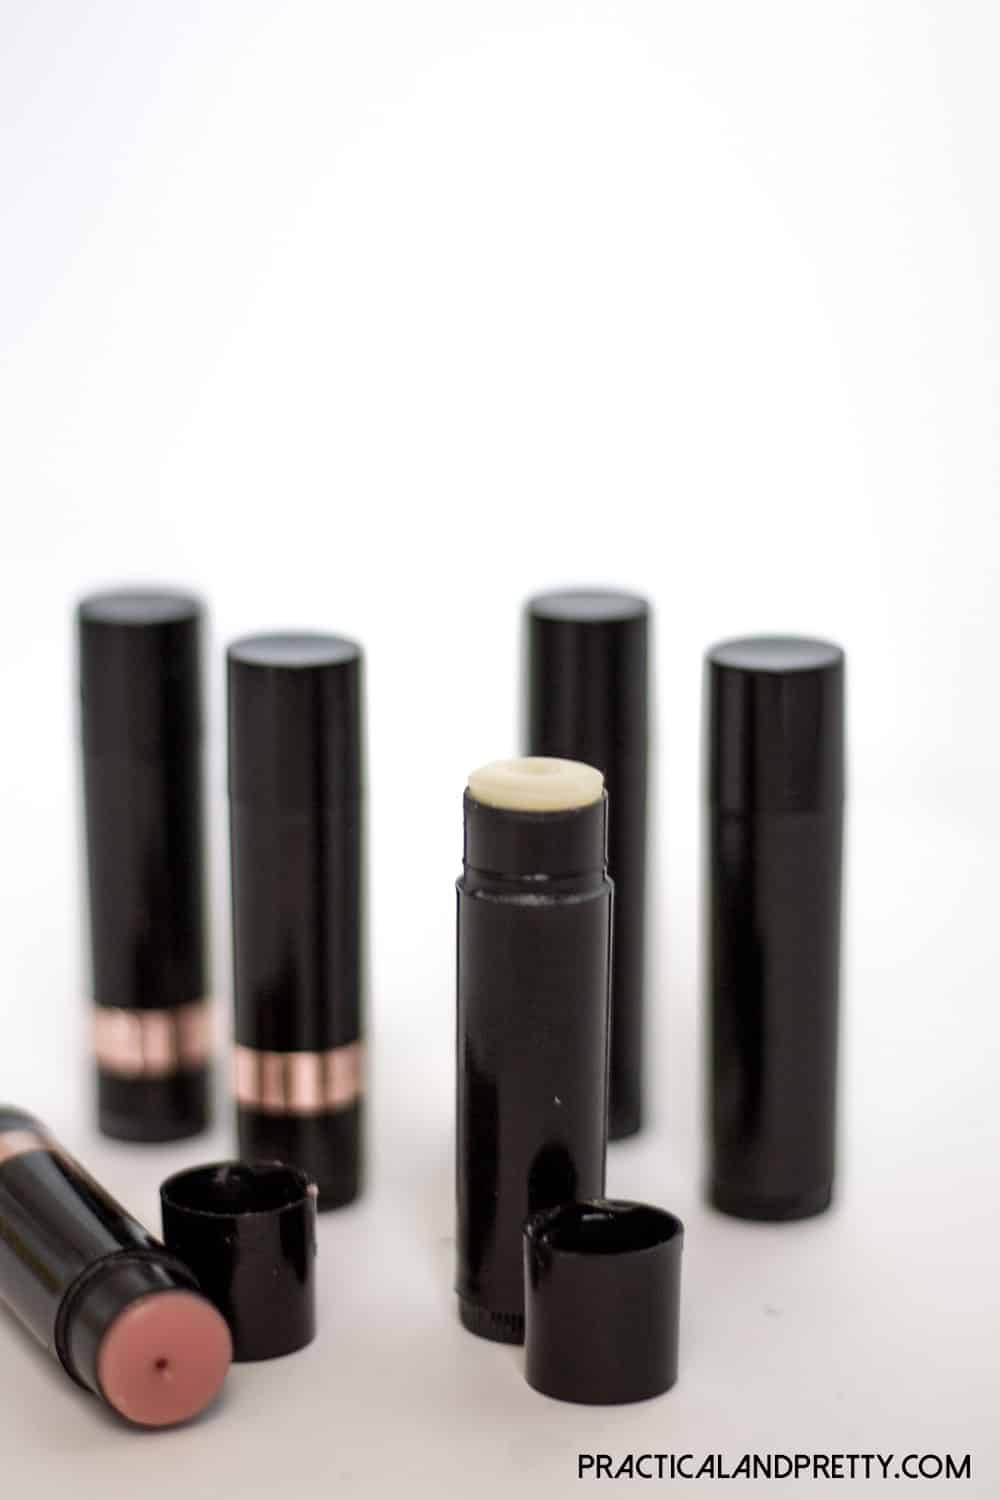
Making your own tinted chapstick is so simple. You'll wonder why you hadn't done it sooner!

Then you’re all finished! I just love this chapstick. It makes my lips stay super smooth forever and has just the perfect amount of tint.

Don’t miss a post by following along!

Blog | Instagram | Facebook | Pinterest

Tweet
Pin409
Share
Email
409 Shares

Reader Interactions

Comments

  1. Terri

    July 28, 2022 at 5:46 pm

    How many tubes does this recipe make?

    Reply

Leave a Reply Cancel reply

Your email address will not be published. Required fields are marked *

Recipe Rating


Primary Sidebar

about-pretty-providence  

Hey! We're Sarah and Jessica. We're BFF's and have known each other since we were 5 years old. This blog is our place to share all of our best recipes, tips, crafts and DIY projects.

You can read more about us on our about page and find us on instagram! We love making new friends.

  • Email
  • Facebook
  • Instagram
  • Pinterest
  • TikTok
  • YouTube

Most Popular

Breakfast casserole with sausage, eggs, cheese and bell peppers on a white plate

World’s Best Breakfast Casserole

DIY desk made from two storage cube bookshelves and IKEA desk top with marble look

DIY IKEA Desk Hack

Iron-on t-shirt with Cricut collage of supplies needed, iron-on cut and weeded, and then the final shirt that says "#tired" in gold iron-on letters

How to Make a Shirt with Cricut

The Office birthday party table with decorations, food, balloons and "it is your birthday" sign

The Office Birthday Party

Teepee style blanket fort made with bedsheets and clothesline hung from a light fixture.

How To Build The Best Blanket Fort

German Pancakes just out of the oven, dusted with powdered sugar in a glass baking dish.

German Pancakes

Organization

a habit tracker with pink squares next to a rose gold pen

Free Printable Habit Tracker

collage image of four different laundry hacks to make laundry easier

The Best Laundry Hacks

art supplies organized and labeled on a white IKEA kallax shelf

School and Art Supply Organization

Weekly cleaning checklist and routine, and checklist for kids too with pictures and check boxes!

Weekly Cleaning Routine + Checklist

Laundry Care Symbols Explained

pantry organization at it's finest! great tips and tricks in this post!

Home Organization Ideas

CRICUT

Light blue Cricut Maker 3 with an assortment of colors of vinyl and iron-on vinyl fanned out under it and behind it.

The Best Iron On and Vinyl to Use with a Cricut

custom hats with cricut iron-on, baseball cap style

How to Make Custom Hats with Cricut

light blue Cricut maker 3 next to vinyl and art on shelves

Cricut Materials – Everything You Need to Know

cute first/last day of school whiteboard on a light blue background

Back to School Photoshoot Board

DIY tote bag canvas with a rainbow and the words 'I'll walk with you' in gold iron-on vinyl

Rainbow DIY Tote Bag

DIY Custom Napkins

Footer

Copyright © 2012-2019 Pretty Providence | Contact Us | Privacy Policy | Disclosures