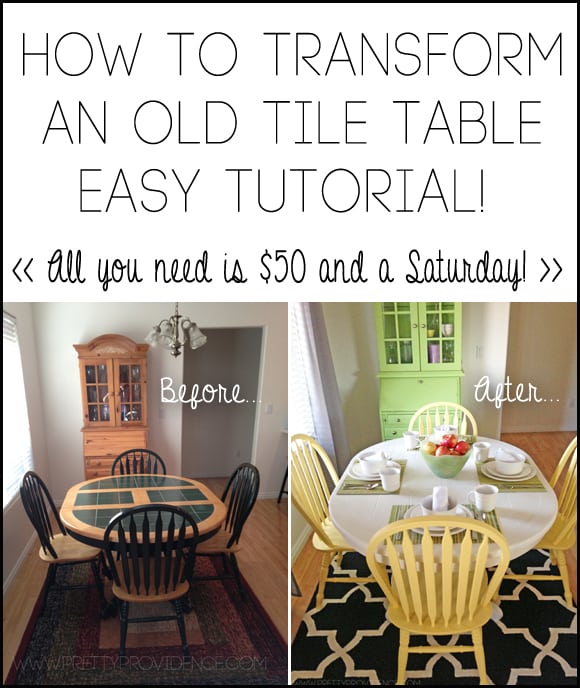
Tile Table Makeover
Have you ever thought about how to paint furniture white? We have! And in this How to Transform an Old Tile Table Tutorial, we've done the work for you. And if you are feeling ambitious, here's How to Paint Furniture with Chalk Paint too!
History of the Dining Table
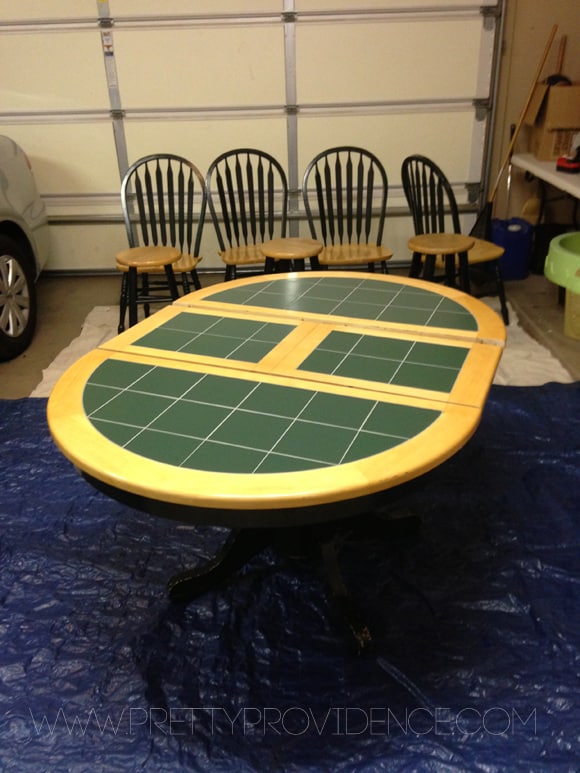
Six years ago when Bryce and I got married, my Grammy and Grandpy gave us this dining table and chairs. It was a really solid, well-built table with an interesting shape. But, I was not crazy about the forest green tile/oak wood combo. Beggars can't be choosers though, and it was honestly way nicer than any of our other options. We gratefully accepted it and ate, played and puzzled on it for five happy years.
Why DIYs Work
Anywho, I anxiously awaited the day when we could afford to buy a new dining table. As I started to shop around I realized how expensive our set was going to be to replace. I obviously heard of refinishing furniture, but for some reason, the tile always scared me off. Until one fateful morning when I just woke up and decided, "I'm doing this thang."
Of course, the first thing I did was google it, and shockingly I turned up with little to no helpful information, so I decided to wing it. I figure if it turned out a nightmare, it would just speed up my buying process, and if it turned out awesome, I saved us big bucks! I am sooo happy with how it turned out, and it has given me the confidence to try more furniture related DIYs.
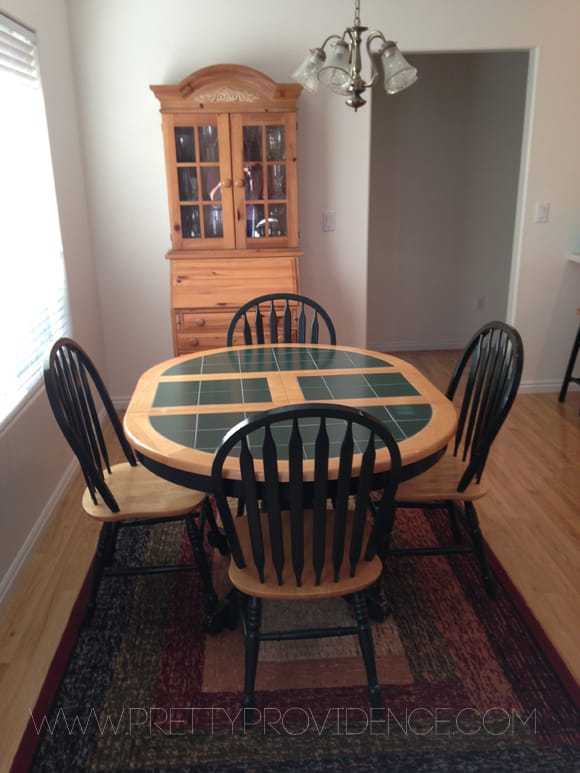
Old Tile Table Makeover Before
So. I think you might die when you realize how easy this is. Before we start this how to transform an old tile table tutorial, here are a couple of lovely before pictures for your viewing pleasure.
How to Transform an Old Tile Table Tutorial
Okay, now that you have a working knowledge of the "before" set, let's get to work. Move your table and chairs to an area where you can paint. Then follow these instructions:
- Clean your table and chairs thoroughly
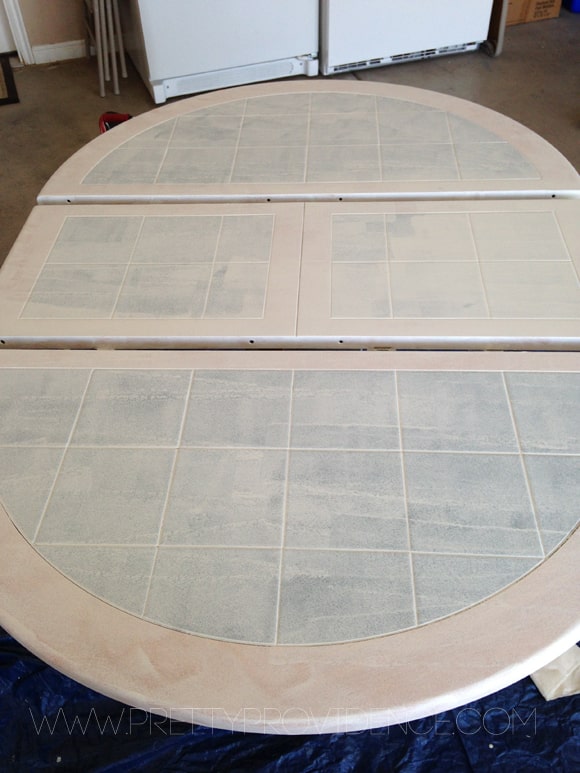
- Prime
- Prime Again
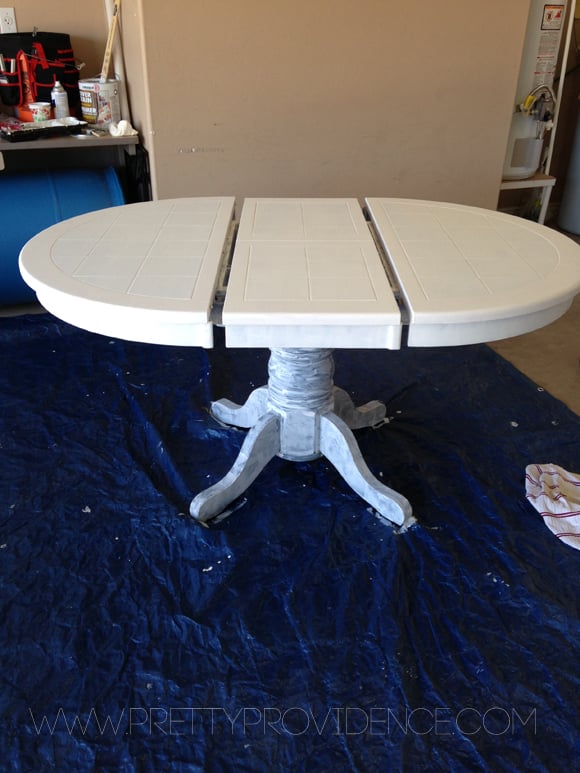
- After your Primer is completely dry, Paint
- After your table and chairs are completely primed, painted and dry, you will need a sealant or top coat
Step 1
Clean your table and chairs thoroughly and wait until completely dry.
Step 2

Step 3
Step 4
Step 5
Step 6
Pro Tips
- Make sure you clean the table surface thoroughly before painting. Use washing water and a soft cloth to clean the surface of the tiles. An old toothbrush works to remove any dirt in the grout. Rinse with clean water and dry with a clean cloth.
- Use oil-based paint - do not use latex paint. And choose between a satin or semi-gloss finish for the best results.
- Take your time between coats of paint. Make sure the first coat is completely dry before adding a second.
- If you are painting a wooden table, sand it first before applying the primer.
- And always keep a touch-up can of paint handy in case it needs it.
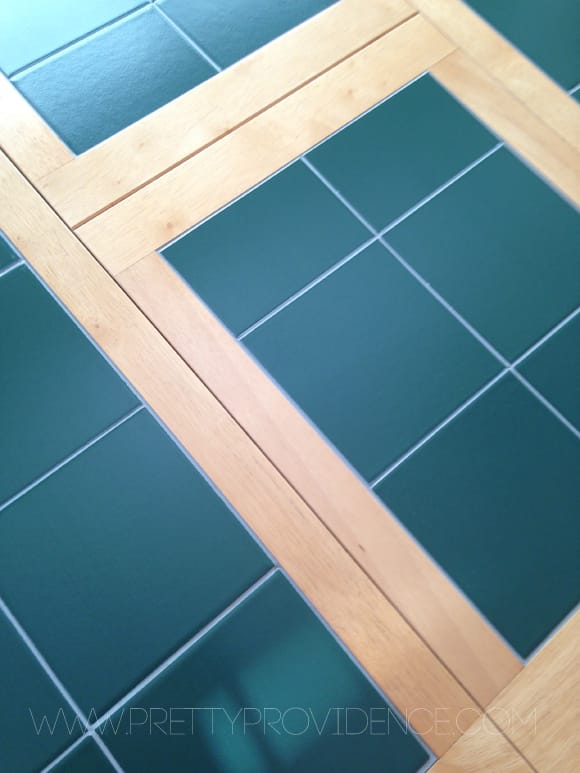
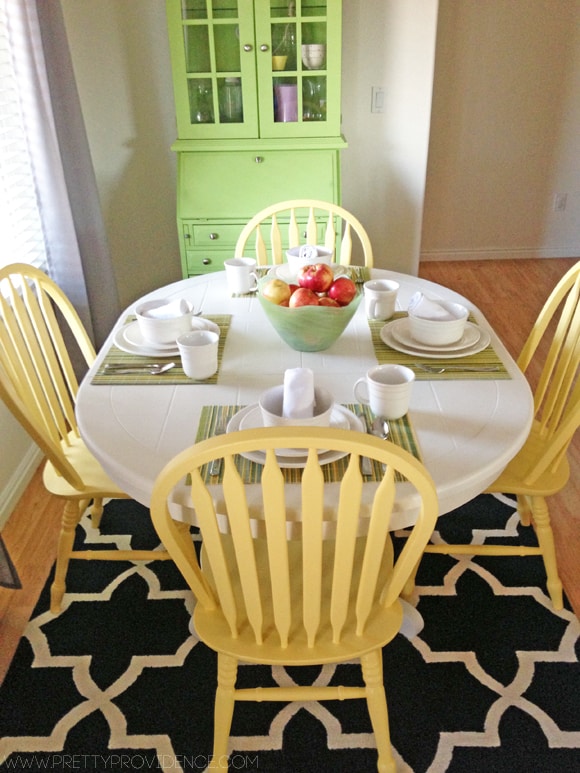
It's ironic that the thing I disliked most about my table beforehand (the tile) is now my very favorite part of the table. It adds texture and interest to the tabletop without being too bold or distracting!

Also, if you love frugal and AMAZING DIY projects as much as we do, check out our awesome DIY Sliding Barn Door video tutorial!
Are you ready to transform your old tile table? Make sure you share your creations by tagging us on Instagram!
Originally published on December 17, 2013, and since updated on July 11, 2019.

Hey ladies. what type of screw or bolt connects the pedestal to the bottom of the table? and don't suppose you have photos? thank you! michael
Can you paint the table a different color than white? My table is just like yours ????
Sure! Any color should work!
I have this table also , I saw where you said if you don’t sand you have to use the primer so I do have a good sander could I send these tiles? I love the way your table turned out although I’m not distress it just a little don’t know
I have the exact same table and didn't know how to paint it.
Thank you so much for the advice.
Can't wait to start painting that table and give it a new look.
Can you use chalk paint on this table?
I'm sure you could! I haven't tried it myself but I used chalk paint for my piano makeover and love it!
Will the paint on the tiles chip off or scratch off or peel off over time
Mine didn't! We used it for about two years and then we donated it when we got a different table, so it was great for that amount of time at least.
Can I still do this if I have cracked tiles ave removed grout?
Yes, but I would probably caulk them or fill them in somehow first!
We have the same exact table as you. We are also looking to redo it since we remodeled our kitchen and it no longer matches.
Also recieved it from my grandma when she passed on and it is a great table for the space we have.
I love that we can have it round and then open it up when we have guests.
The question i have.
We keep it round most of the time. When painting the tile on top and you put the extender back into the inside does it scratch up the paint?
I love how this turned out and again i love that it is the same table so i have an idea of what it would look like!
Thank you for sharing this!
Stacy
We mostly kept ours round also! It didn't scratch or chip, but make sure you paint them all separated, so that you can get the sides etc.
Can you please let me know how long it should cure before using and also what products can you use to clean table afterwards.
Thanks
It should cure for at least 24 hours! And you can use any product you normally would. I typically just wiped mine down with a hot wet rag, but I used cleaner too from time to time and it held up well.
I just began painting my tiled table that has a hidden leaf. It came from a extreme smokers home. I cleaned the table like the original poster suggested but I used rustoluem bin primer which is a shellac based primer. This helps also seal the smoke damage and I liked how it had great coverage and dries in 45 mins. I used a small roller to get an even coat as it was hard to use a paintbrush with this primer as it dries so quickly!
I currently have two coats of bin primer and one coat Sherman Williams showcase paint in ultra white. I plan on doing already one more coat. I then plan on using stencils to make a modern design on the top. I will seal it with a top coat.
Hi. Did you have cracked or chipped tile on the table before starting your transformation? If so what did you use to fill it in?
No, we didn't! I'm sorry!
I am planning on doing this with mine and I'd love to see your finished product! My table has a floral design etched in the tile that I'm hoping I can fill and cover.
Sounds like my table. Would love to hear what you did? My tiles are cracked and the silicone grout is missing as well. Did you have these issues? If so, how did fix it? World love to see an after picture.
Hi. I know this is an old post but I have the exact same table and I want to repaint it purple.
I was gonna do just the tile but I might do as you have and do the whole thing but my question is can you still put the extension away and have it as a round table??
Thanks
Did you paint your table yet? I have the same question, although we first tried removing the tiles & that not only didn't work, but also damaged the extension. So I'm using it as a test piece. So far I've primed it twice, plus a little extra in the (black) grout, since some spots were still showing through. I'm painting it white with the same paint we used on our kitchen cabinets: Sherwin Williams Pro Classic. I'm guessing two coats of that will do it?
Another question I have is how long does the table top need to cure before putting anything on it? I've read as long as a month.
You dont actually state whatvpaint you used! Anyone try this since or anyone remove the tiles?
we have this exact same dining table and chairs that were given to us by my husband's grandma too! It it is a very solid table but I didn't think it was possible to refinish it with the tile. I was just researching that and came across this post so I am very encouraged! my questions are, approximately how much money did you spend on this project? And how many hours did it take you? thank you for sharing!
Oh gosh, it was so long ago I don't remember the exact amounts but it was probably about $30 for paint and supplies! And maybe five or six hours, but split that up into different coats? Definitely not a huge time or money investment! Good luck!
This is The exaCt table i have! I found your post because im in desperate need Of a revamp. It Was also a hand me down for us. i’ve had it for ten years and its held up so well!
Jessica, I am trying to find the manufacturer of your table. We have one at our home in Russia and would like to find a source here to save us the cost and difficulty of shipping when we sell our home there this year. Can you help us? Thanks!
We have a very similar table , however it is rectangular. It has the same forest green tile. We bought it new in 1997 and it was manufactured by Ashley of North Carolina. This was before they had opened up their own chain of stores. We bought it in San Antonio at Oak Gallery.
Mine is a Dinaire.