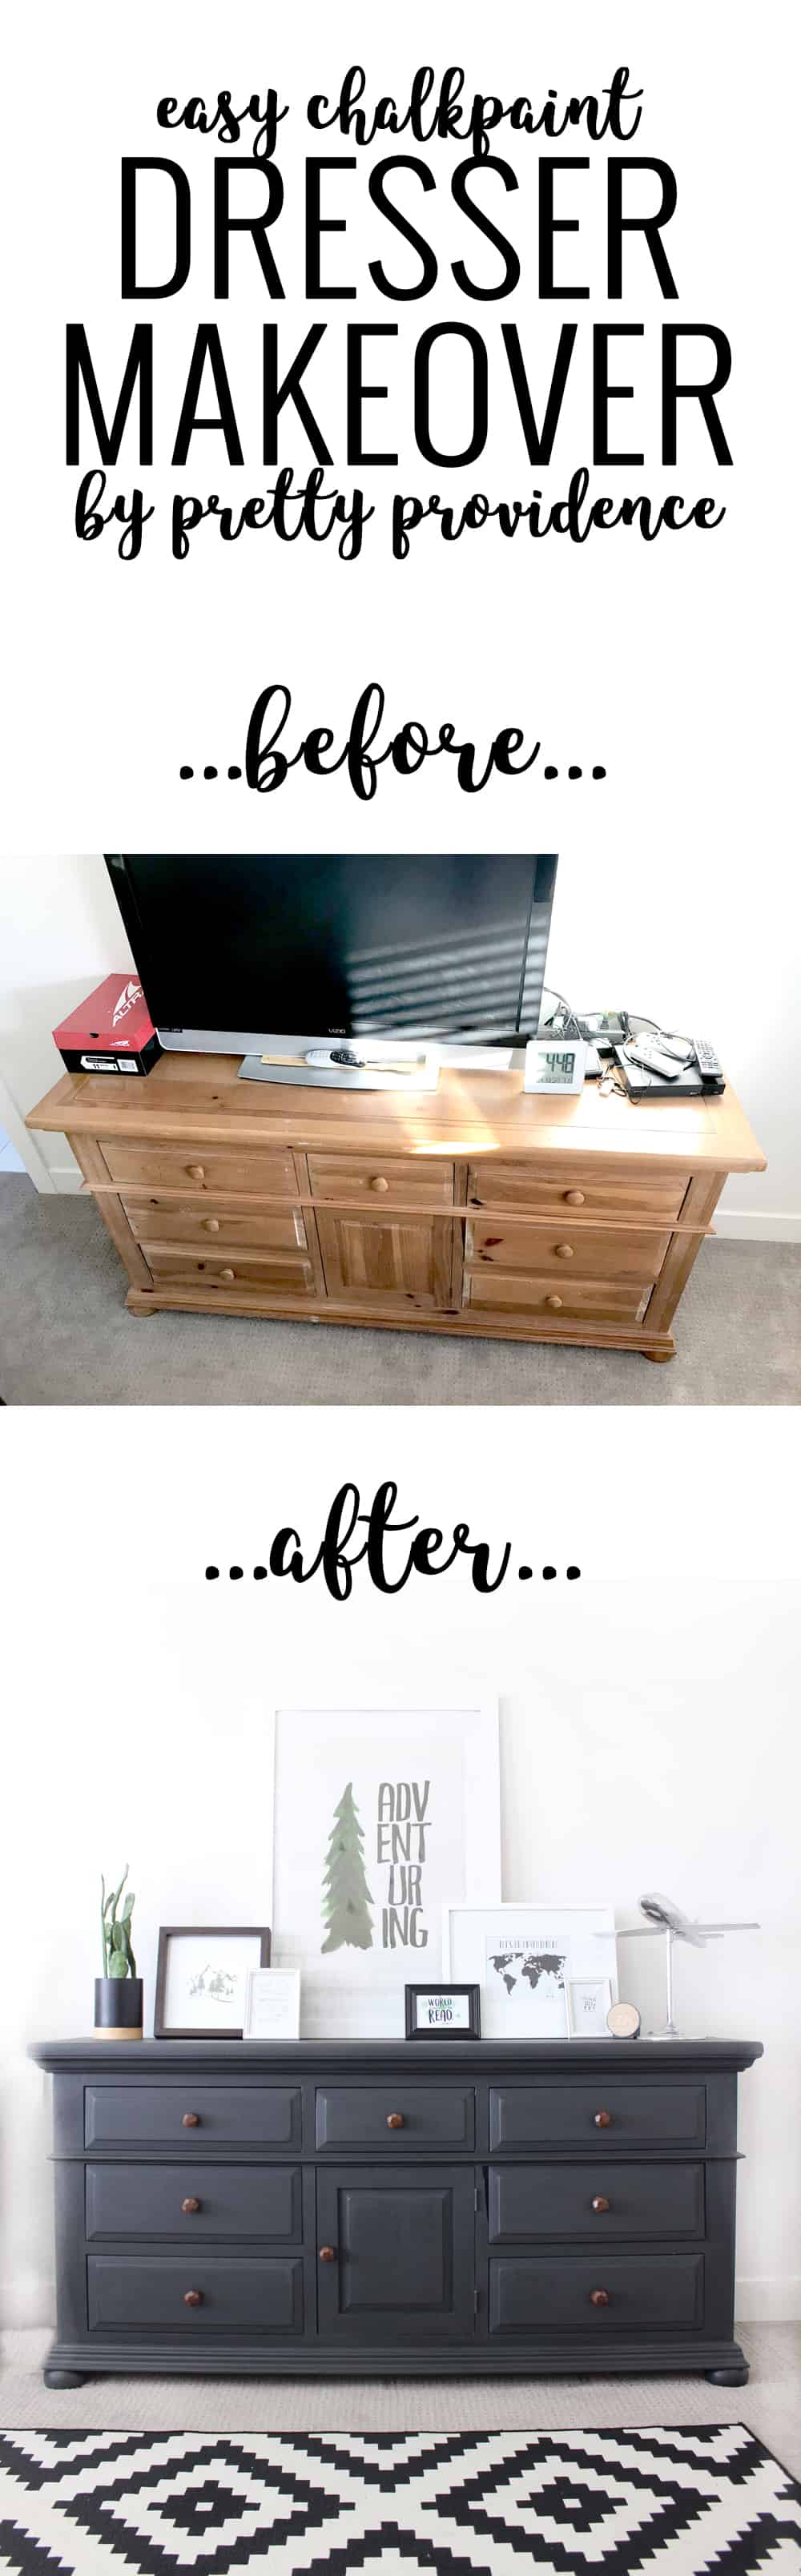
If you've ever wondered how to paint furniture with chalk paint this easy dresser makeover is for you!
 One of the most labor intensive parts of Luke's new big boy bedroom was this dresser makeover! If you've ever wondered how to paint furniture with chalk paint this post is for you! Even though it takes awhile, it really is so easy!
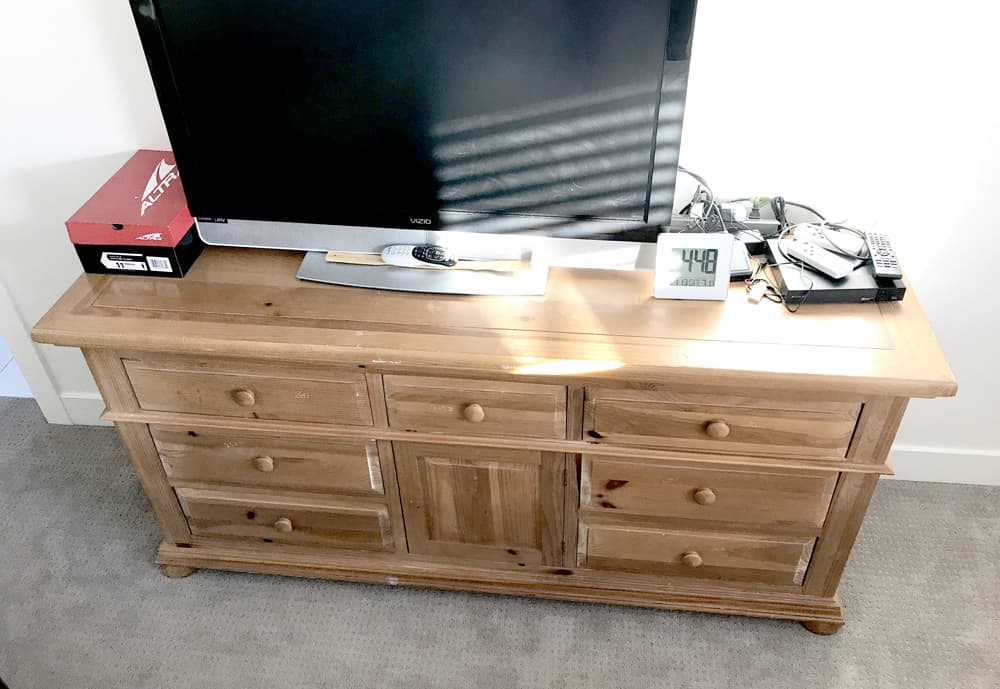
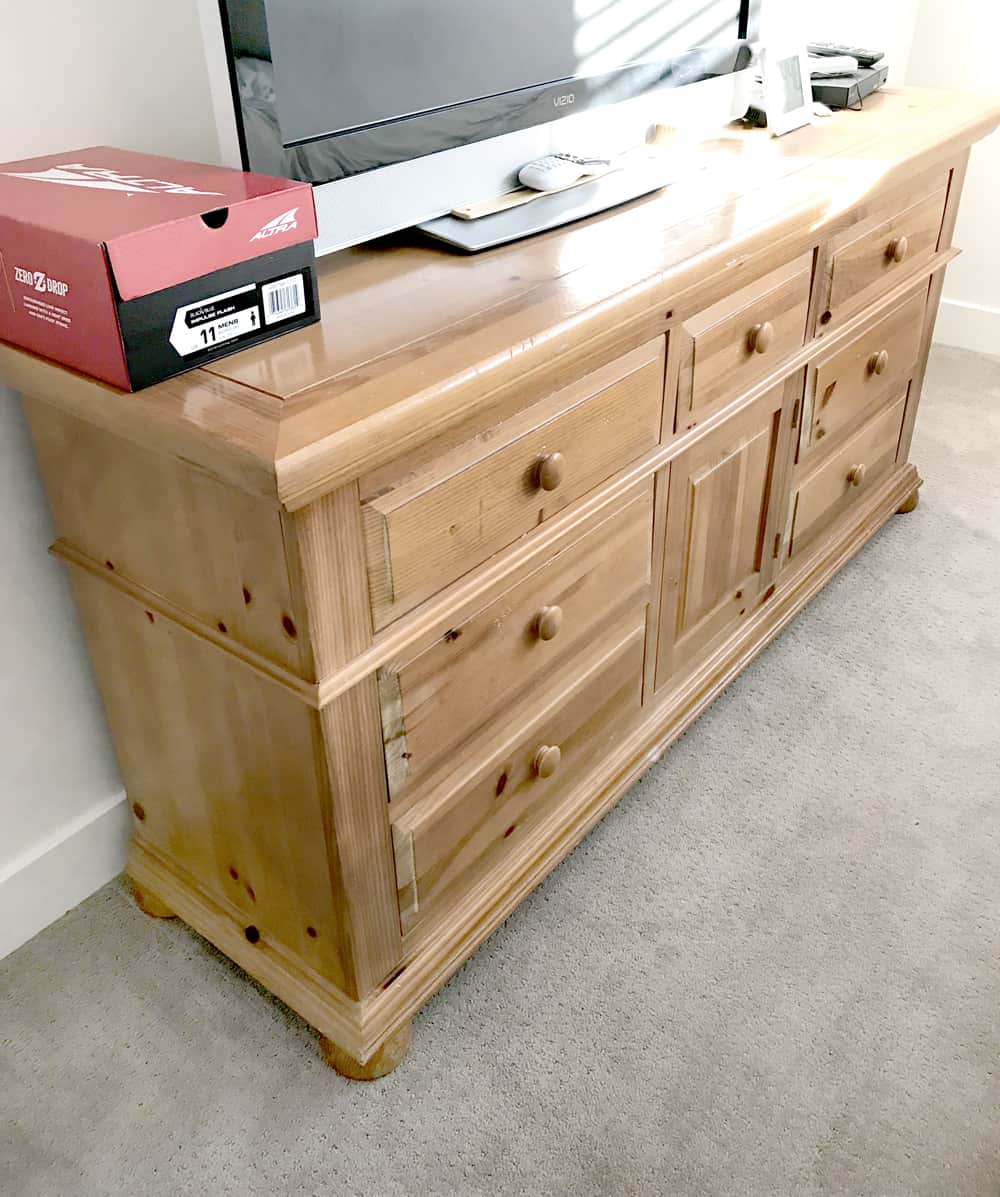
Another great thing about using chalk paint to makeover furniture is that it is super cost effective- and it gives you a major bang for your buck. Wanna see what I mean? Let's check out some before pictures shall we?
Dresser Makeover Before
I literally got this dresser for my childhood room when I turned twelve. It's a good testament to the quality of the dresser that it has lasted so well for so many years, which is one of the reasons that I decided to paint this dresser with chalk paint instead of getting rid of it!
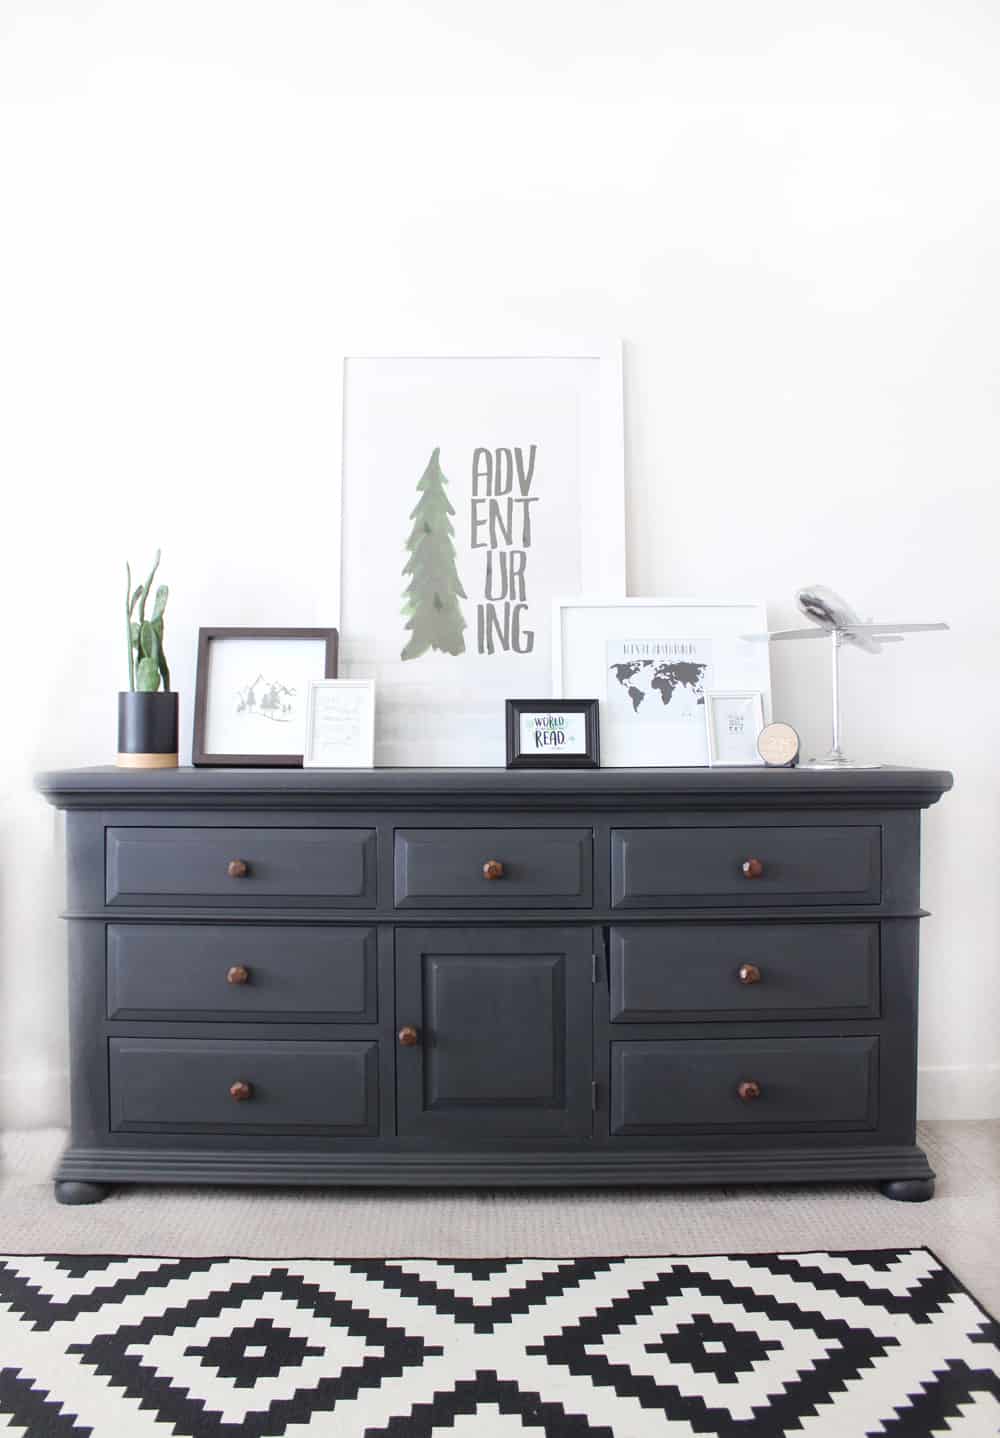
 There she is in all her glory! Okay, who's ready to get down to details?
What you need to refinish a piece of furniture using chalk paint:
- A sander and/or fine sand paper
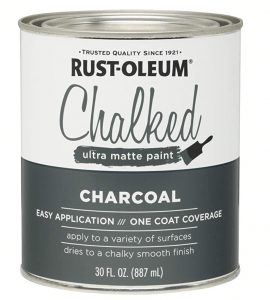
- Rustoleum Chalk Paint (I used the color charcoal, you can find the other color options here)
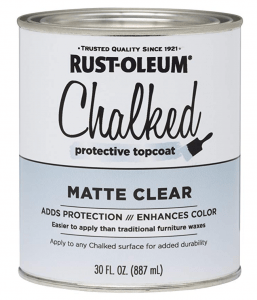
- Rustoleum Matte Clear Topcoat
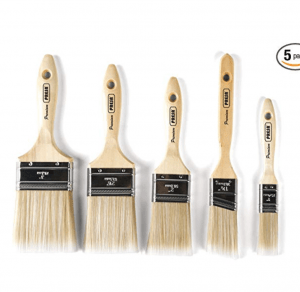
- Paint Brushes
- New Knobs (if desired)
How to paint furniture with chalk paint
- Take off all existing hardware and remove drawers.
- Lightly sand your piece of furniture. I used my sander (linked above and below) and when I say light I mean light. It literally took me an hour to sand the entire thing! I did all the flat areas using the sander but if you have any intricate details you can use a free piece of sandpaper to quickly get those areas or hard to reach corners.
- After sanding, wipe down the entire dresser with a wet cloth to get the extra sand dust off, and then let dry.
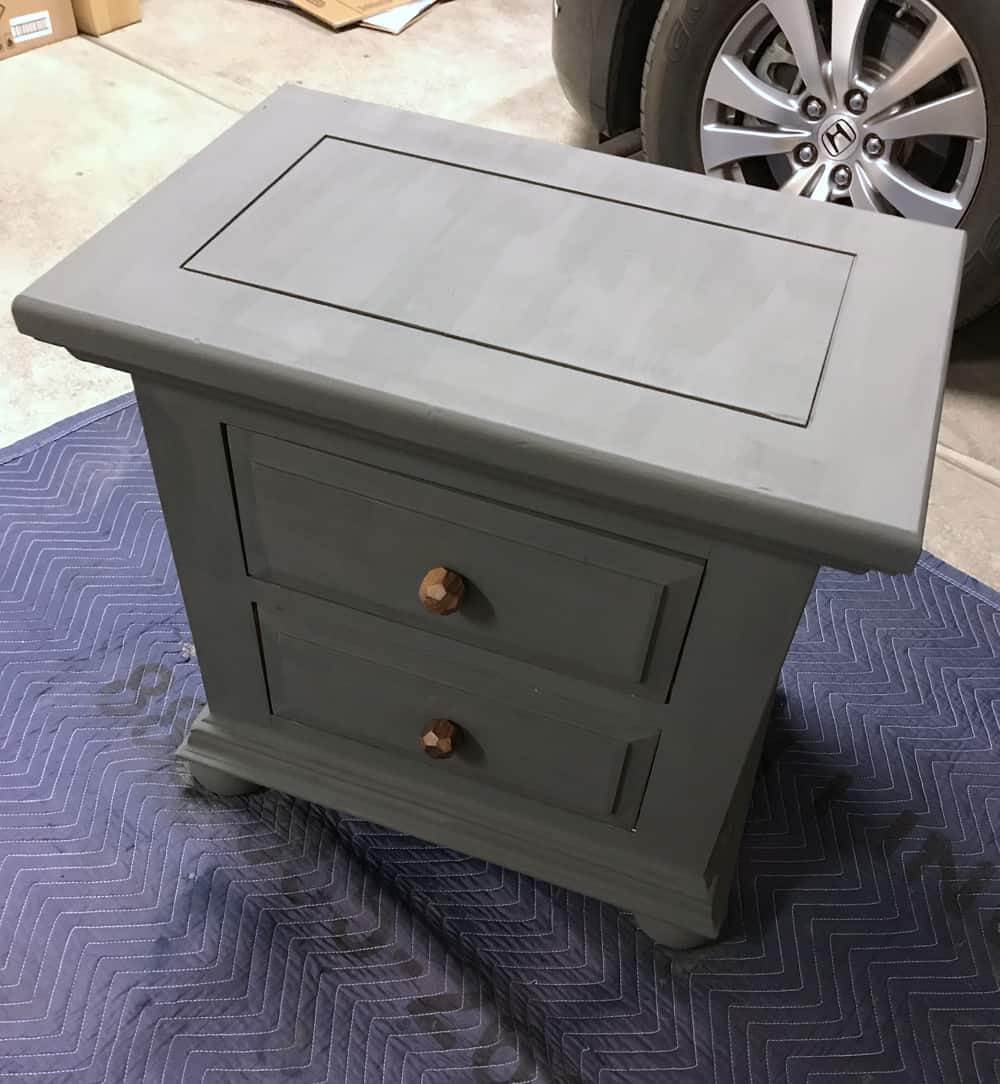
- Now comes the fun part, paint your first coat! This is the definitely the most time consuming part of the job. I put Gilmore Girl’s on the kindle and painted a coat each night. I did 2 coats of the chalk paint (plus a touch up) and 1 coat of the top coat (plus a touch up). I didn’t want my dresser to be super shiny in finish, but if you do you may want to do an extra top coat! I did a coat each night for four nights and honestly it was kind of therapeutic. Even though it takes awhile, it's so easy!
- Add new hardware and voila! You have a beautiful new dresser.
Do you have to sand before painting with chalk paint?
Lots of people ask if you have to sand before painting. The answer is no. Chalk paint will stick without sanding, but the sanding I did literally took me 15 minutes and it will make your finished project look better.
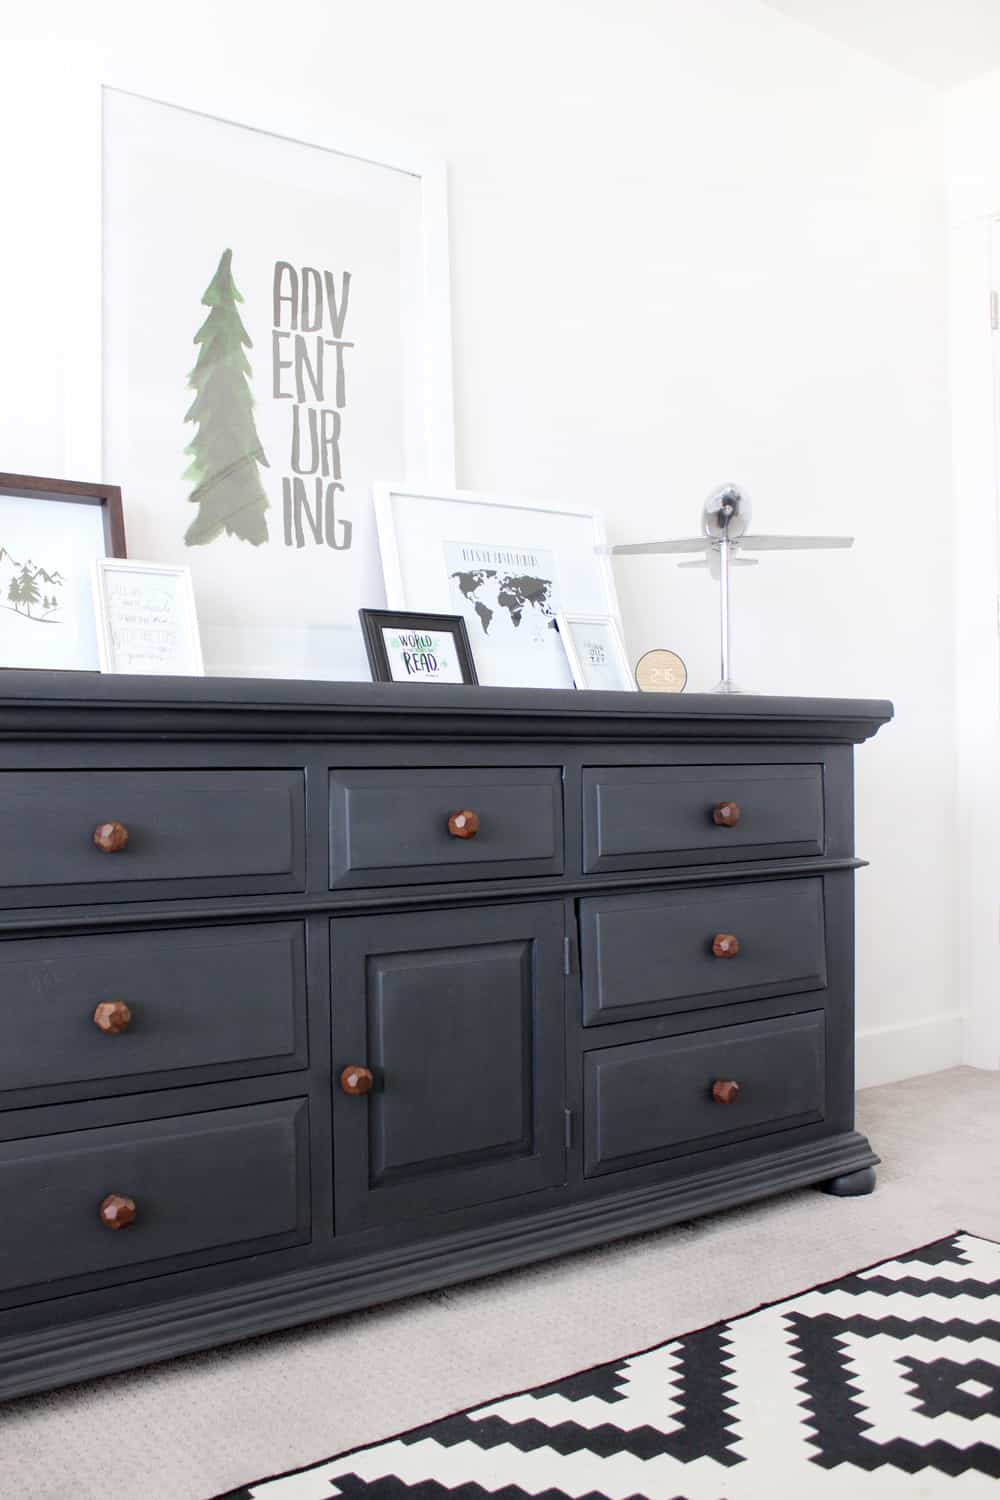
Because my dresser was so old there were a lot of dings and gouges and sanding really helped to smooth those out, see in the picture below.
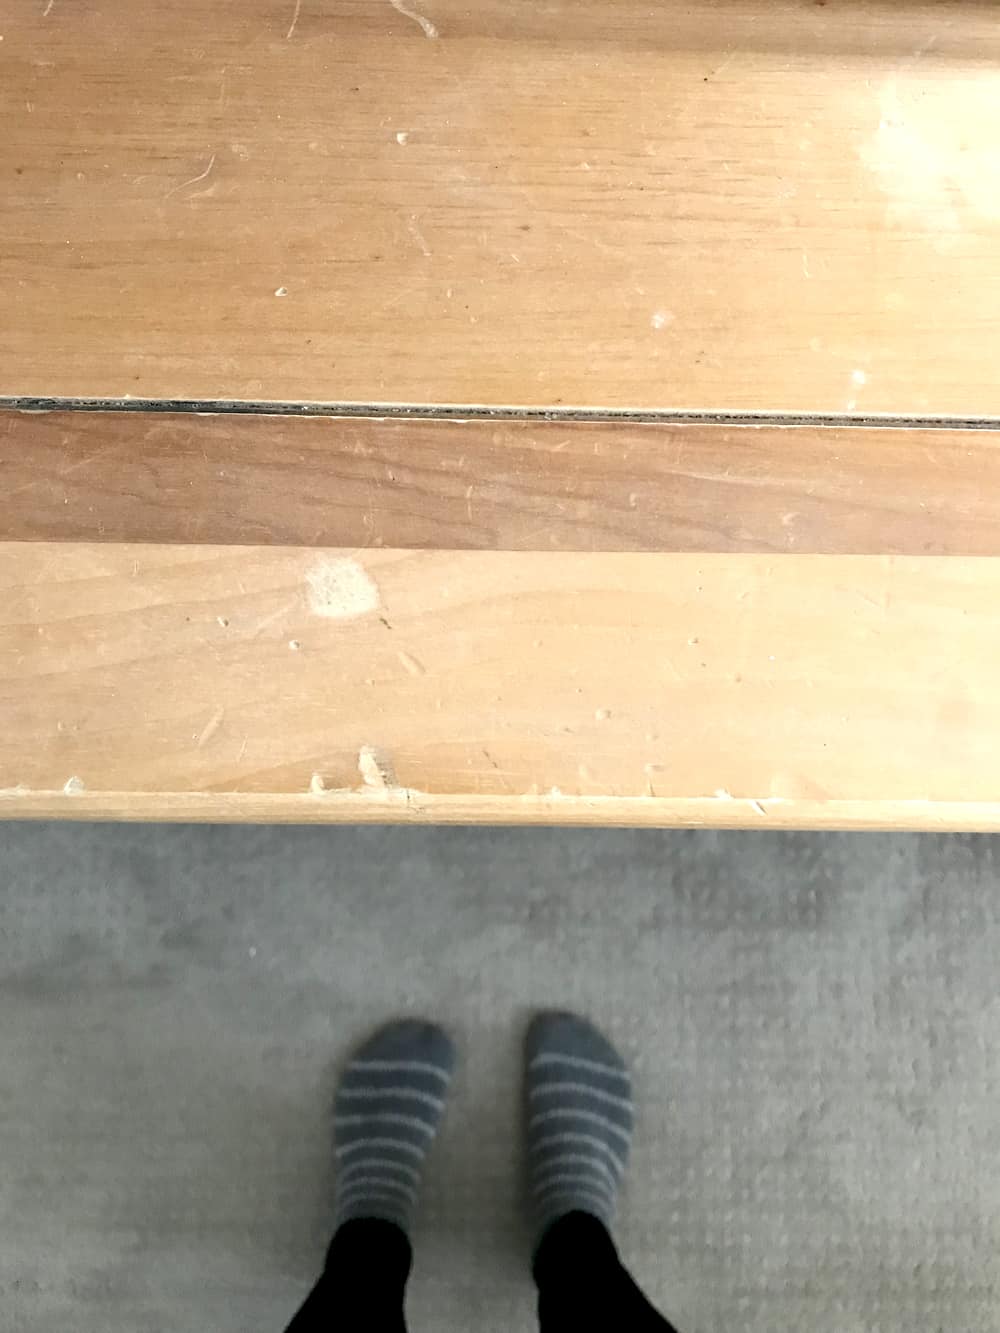
Now see how in the finished project you would have no idea where those dents were!
I just laid a moving blanket out in my garage and parked outside for a few days while we were doing this project! It was so nice to not have to worry about anyone touching wet paint, etc.
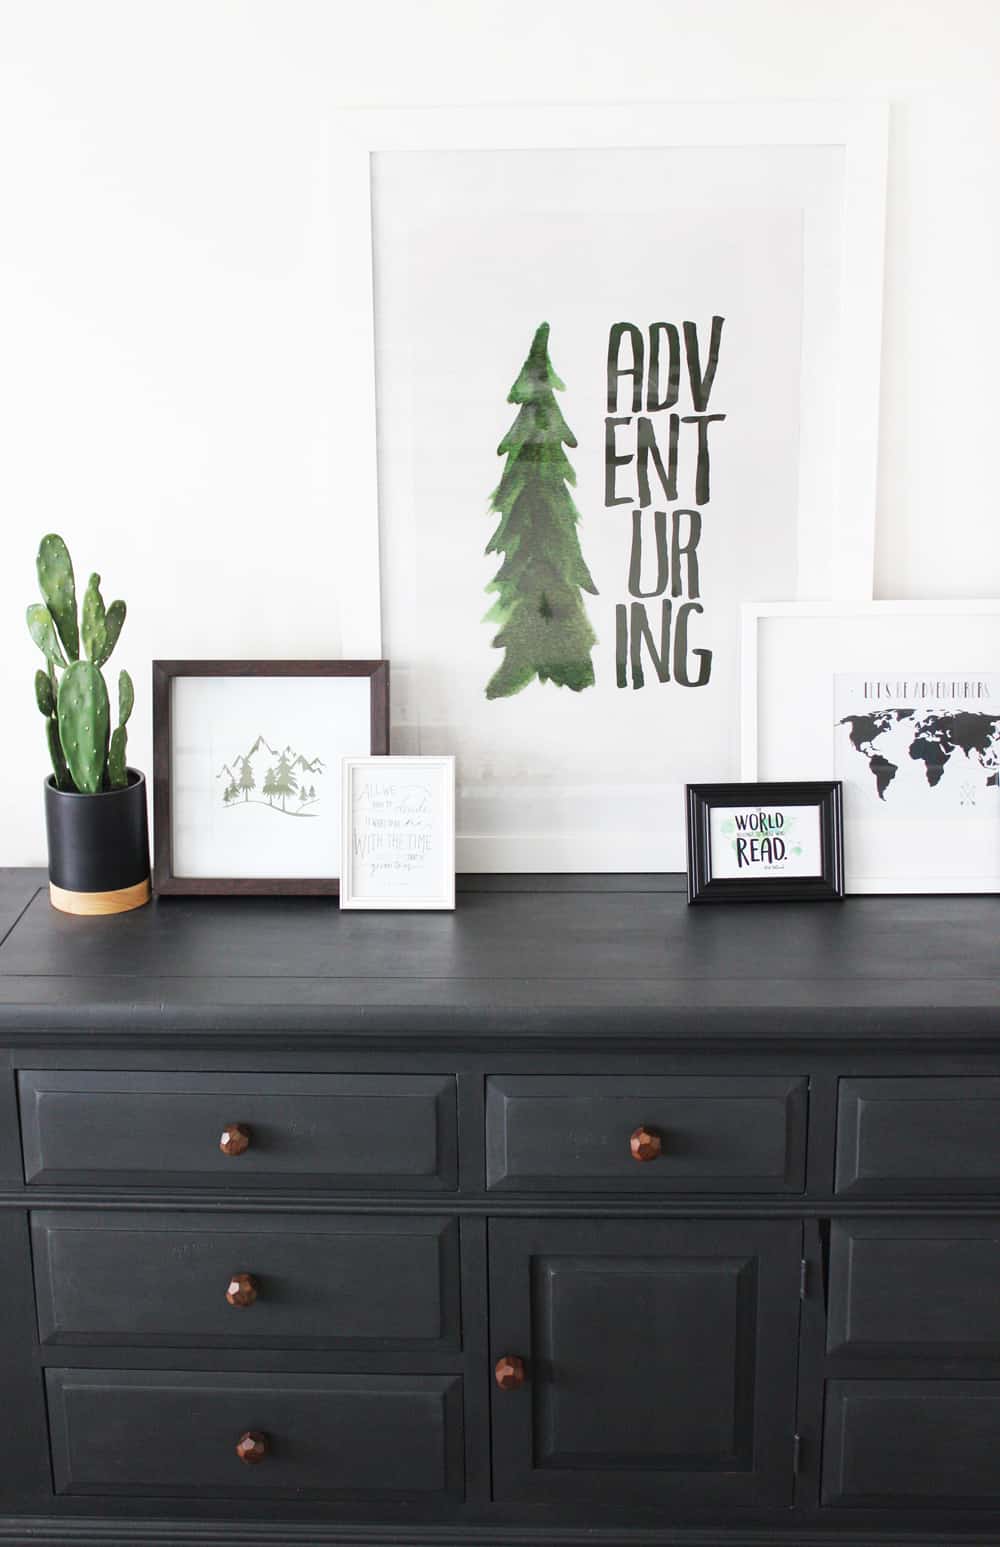
Here's a few more finished project photos of Luke's easy dresser makeover!
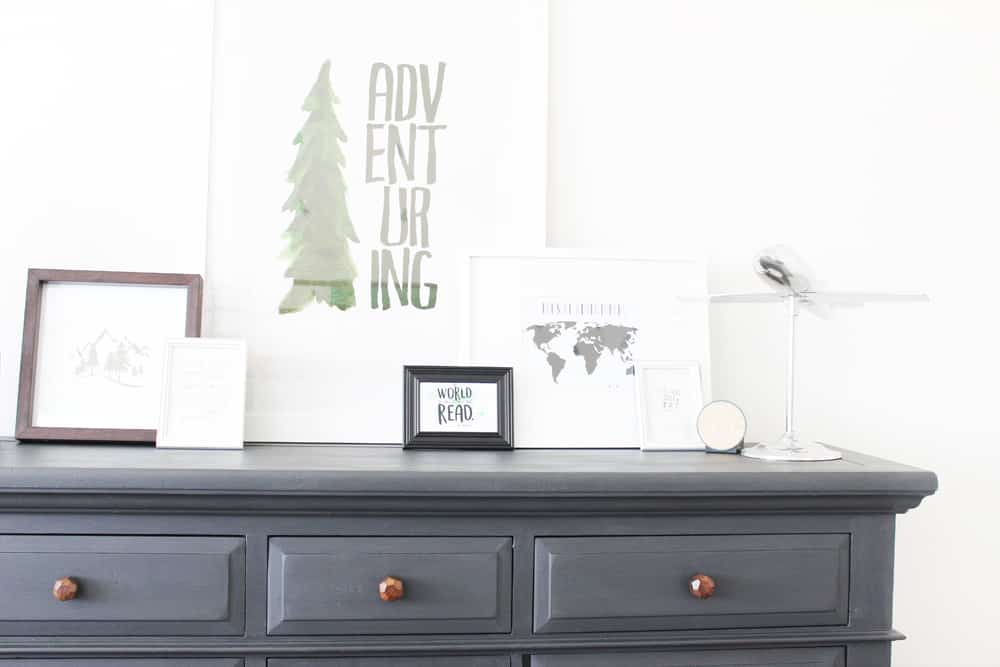 I found these walnut fauceted knobs at hobby lobby and I love them so much! They really tie Luke's dresser and desk together.
 To see more pictures from Luke's big boy bedroom click here.
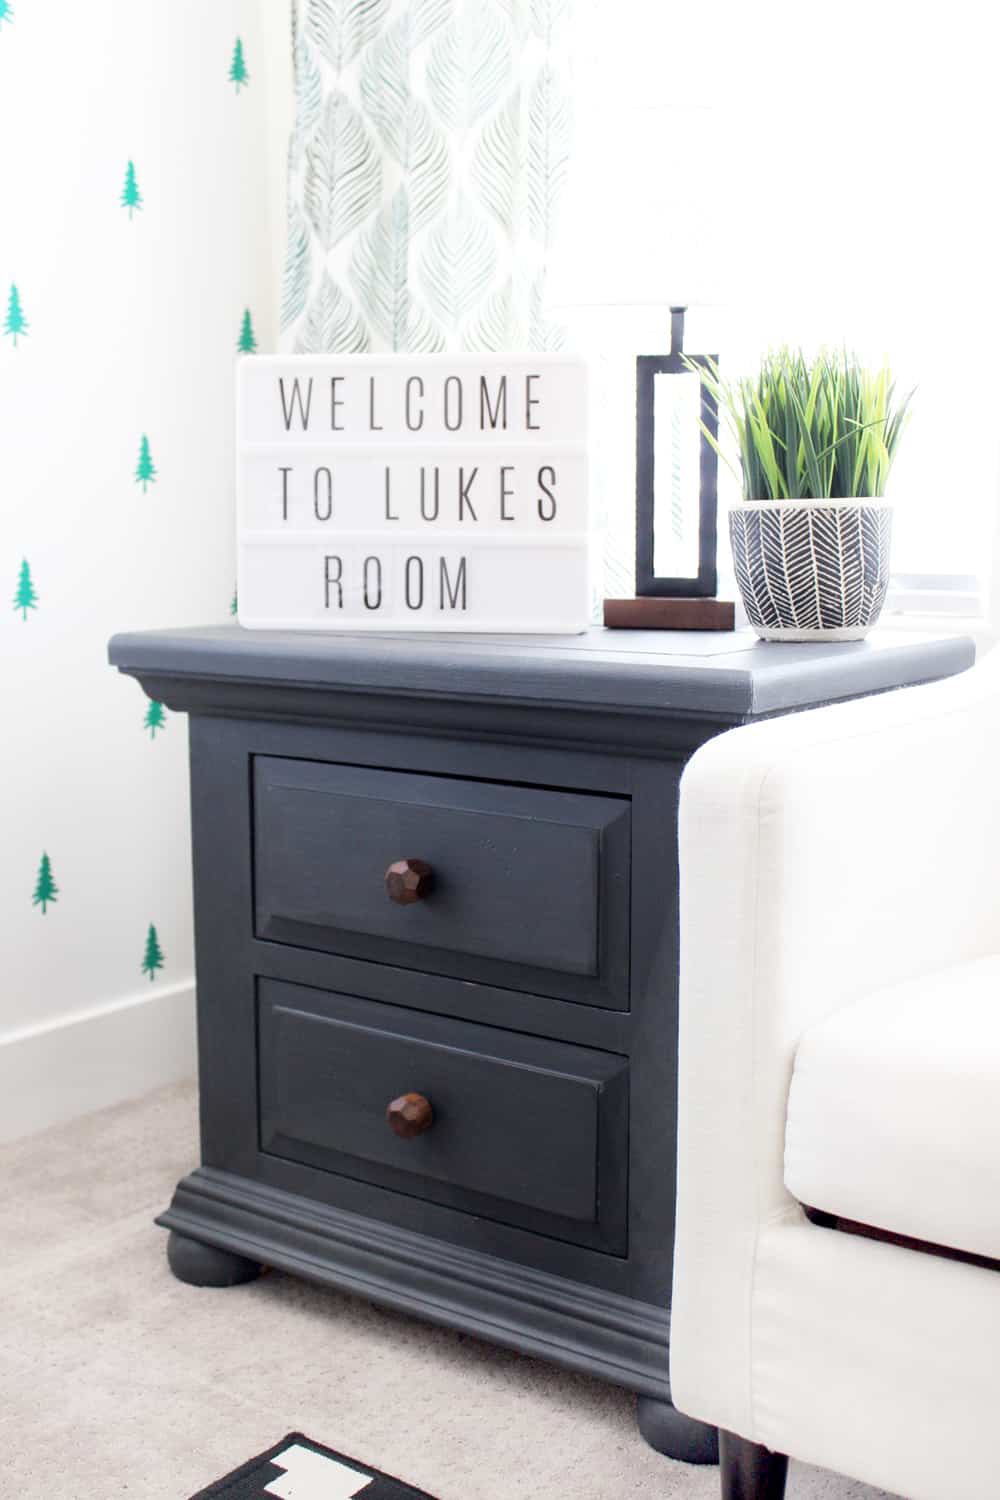 Well there you have it friends! Time to hit those thrift stores!
xo,

Other Posts about Luke's Room:
Shop this Post:
|
|
|
Ellie
Should I paint the lip of drawers? Would it be sticky when you close the drawer? Thank you for your comments.
Jessica
If you use the top coat it shouldn't be sticky! I painted the tops of mine but it is totally personal preference as no one can really see them.
Eileen
I love how the dresser turned out! What is the difference between using wax as opposed to the clear coat you used as the final step? Thanks
Jessica
Wax you rub on and clear coat is painted on! Either would work fine, I just prefer clear coat.
jean
I did my bedroom furniture using the same paint and top coat. It looks great, however, I seem to get alot of brush marks, especially when using the top coat. Any suggestions for my last piece of furniture that I am getting ready to paint?
Rebecca
I have the same bedroom set and absolutely love how you have painted it. I am bored with the honey oak which I’ve had for 20 years. This may be just the option I am looking for. I’m going to start out with an extra set of the nightstands. Choosing a color just seems so intimidating.
Jessica
You got this Rebecca!! I seriously still LOVE the new dresser! If you don't like the color you choose you can always re-paint, but I think you will love anything you choose, change is so fun.
Veronica
Thank you so much for this!! Very helpfuL!
Sarah
You're so welcome!
Damaris Valdez
I’m a little confused about the brush paint. Did you use those little brushes that you linked to amazon to paint the entire dresser or did you use regular brushes?
Thanks
Jessica
Ugh it looks like Amazon switched out my link! I'm so sorry, yes I used regular brushes, like these: https://amzn.to/3hoDCfW
Brenda Walker
I’m really new to this and my craft/artistic abilities are such that my my neighbor thought the it was so cute I framed a painting my kindergartener did. It was mine. And one time I bought a used dresser at a thrift store to transform it into something that would make people’s jaws drop. Which is necessary when they’re trying to put their foot in their mouth when they see my newly painted to look antique-like coffee table and said, “For your first chalk paint project maybe pick something simple, because it would take a lot of work to make this look good.” It’s all true, some of us are born artists while others are born to perfectly parallel park...that would be me. It’s what you and I have in common, our talents bring peace and happiness wherever we go. You’re welcome world.
As far as my second chance at chalk painting something awesome, I have one question. That was a lie, I have about a hundred questions, but since we are in the middle of a global epidemic, we’ve got time, so no need to ask them all at one. Let’s start with this one - is it necessary to buy the $56 round chalk paint brush or can you use a normal paint brush that doesn’t shed? I only wondered because when I asked a local boutique that was just allowed to reopen with limited hours about brushes she said, “This (holding the $56 round chalk paint brush like she was the Statue of Liberty holding the torch above her) is NOT just a paint brush. It the only brush made for chalk paint and if you think you’ll get the same quality look with an ordinary brush, then you might as well be finger painting.” I told her an ordinary paint brush would work great since I have three kids who feel it’s their mission to put fingerprints on every possible service and a newly painted dresser, that’s like Christmas came early for those little fingers of theirs.
So - paint brushes made for chalk paint or regular paint brushes, is there a difference and is that difference worth buying Lady Liberty’s torch?
-brenda
Jessica
Haha that is hilarious! I have never had the $56 brush so I can't attest to its merits myself, but my regular (nice quality) brush worked great!
molly
I have a dresser about this same size. How many cans of paint did it take?
Jessica
I bought the 30 oz. can linked in the post and it was more than enough!
Heather
Just curious how this dresser has held up now that it is a couple years later? I haven’t used chalk paint before so just curious how tough it is!
Thanks :)
Jessica
It's held up amazing! Basically no issues whatsoever!
Michelle
If you use 2coats will it make the color darker? I used charcoal but it came out lighter then I wanted.And do I apply one coat. Of sealer
Jessica
Yes another coat should darken it a little, but the sealer will actually make it appear a little darker as well! You can do as many coats as you like. If it's a table top or something that sees a lot of use I would do at least 2!
Nadia
Hello! Question. I am new to this and I’ve read about bleed through from wood (I want chalk white), do I need to apply a special coat of something prior to chalk paint spray? Thank you?
Jessica
Well with the Rustoleum chalk paint you brush it on not spray! You can definitely prime it if you want to but I have never needed to! I just typically do an extra coat until I get the color/consistency you want.