How to Make Custom Hats with Cricut

You won't believe how easy it is to make a custom hat with Cricut machine and the hat press!
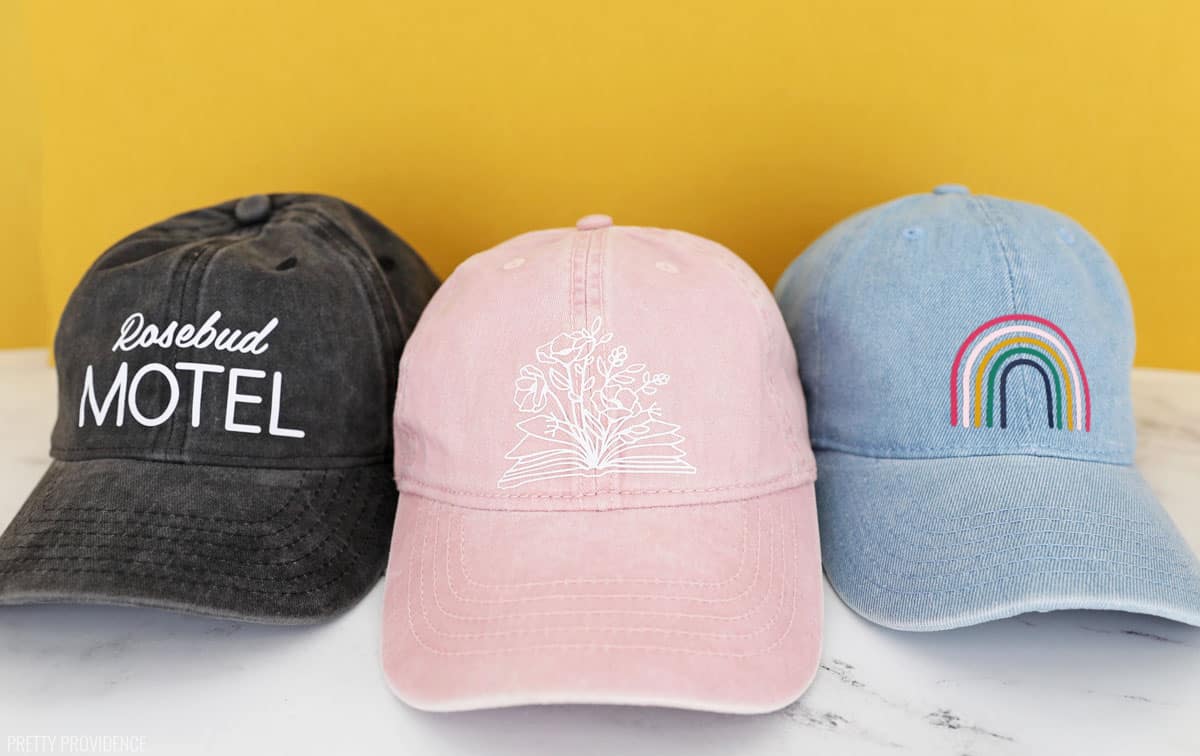
I have been beyond excited to make some custom hats since the Cricut hat press came out last year!
We make custom t-shirts with Cricut all the time, but we hadn't done many hats yet.
Now, I'm going crazy with ideas. This year during the holidays, I'm going to be Cricut Oprah: "You get a hat, and you get a hat, and you get a hat!"
Below I'm sharing a super simple tutorial on how to make custom hats with Cricut (great for beginners.)
Make sure to check out our other Cricut projects and tutorials on our Cricut page as well!
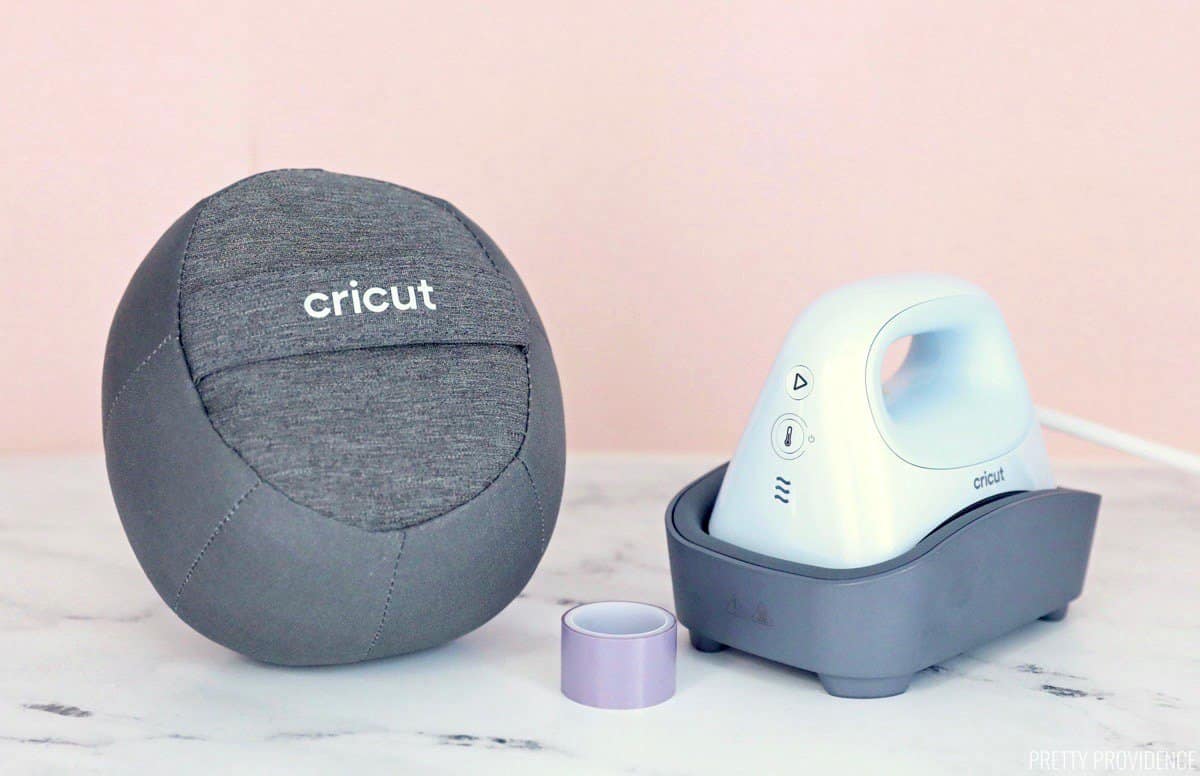
Cricut Hat Press
What is a hat press?
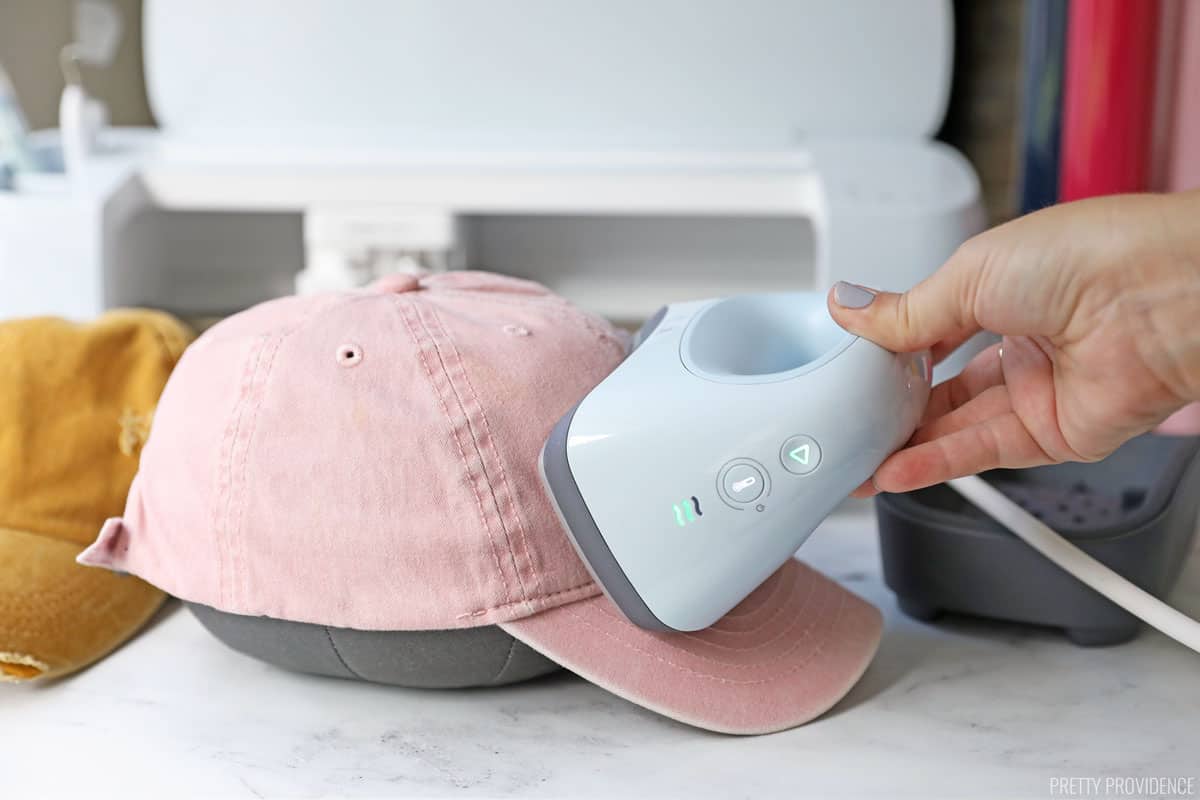
The hat press is a curved heat press, perfectly shaped for applying custom designs to hats with iron-on or infusible ink.
What comes with the Cricut Hat press?
The hat press comes in a box with purple strong heat-resistant tape and a hat form. The hat form keeps hats in place and in the right shape so that you can transfer designs to a hat without worrying about your design sliding around or wrinkling.
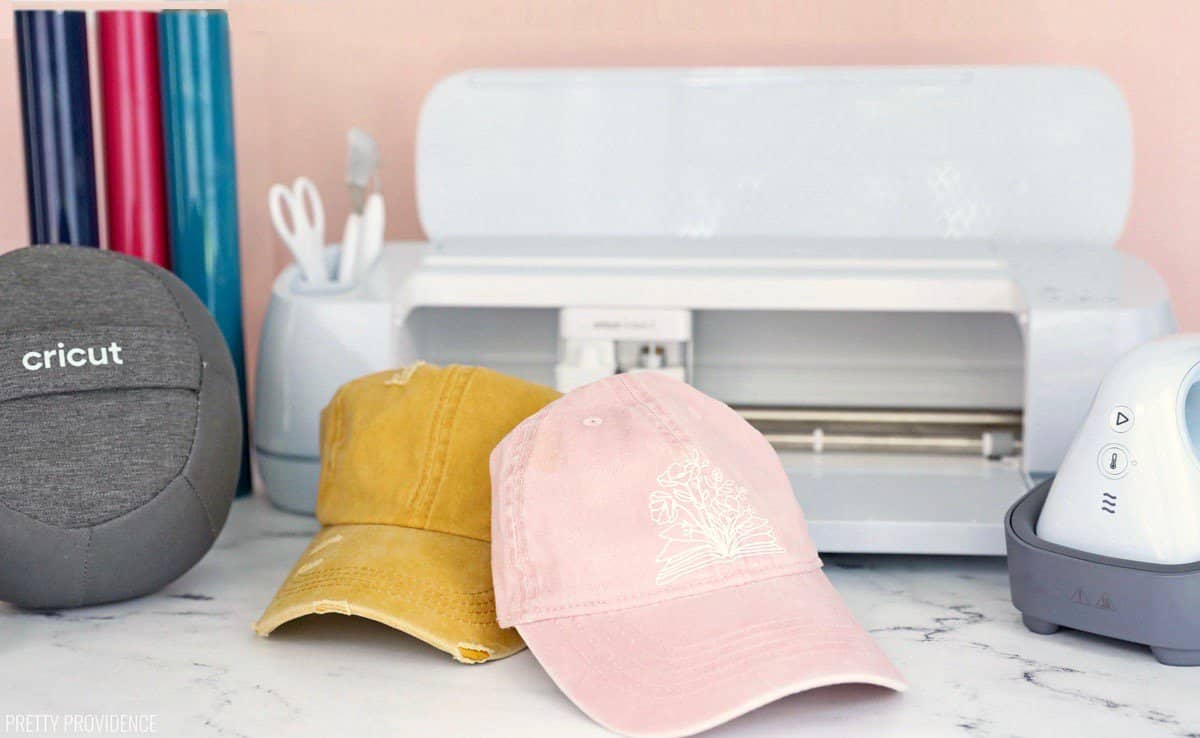
Cricut also has blank hats that work great for their projects: trucker hats and baseball caps.
How to Make Custom Hat with Cricut
 Materials Needed
 Materials Needed
Instructions:
Open Cricut Design Space on your computer, tablet, or phone. Create a design you like or choose from one of the many designs in Design Space.
Gather materials needed, and click the green 'Make it' button in Design Space.
Follow the prompts asking what size mat you have and what materials you are using, then turn 'mirror on.' (When cutting iron-on you always want to mirror the design.)
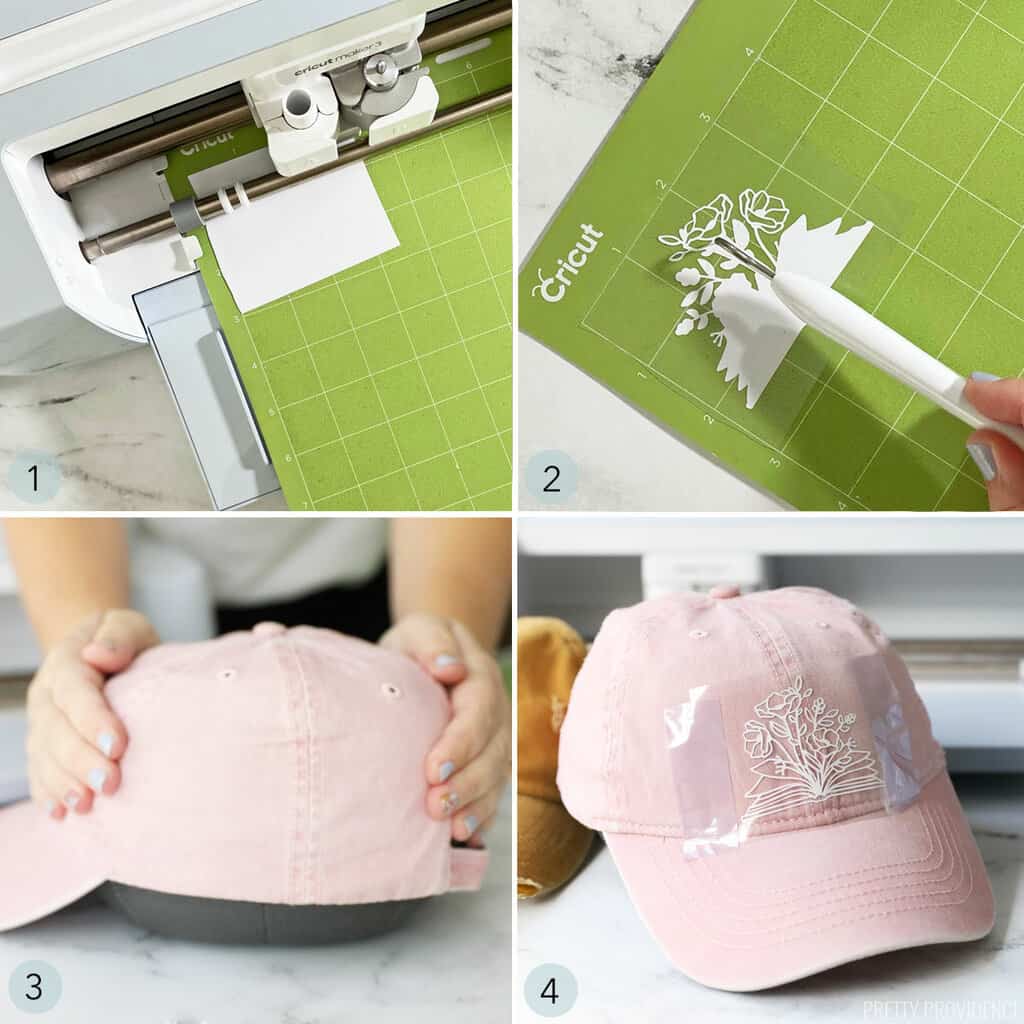
- Put iron-on onto a StandardGrip mat, shiny side down. Follow the prompts in design space to load the mat and cut the iron on.
- Weed iron-on design, removing anything around the edges or inside that you don't want to be transferred to the hat.
- Put the hat snugly on the form.
- Place an iron-on design onto the hat, then use purple heat-resistant tape to secure the design on your hat.
How to Use the Cricut Hat Press
First, download the Cricut Heat app to a smartphone or tablet. This app allows you to choose the right heat settings based on the material of your hat and the type of iron-on you're using.
Turn the hat press on and open the Cricut Heat app. Connect the heat press using Bluetooth and follow the steps to choose the iron-on material and the material of your hat.
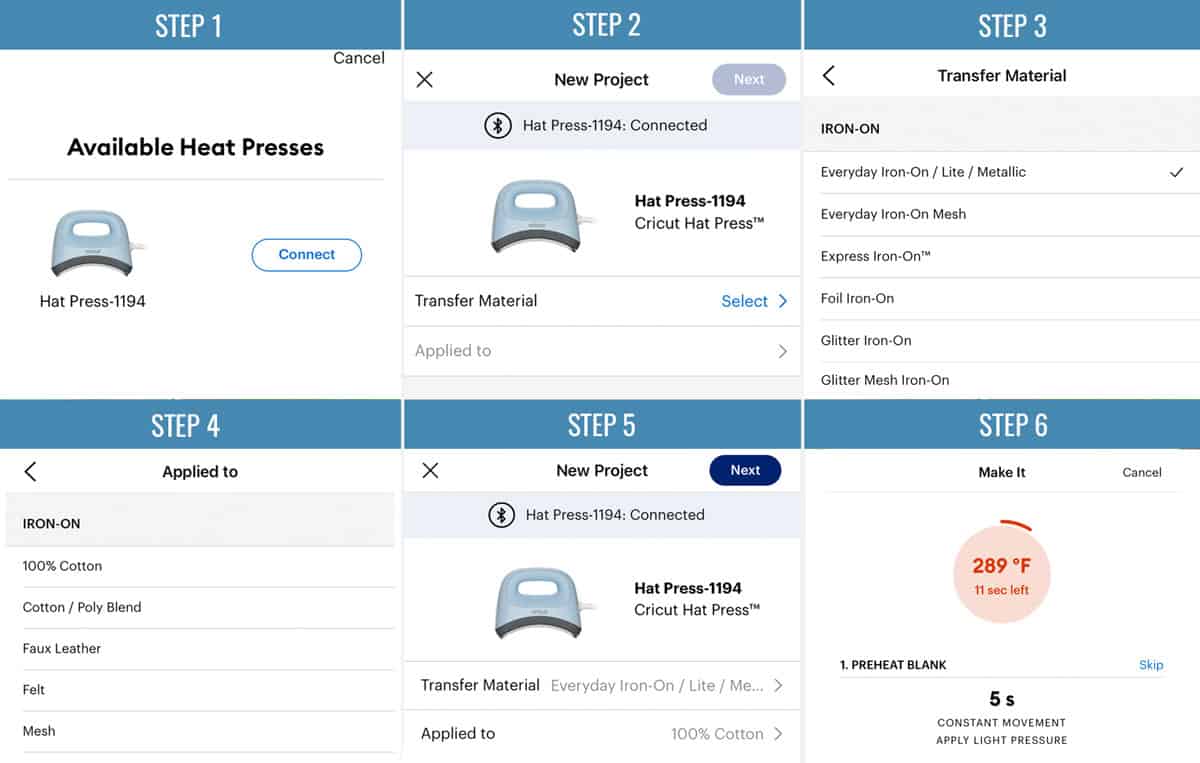
Press the hat press onto the hat for the amount of time indicated in the heat app.
To finish, peel the clear iron-on backing off of the hat when it is cool to the touch.
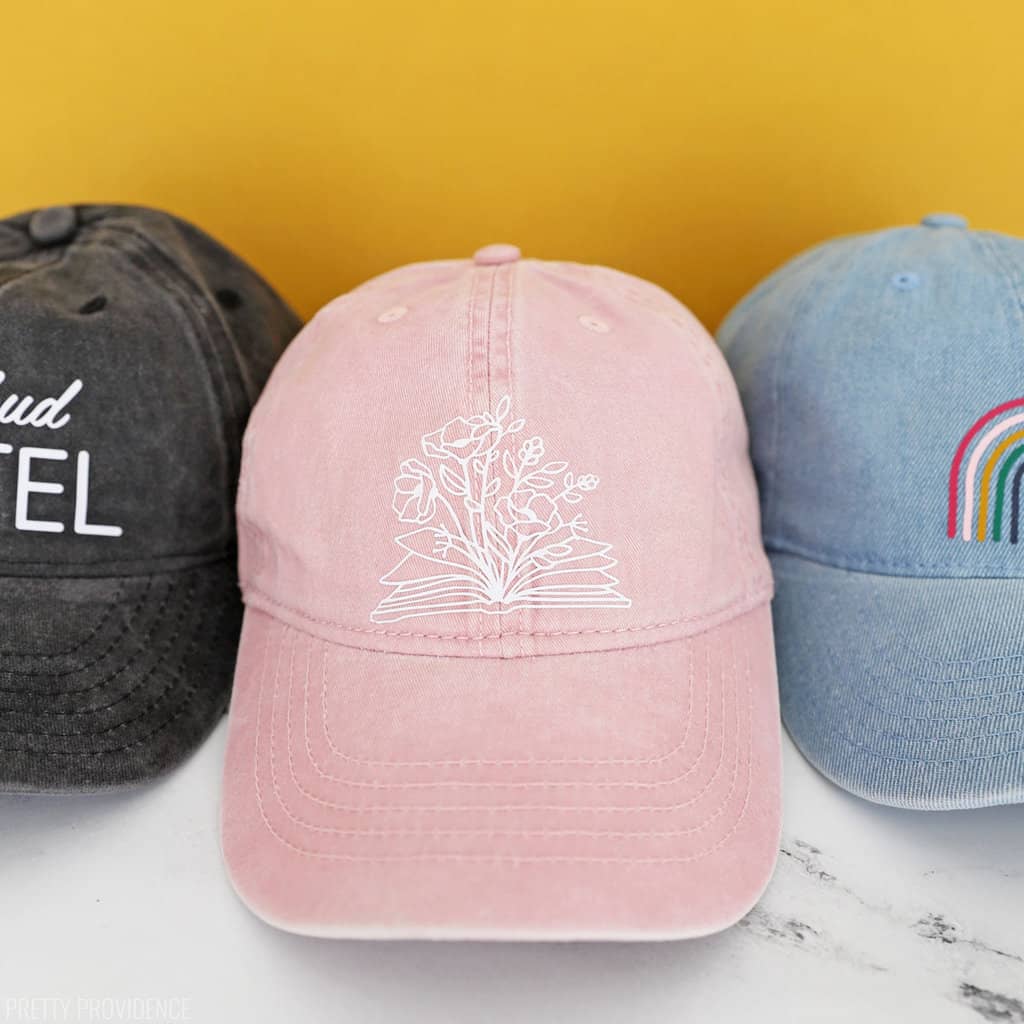
Ta da! Once you have a Cricut machine and all of the materials, this really is so easy and affordable to do. I love to make custom gifts for the holidays, so this hat press is going to change the game.
If you use this DIY Cricut hat heat press tutorial, please let us know that you like it with a comment and positive review! They mean a lot to us! :)

How to Make a Custom Hat with Cricut
Equipment
- Cricut Machine Maker 3, Maker, Explore Air, Explore Air 2, or Joy
- Hat Press optional, you can also use an Easypress Mini or a household iron
Materials
- Everyday Iron-On
- Plain Hat
Instructions
- Open Cricut Design Space on your computer, tablet, or phone. Create a design you like or choose from one of the many designs in Design Space.
- Gather materials needed, and click the green 'Make it' button in Design Space.
- Follow the prompts asking what size mat you have and what materials you are using, then turn 'mirror on.' (When cutting iron-on you always want to mirror the design.)
- Put iron-on onto a StandardGrip mat, shiny side down. Follow the prompts in design space to load the mat and cut the iron on.
- Weed iron-on design, removing anything around the edges or inside that you don't want to be transferred to the hat.
- Put the hat snugly on the form.
- Place an iron-on design onto the hat, then use purple heat-resistant tape to secure the design on your hat.
- How to Use the Cricut Hat Press
- First, download the Cricut Heat app to a smartphone or tablet. This app allows you to choose the right heat settings based on the material of your hat and the type of iron-on you're using.
- Turn the hat press on and open the Cricut Heat app. Connect the heat press using Bluetooth and follow the steps to choose the iron-on material and the material of your hat.
- Press the hat press onto the hat for the amount of time indicated in the heat app.
- To finish, peel the clear iron-on backing off of the hat when it is cool to the touch.
Notes


So fun! I love how many possibilities this has!
Me too!
I'm so excited for a new thing to make with my Cricut! Thanks for the step-by-step tutorial...easy and fun!
You're welcome!
Such A great idea! Makes me want to take out of all my craft stuff and get creative!
Yay! So glad to hear it!