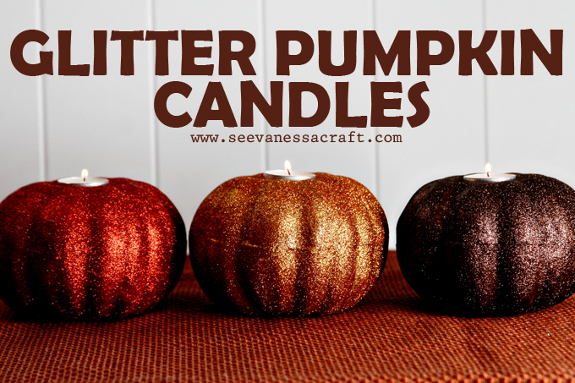
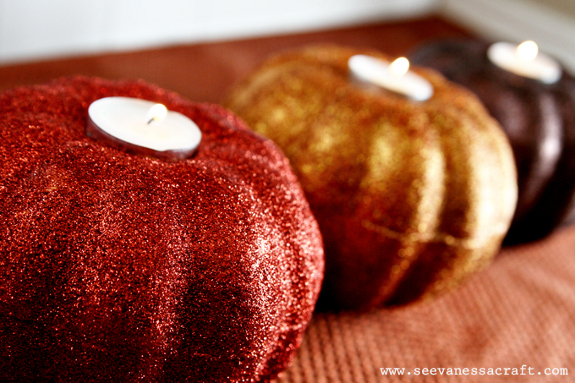
• Skip to primary navigation
  • Skip to main content
  • Skip to primary sidebar
  • Skip to footer

Pretty Providence

  • Home
    • Newest Blog Posts
  • About
  • Recipes
    • Appetizers
    • Beverages
    • Breakfast
    • Dessert
      • Cookies
    • Dinner
    • Salads
    • Side Dishes
  • DIY & Crafts
    • Cricut
    • T-Shirts
    • Crafts
    • Decor
    • DIY Projects
  • Holidays
    • Halloween
    • Thanksgiving
    • Christmas
    • New Years Eve
    • Valentine’s Day
    • St. Patrick’s Day
    • Easter
    • Mother’s Day
    • Father’s Day
    • 4th of July
  • TIPS
    • Tips
    • Organization
    • Family Life
      • Baby
      • Fun
      • Family
    • Travel
  • OCCASIONS
    • Gifts
    • Parties
  • Navigation Menu: Social Icons

    • Facebook
    • Instagram
    • Pinterest
    • YouTube

Glitter Pumpkin Candles

Home » Decor » Glitter Pumpkin Candles

Published November 7, 2012 Last Updated June 10, 2019 / By Pretty Providence 3 Comments

Tweet
Pin38
Share
Email
38 Shares

Hello Pretty Providence readers! I’m Vanessa from See Vanessa Craft, where I blog about my love for glitter and glue guns (among other things). A big thanks to Jessica & Sarah for having me on their beautiful blog. I’ll be showing you how to make inexpensive Thanksgiving centerpieces. If you are a craft hoarder like me, then you stocked up on faux pumpkins from the Dollar Store around Halloween time. Err, maybe I’m the only one? Luckily, pumpkins are still on the shelves for Thanksgiving time. Go pick some up, along with some glitter and Mod Podge and let’s get crafting!

Materials:
Fake Pumpkin (I found mine at the Dollar Store)
Carving Knife
Mod Podge
Glitter
Sponge Brush
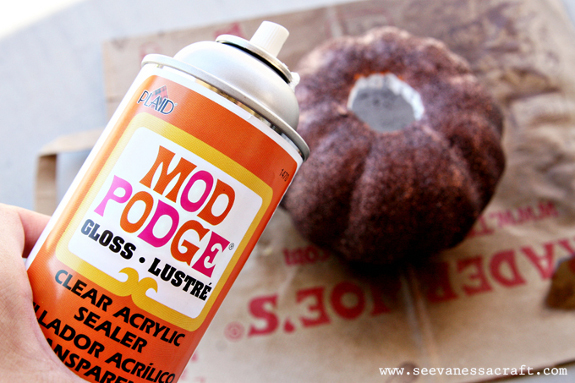
Mod Podge Clear Acrylic Sealer
Tea Light Candle

Directions:

Step 1 Cut a circle, slightly smaller than the tea light candle, around the stem of the pumpkin. Remove the stem.

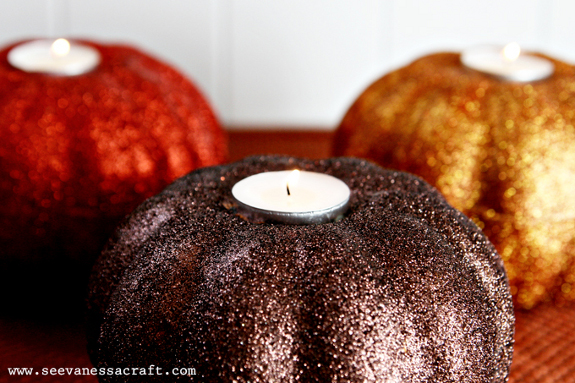
Step 2: Apply glitter, in patches, to the pumpkin using a foam brush and Mod Podge. Allow to dry.
Step 3: Spray a coat of Mod Podge Clear Sealer over the entire pumpkin. If you don’t have the sealer spray, you could brush another coat of regular Mod Podge over the glitter. This will prevent glitter from getting everywhere.

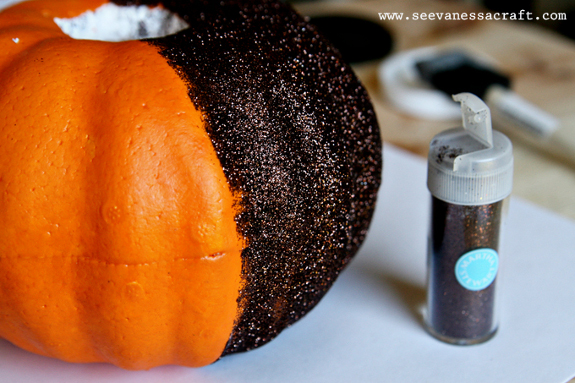
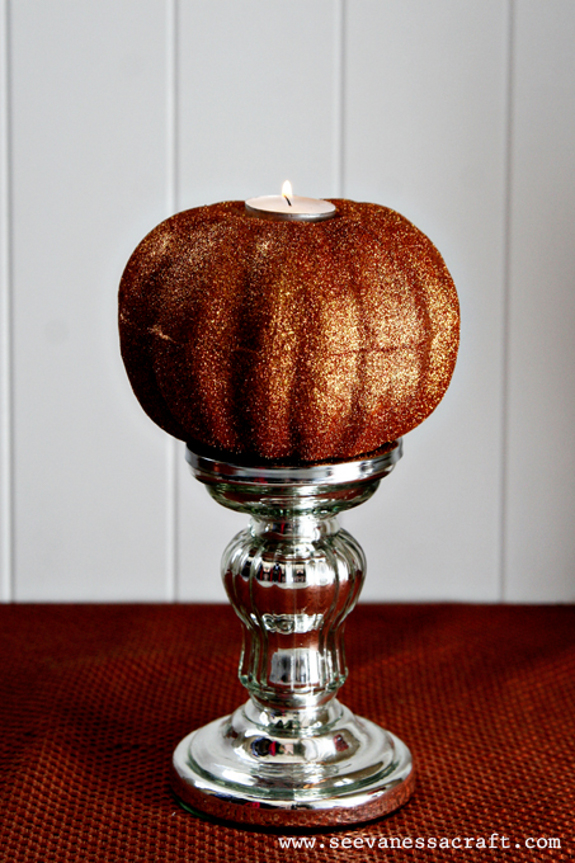
Step 4: Stick the tea light candles inside the pumpkins. Use as a centerpiece or place on top of a candle holder and display on your fireplace mantel.

I’d love for you to stop by See Vanessa Craft! You can also find me on facebook, twitter and pinterest.
Brought to you by:

See Vanessa Craft

Thanks so much Vanessa! These centerpieces are gorgeous, I would never guess how cost effective they were to make. You are the best, thanks for sharing!
Tweet
Pin38
Share
Email
38 Shares

Reader Interactions

Comments

  1. Vanessa @ See Vanessa Craft

    November 07, 2012 at 2:06 pm

    Thanks so much for having me on your blog ladies :)

    Reply
    • Sarah

      November 11, 2012 at 3:34 pm

      No, thank you!! It is an honor :) I definitely need to glitter up some of my fall decor. I have never tried that spray modpodge but I’m thinking I might need to invest in some of that this week!

      Reply
  2. Carrie from Talking In Space

    November 07, 2012 at 2:01 pm

    So cute! I want to run out and buy pumpkins right now. : )

    Reply

Leave a Reply Cancel reply

Your email address will not be published. Required fields are marked *

Recipe Rating


Primary Sidebar

about-pretty-providence  

Hey! We're Sarah and Jessica. We're BFF's and have known each other since we were 5 years old. This blog is our place to share all of our best recipes, tips, crafts and DIY projects.

You can read more about us on our about page and find us on instagram! We love making new friends.

  • Email
  • Facebook
  • Instagram
  • Pinterest
  • TikTok
  • YouTube

Most Popular

Breakfast casserole with sausage, eggs, cheese and bell peppers on a white plate

World’s Best Breakfast Casserole

DIY desk made from two storage cube bookshelves and IKEA desk top with marble look

DIY IKEA Desk Hack

Iron-on t-shirt with Cricut collage of supplies needed, iron-on cut and weeded, and then the final shirt that says "#tired" in gold iron-on letters

How to Make a Shirt with Cricut

The Office birthday party table with decorations, food, balloons and "it is your birthday" sign

The Office Birthday Party

Teepee style blanket fort made with bedsheets and clothesline hung from a light fixture.

How To Build The Best Blanket Fort

German Pancakes just out of the oven, dusted with powdered sugar in a glass baking dish.

German Pancakes

Organization

a habit tracker with pink squares next to a rose gold pen

Free Printable Habit Tracker

collage image of four different laundry hacks to make laundry easier

The Best Laundry Hacks

art supplies organized and labeled on a white IKEA kallax shelf

School and Art Supply Organization

Weekly cleaning checklist and routine, and checklist for kids too with pictures and check boxes!

Weekly Cleaning Routine + Checklist

Laundry Care Symbols Explained

pantry organization at it's finest! great tips and tricks in this post!

Home Organization Ideas

CRICUT

Light blue Cricut Maker 3 with an assortment of colors of vinyl and iron-on vinyl fanned out under it and behind it.

The Best Iron On and Vinyl to Use with a Cricut

custom hats with cricut iron-on, baseball cap style

How to Make Custom Hats with Cricut

light blue Cricut maker 3 next to vinyl and art on shelves

Cricut Materials – Everything You Need to Know

cute first/last day of school whiteboard on a light blue background

Back to School Photoshoot Board

DIY tote bag canvas with a rainbow and the words 'I'll walk with you' in gold iron-on vinyl

Rainbow DIY Tote Bag

DIY Custom Napkins

Footer

Copyright © 2012-2019 Pretty Providence | Contact Us | Privacy Policy | Disclosures