Back to School Photoshoot Board
Cute DIY back to school photoshoot board! Perfect to re-use each year on the first and last days of school.
You know how much we love our Cricut machines, and I'm excited to share a fun and easy project with you today. Enter, the first day of school whiteboard project!
If you love your Cricut as much as we do then you should also check out the personalized back-to-school supplies we made, as well as our fun teacher gift ideas! Or, you can find our entire Cricut project gallery here.
Back to School Photoshoot Board
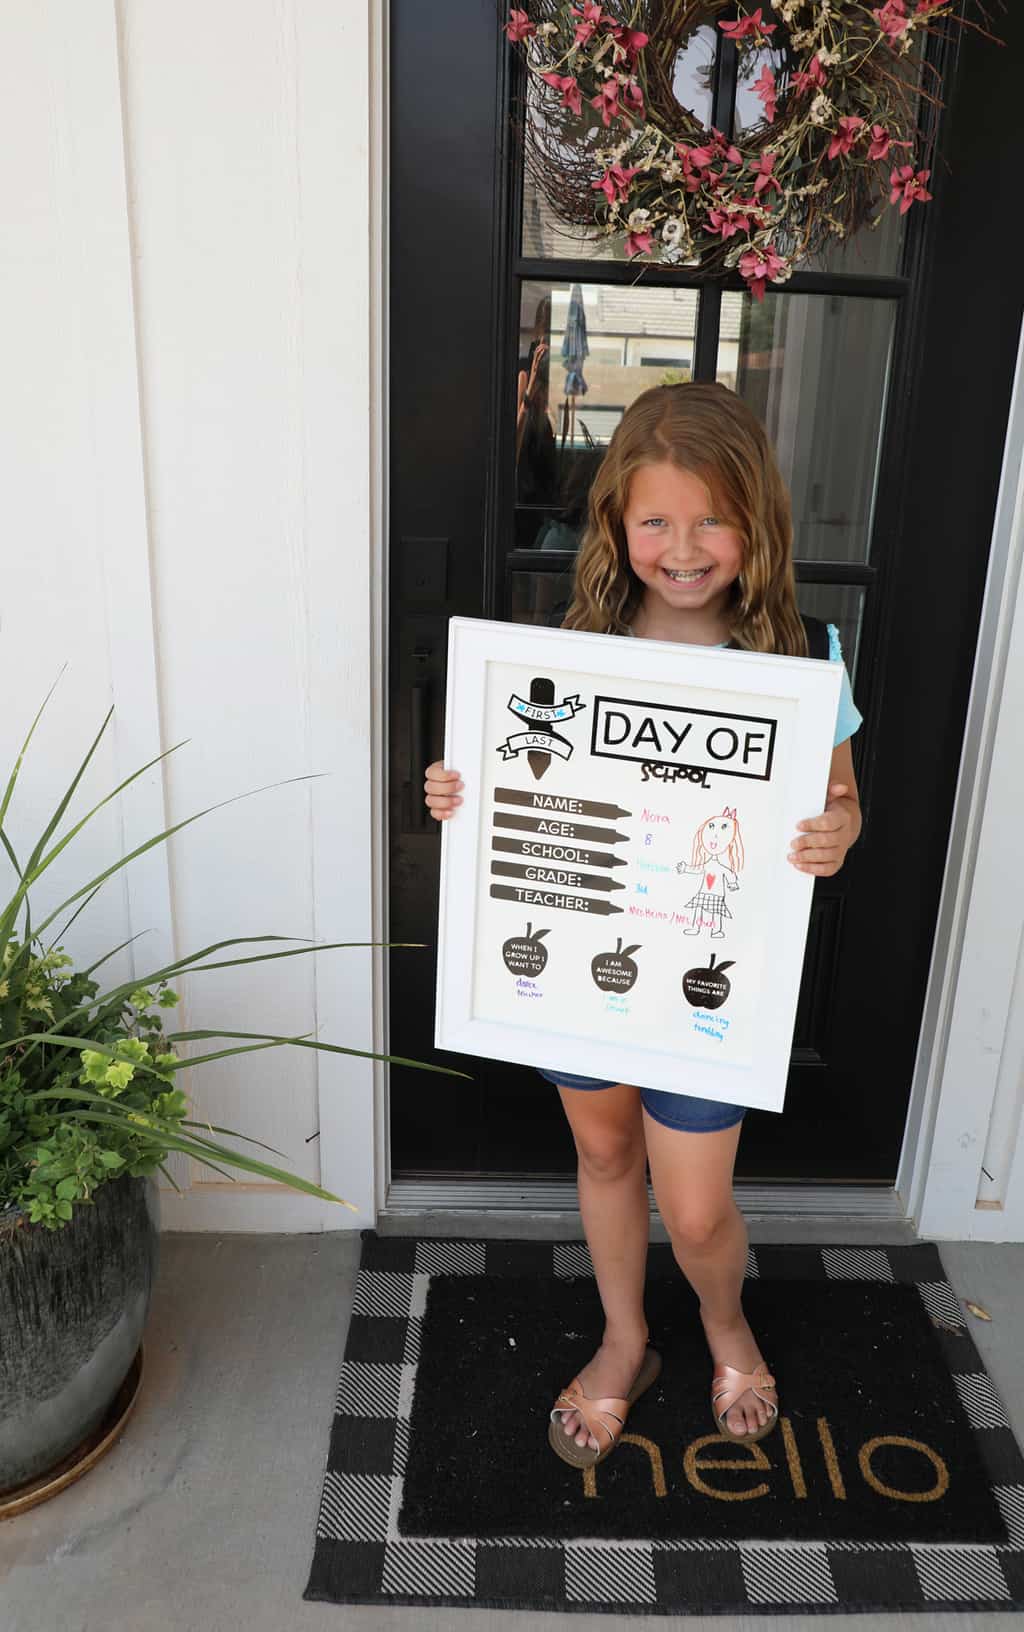
Around back to school, I'm sure you've seen a bunch of cute kiddos holding up various "first day of school" signs in front porch pictures. I know I have! I've always wanted to customize my own, just how I wanted it and this year I finally made it happen.
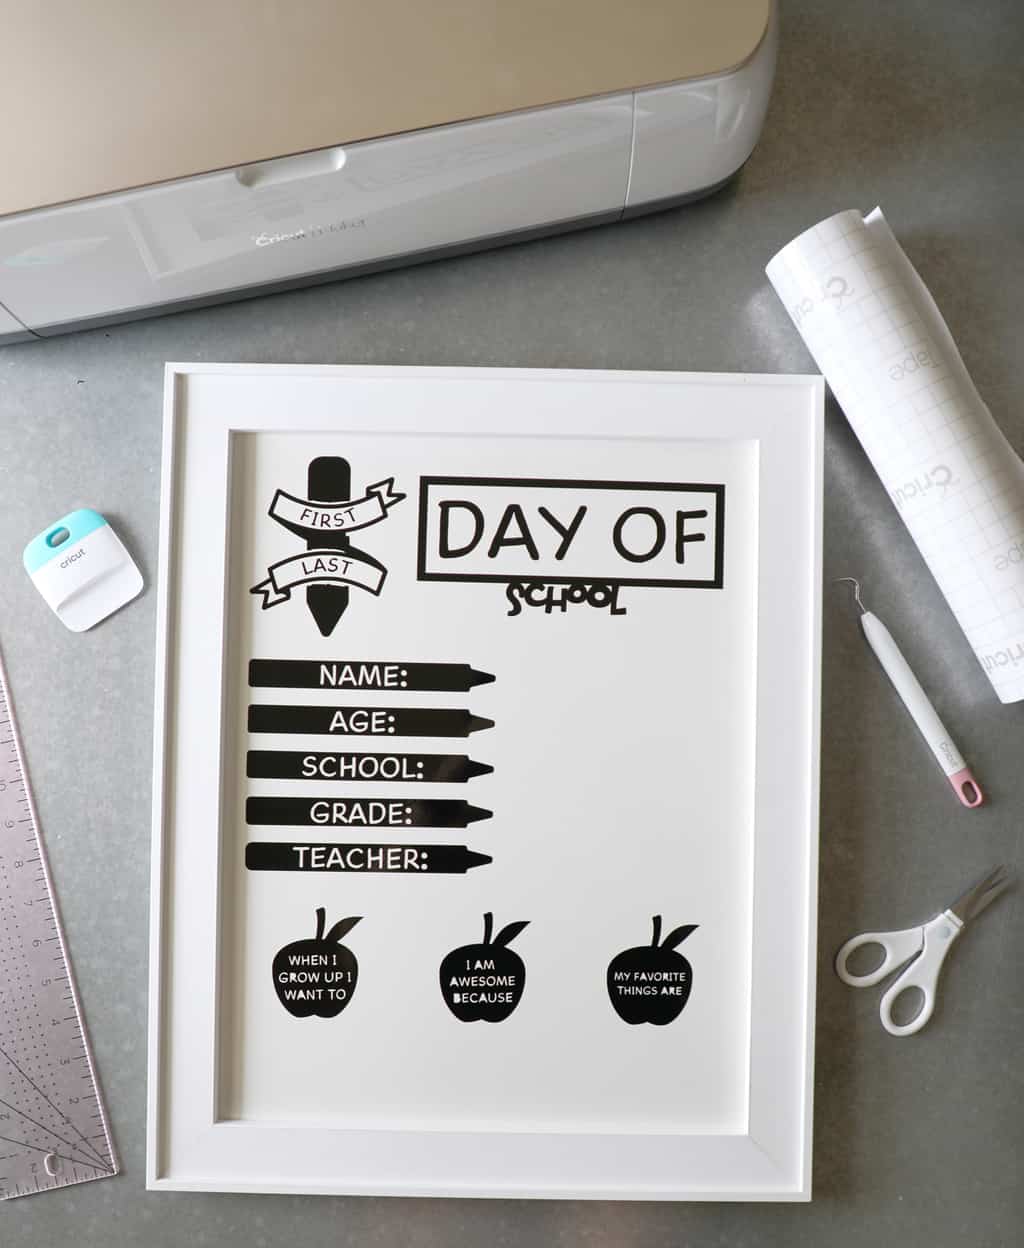
The best part is, it was so easy! You need a Cricut Machine (I used my Maker), a whiteboard, some vinyl, transfer tape, scissors, and a weeding tool, and you are good to go. Are you ready for the easy tutorial?
How to Make a Back-to-School Whiteboard
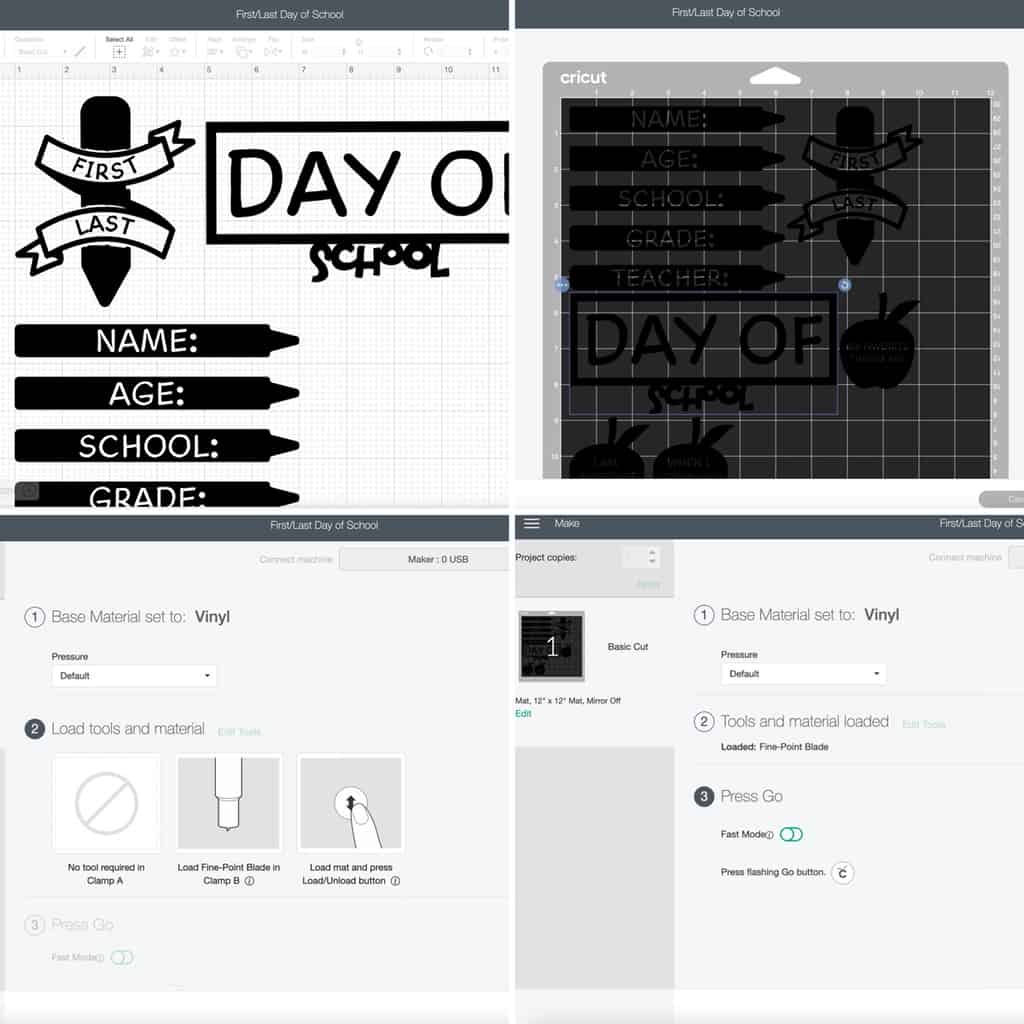
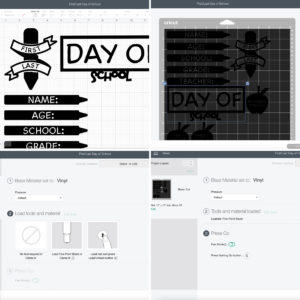
Top Left - Open up my design in design space (or feel free to design your own). Here is the link. You can customize your sizing to fit whatever size board you bought. I found my cute framed board at Michaels.
Top Right - When you are ready click "make it." This will show you what your project will look like on the mat. Make sure the correct mat size is selected on the left-hand side and click continue.
Bottom Left - Set your base material to vinyl, apply your vinyl to your mat (I used permanent shiny black), and load your materials onto your machine.
Bottom Right - Turn on fast mode if your machine has that capability and press go!
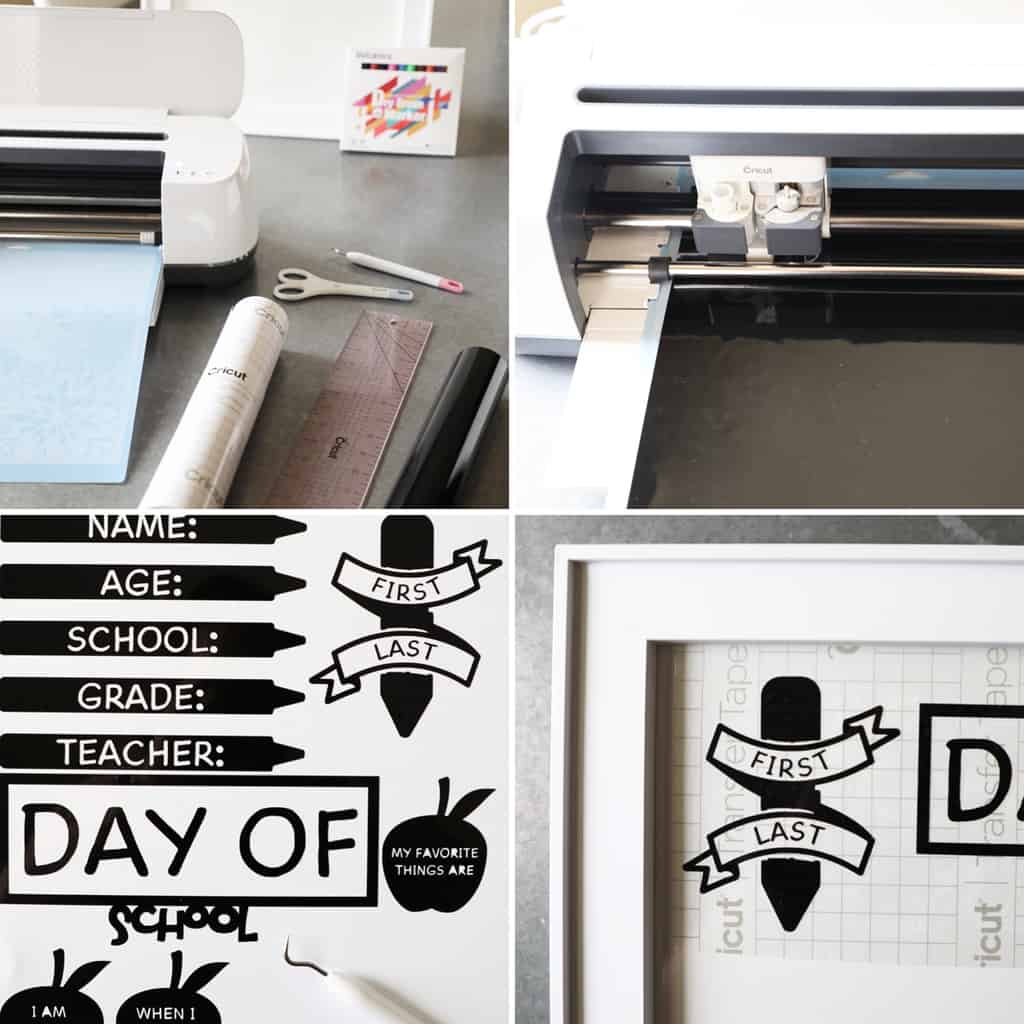
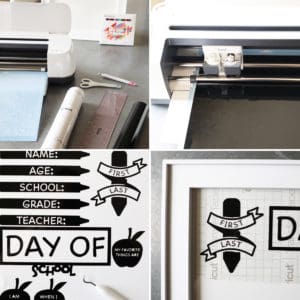
Top Left - Gather all the needed supplies.
Top Right - Allow your machine to cut the design.
Bottom Left - Carefully weed out all excess vinyl.
Bottom Right - Apply weeded designs to transfer tape. Plan out where you want each piece to lay, and adhere them to the surface of your whiteboard. Remove transfer tape.
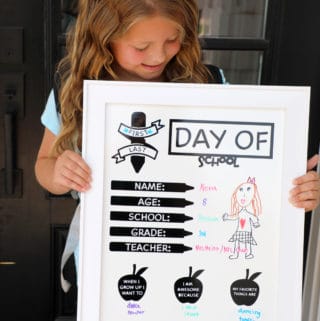
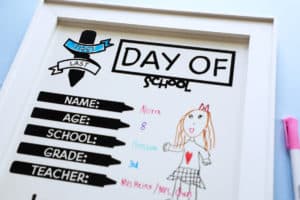
Didn't that turn out so fun?! I purposely chose a whiteboard instead of a chalkboard, because I have four kids and this is so much easier to quickly wipe off and re-write in between photos. Plus, I think the white on white is so cute.
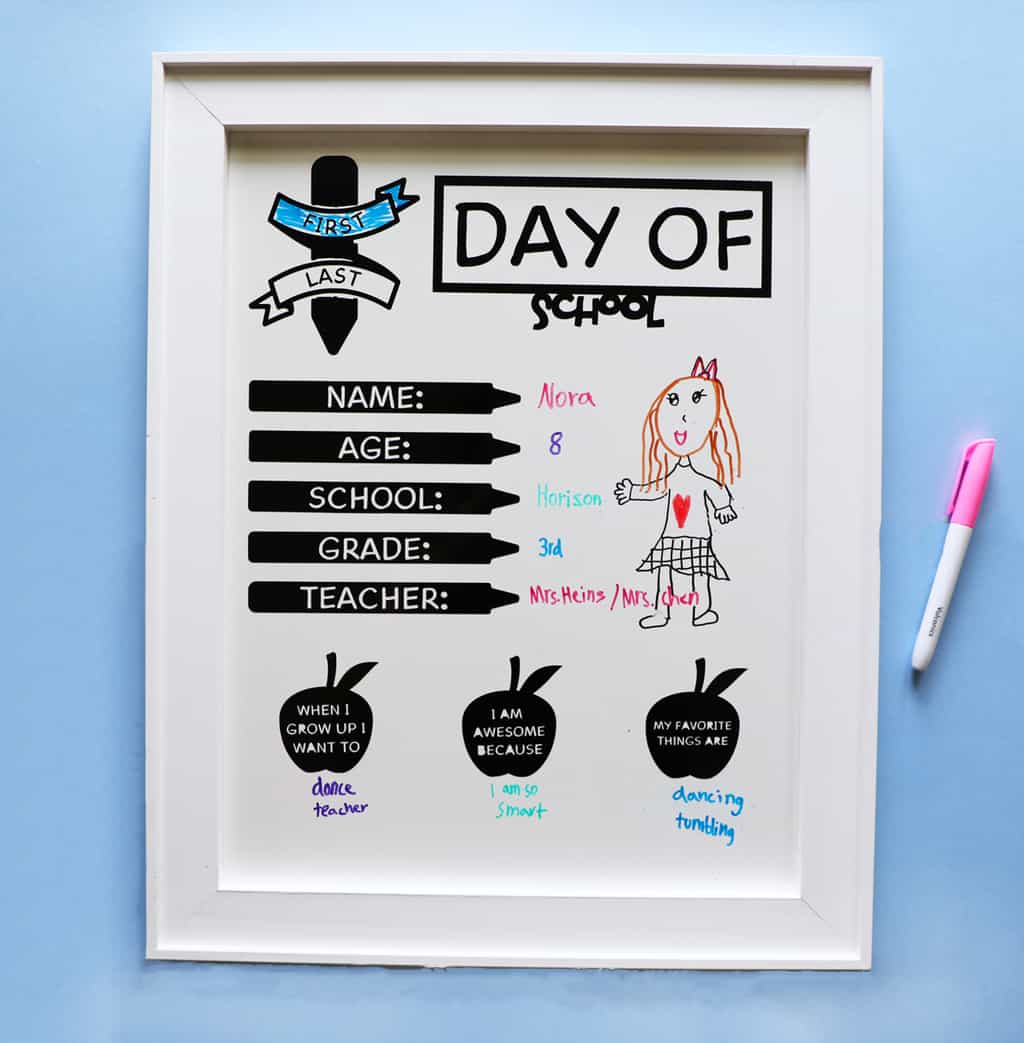
I wanted it to work for either the first or the last day of school, so I made a graphic so that you could star or circle whether it was the first or last day, which worked great.
Have Your Kids Decorate Your Board
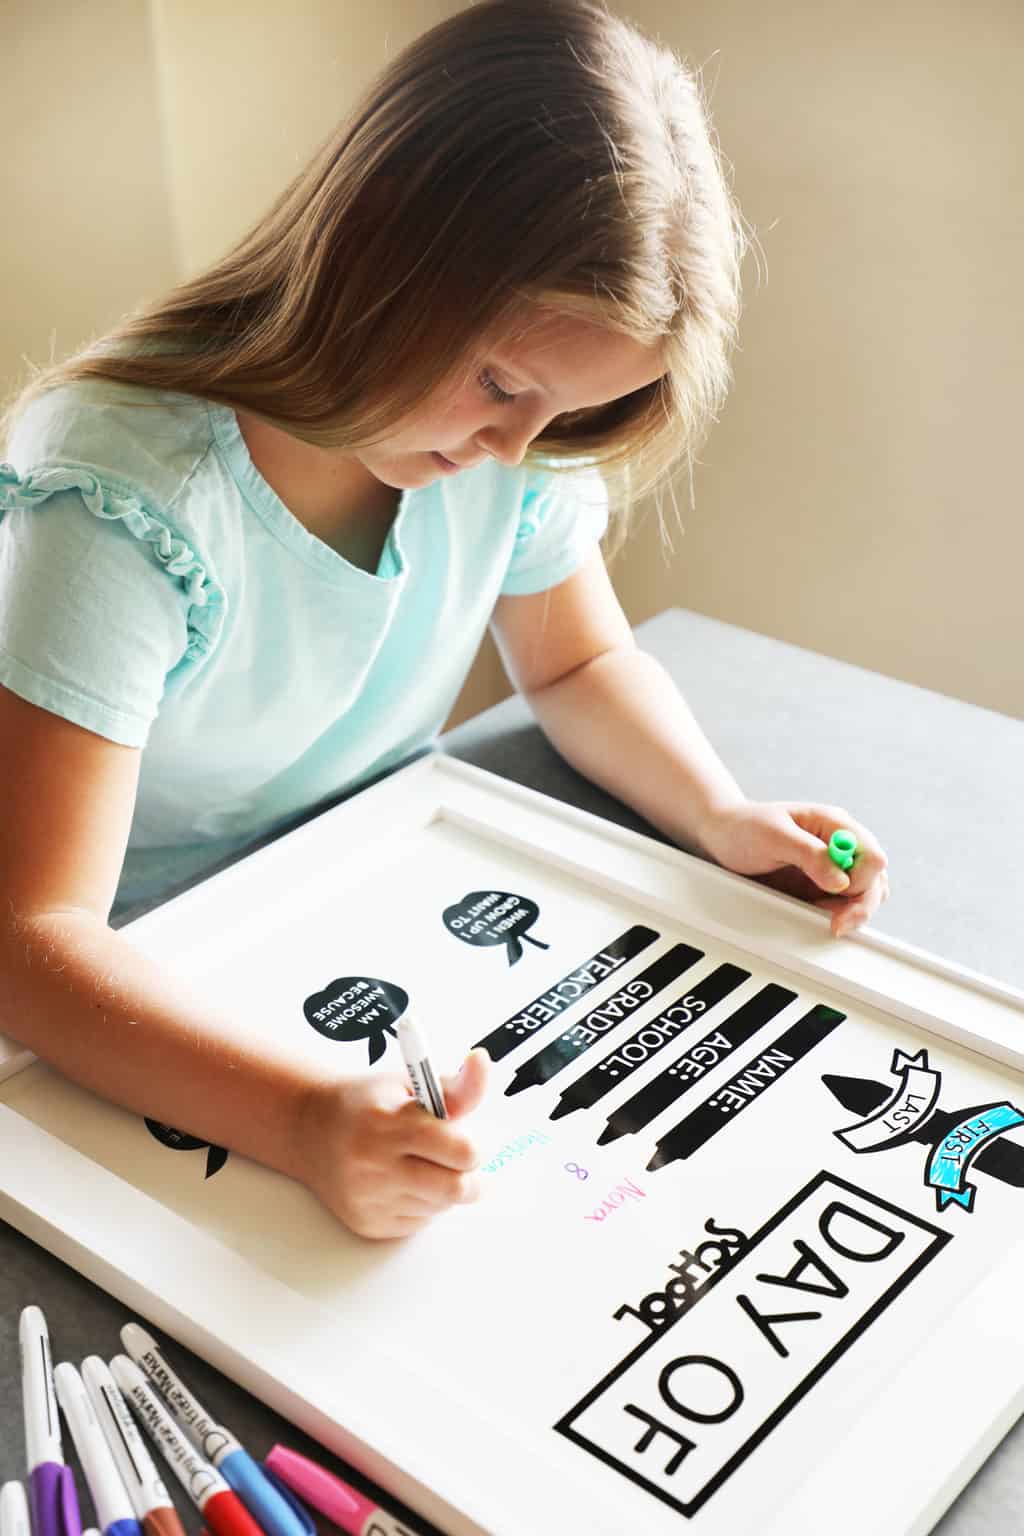
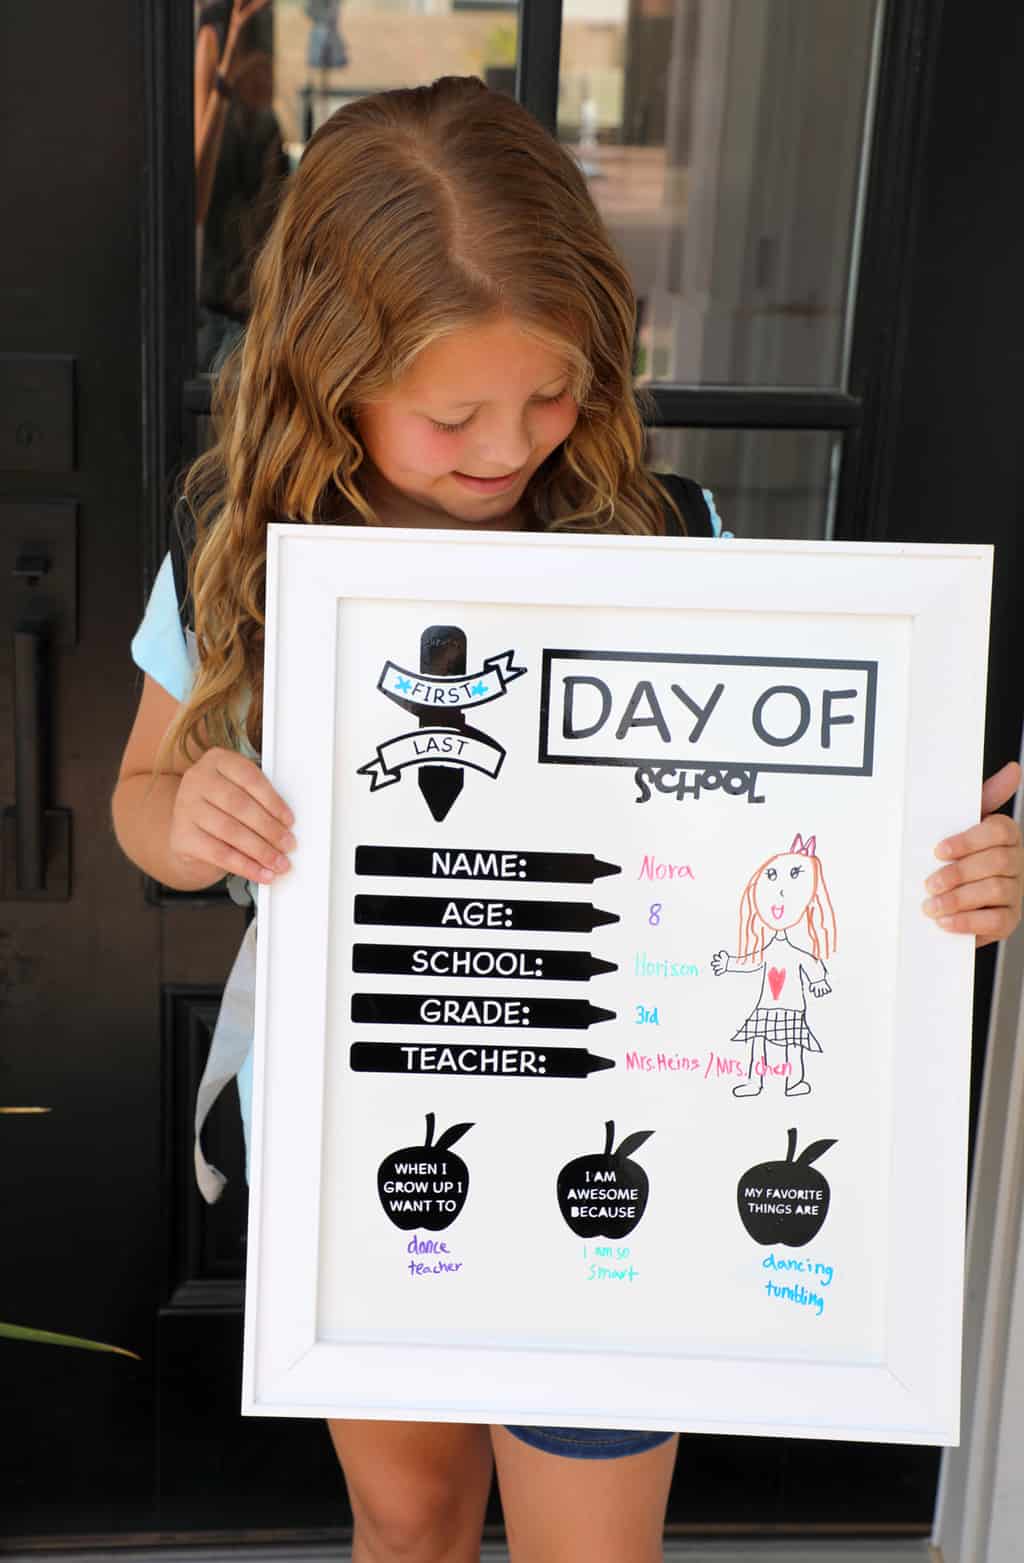
I love that I will have pictures encapsulating my kids' handwriting at the beginning and end of each year, along with all the information gathered on the board.
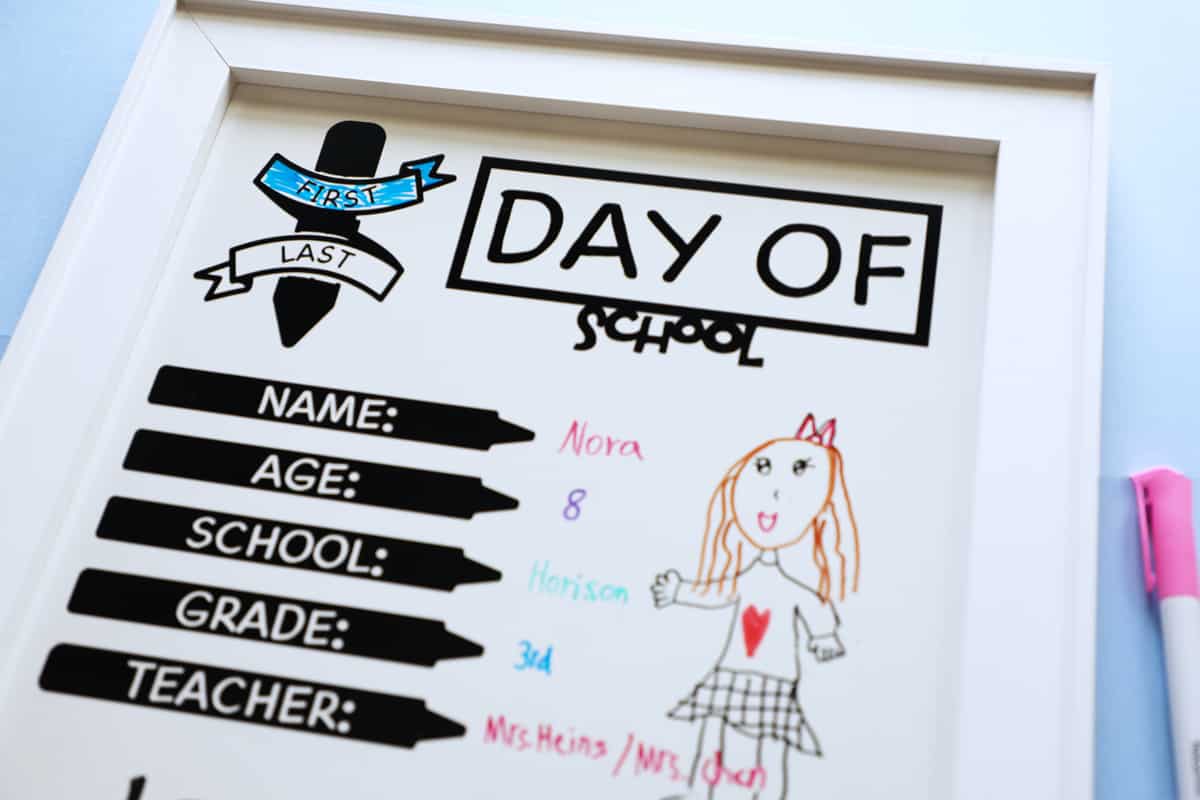
I also had them draw a little self-portrait next to their writing and they turned out so darling!
If you use this tutorial and appreciate it we would love for you to leave us a positive comment or review! They mean so much to us.
Cute DIY back to school photoshoot board!
Equipment
- Cricut Machine
Materials
- Permanant Vinyl Any Color
- Weeding Tool
- Scissors
- Transfer Tape
- Whiteboard
- Dry Erase Markers
Instructions
- Open up my design in design space (or feel free to design your own). Here is the link. You can customize your sizing to fit whatever size board you bought. I found my cute framed board at Michaels. When you are ready click "make it." This will show you what your project will look like on the mat. Make sure the correct mat size is selected on the left hand side and click continue. Set your base material to vinyl, apply your vinyl to your mat (I used permanent shiny black), and load your materials onto your machine. Turn on fast mode if your machine has that capability and press go!

- Gather all the needed supplies. Allow your machine to cut the design. Carefully weed out all excess vinyl. Apply weeded designs to transfer tape. Plan out where you want each piece to lay, and adhere them to the surface of your whiteboard. Remove transfer tape.
- Have your little ones fill out their information and get their smiles on for a fun photoshoot!

Happy back-to-school season, friends!
xo,

This post was originally posted on Cricut's blog as a guest post.


