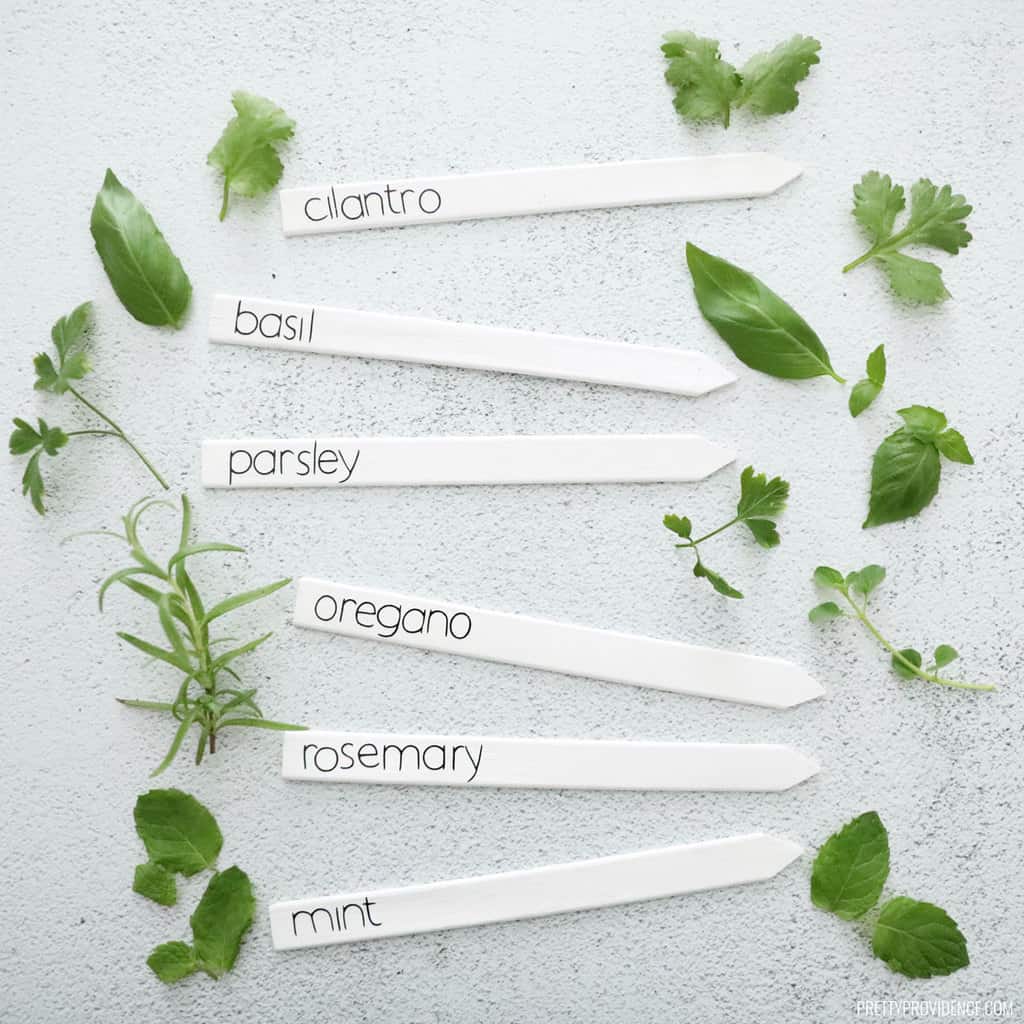
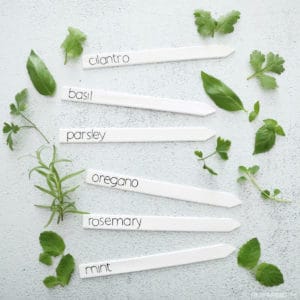
DIY Plant Markers
Keep track of what you planted where with these simple DIY plant markers!
*This post contains affiliate links.
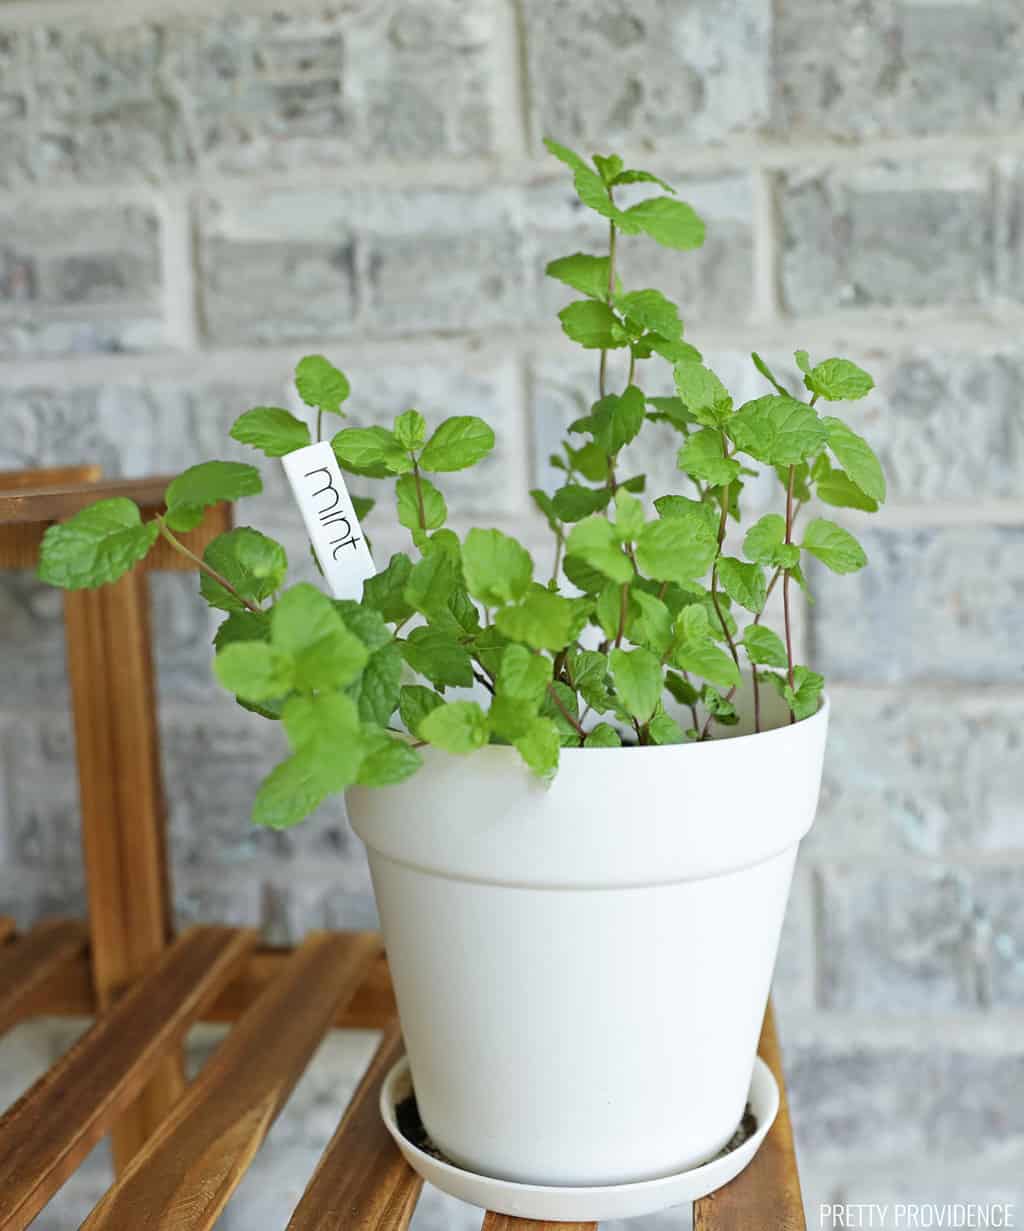
I have really gotten into plants lately and am loving my Vertical Herb Garden! I'm thinking of planting this fall so that I can have some fresh blooms in the springtime. Ranunculus and white Anenomes are in the cards. I will need some markers if I use seeds or bulbs though so I can know which plants are which and keep them on the right watering schedule! That's where these DIY plant markers come in!
How to Make DIY Plant Markers
I just love how these turned out and they were super easy to make with my Cricut and outdoor vinyl.
Materials Needed:
- Cricut Maker
- Standard Grip Mat
- Outdoor Glossy Vinyl
- Basic Tool Set
- Transfer Tape
- Bamboo Plant Markers
- White Paint (optional)
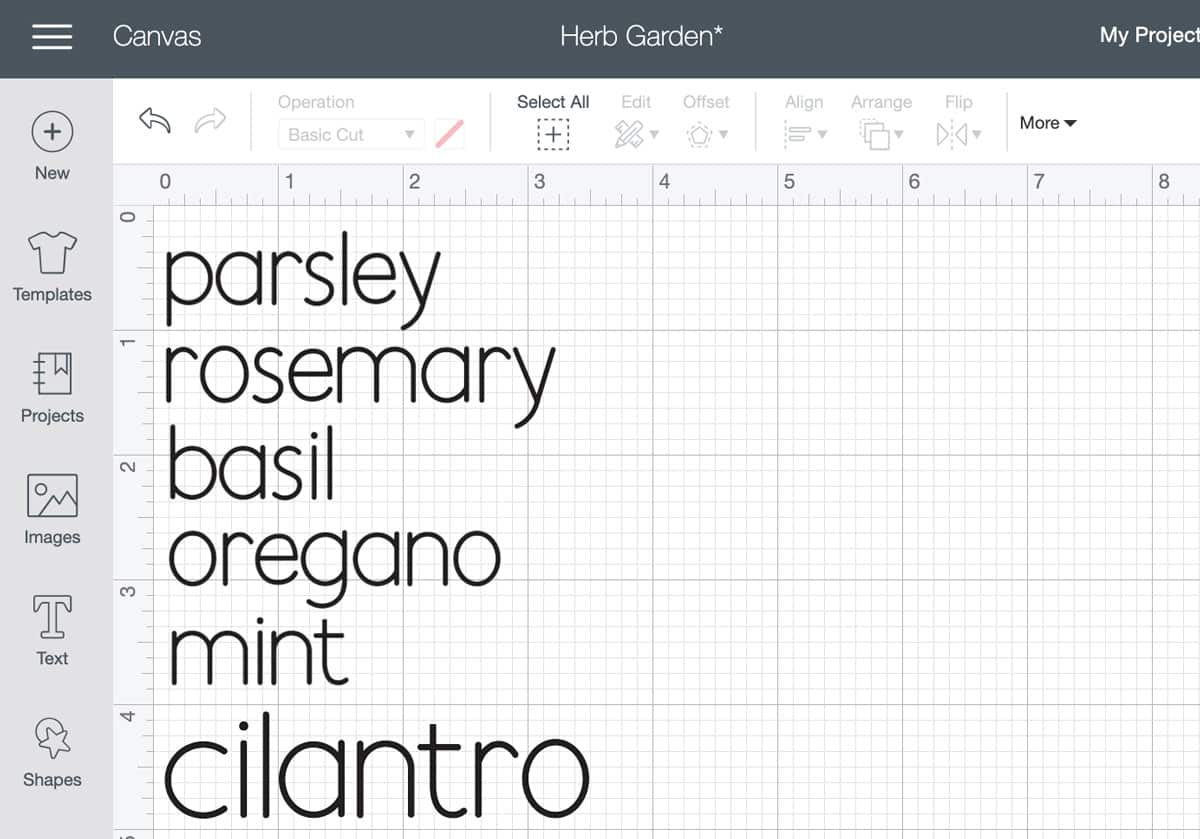
Pick a font in Design Space and create labels for the herbs or plants you need markers for. Size them to fit on your garden markers.
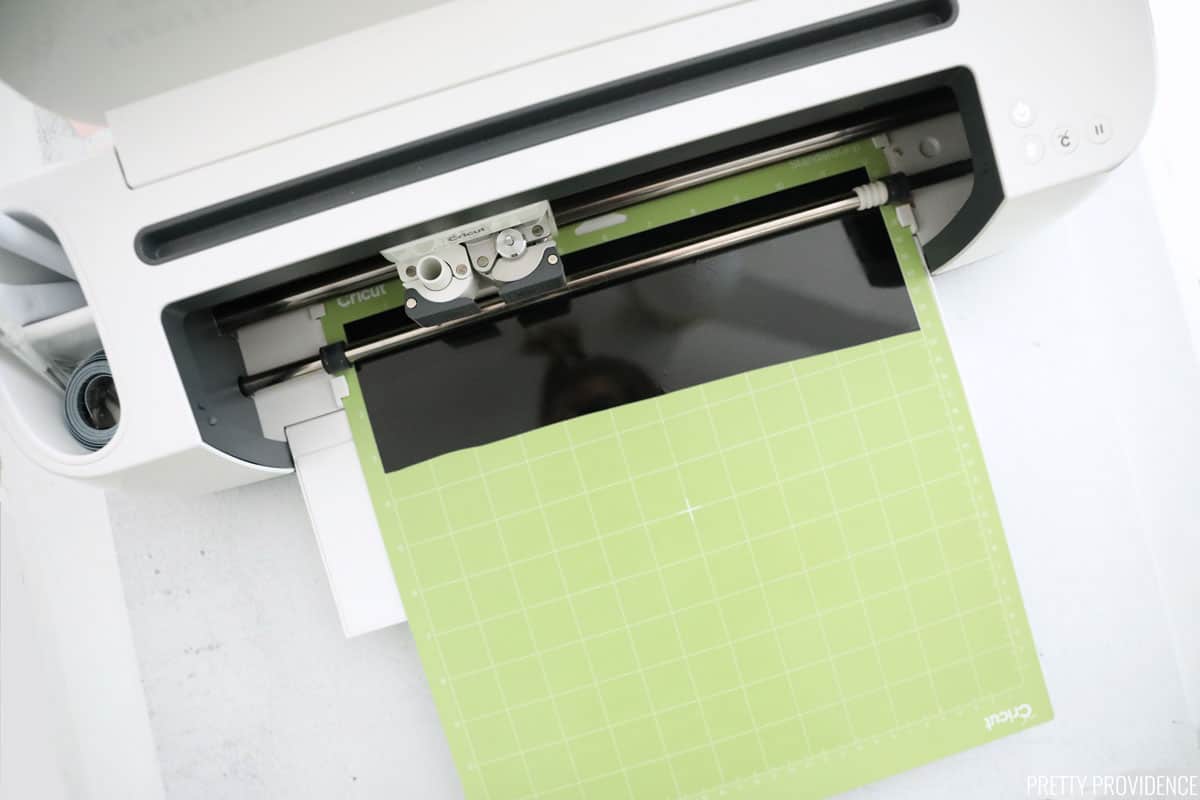
Cut a piece of vinyl and put on on a green StandardGrip mat. Follow instructions in Cricut Design Space to cut vinyl.
Weed extra vinyl and cut each word out so they are separate pieces.
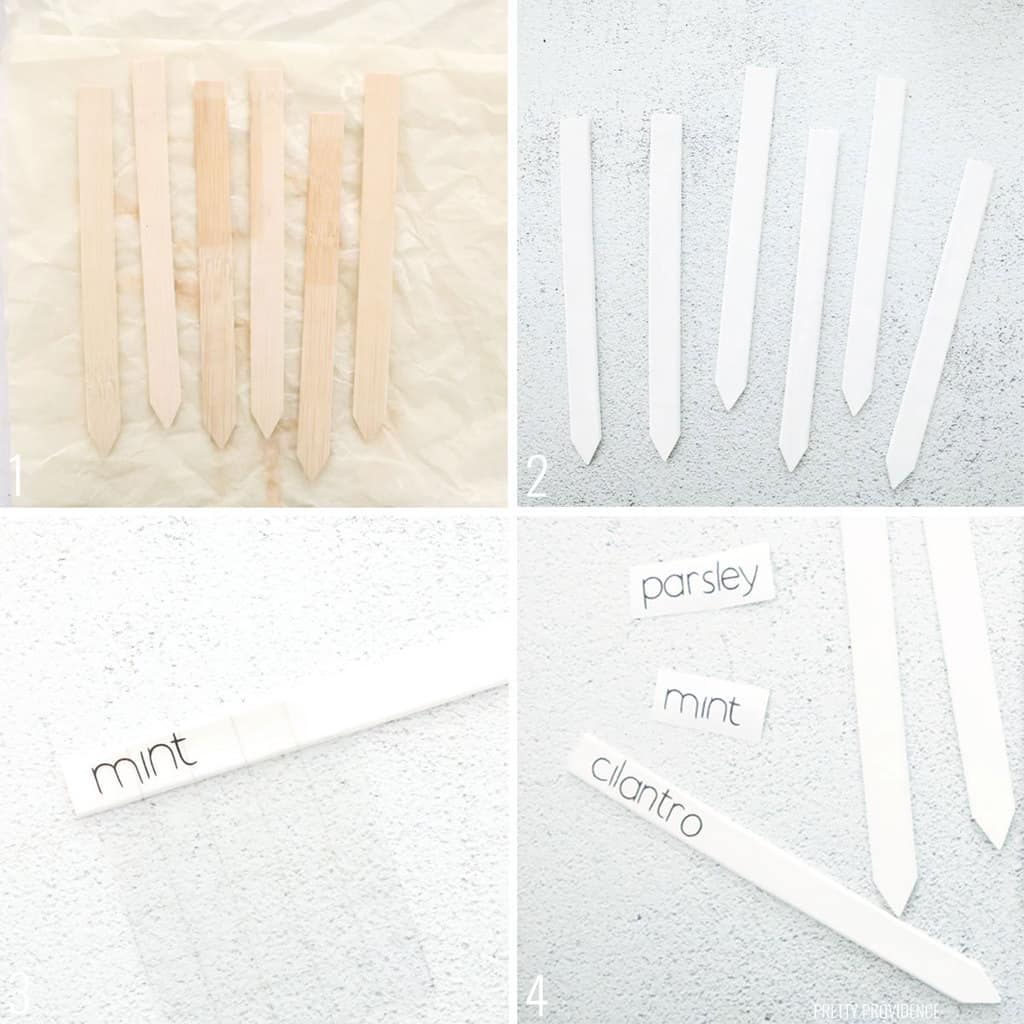
- Put garden markers on a disposable tablecloth or paper.
- Paint wood markers on both sides with an outdoor paint or acrylic paint. You may want to do multiple layers. Let paint dry completely.
- Use transfer tape to apply vinyl to a garden marker. (Read this detailed tutorial for using transfer tape.)
- Repeat until all markers are labeled.
Here are printable instructions for the plant markers. If you make this project, please leave us a comment and a positive review!
Easy DIY Plant Labels
Materials
- Outdoor Glossy Vinyl
- Transfer Tape
- Garden Markers
- White paint optional
- Garden markers
Instructions
- Pick a font in Design Space and create labels for the herbs or plants you need markers for. Size them to fit on your garden markers.
- Cut a piece of vinyl and put on on a green StandardGrip mat. Follow instructions in Cricut Design Space to cut vinyl.
- Weed extra vinyl and cut each word out so they are separate pieces.
- Put garden markers on a disposable tablecloth or paper.
- Paint wood markers on both sides with an outdoor paint or acrylic paint. (You may want to do multiple layers. Let paint dry completely.
- Repeat until all markers are labeled.
Notes


