• Skip to primary navigation
  • Skip to main content
  • Skip to primary sidebar

Pretty Providence

  • Recipes
  • Crafts
  • Printables
  • Holidays
  • Favorite Things
menu icon
go to homepage
  • Recipes
  • Crafts
  • Printables
  • Holidays
  • Favorite Things
    • Facebook
    • Instagram
    • Pinterest
    • TikTok
    • YouTube
  • subscribe
    search icon
    Homepage link
    • Recipes
    • Crafts
    • Printables
    • Holidays
    • Favorite Things
    • Facebook
    • Instagram
    • Pinterest
    • TikTok
    • YouTube
  • ×

    DIY Mirror Frame | Gold Dipped!
    Home » Decor » DIY Mirror Frame | Gold Dipped!

    Published: Jul 12, 2013 · Modified: Jul 20, 2023 by Sarah · This post may contain affiliate links · 16 Comments

    Tweet
    Pin2K
    Share
    Email
    2K Shares

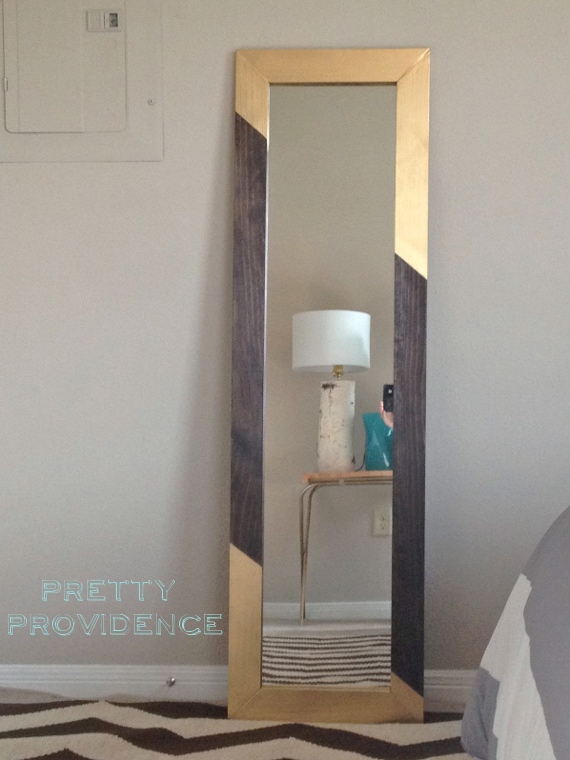
    mirrorpp

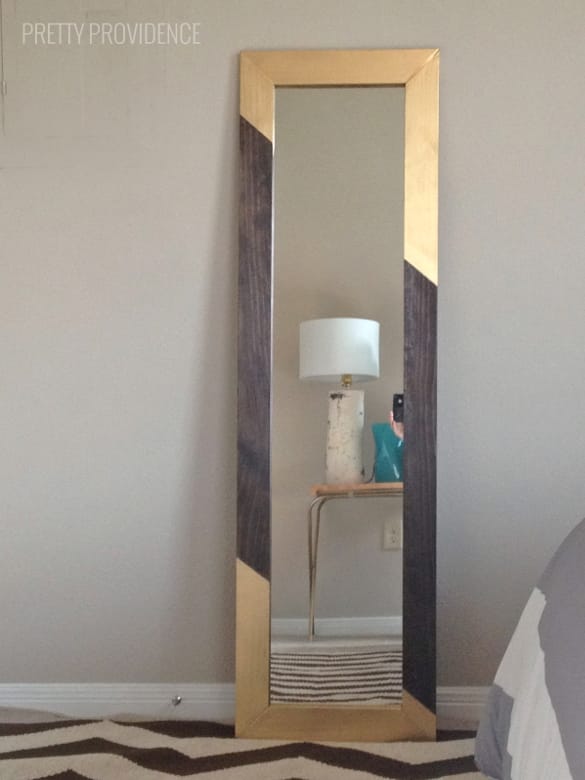
    Okay you guys, I am not going to lie to you here. DIY projects are never as easy as you think. This one seemed soooo easy. It was going to take $15 and one hour of my time. Have you ever tried to do a DIY only to figure out that it's not quite as easy and cheap as it was for someone else? I think it depends on how experienced you are, and how many tools and materials you already own. If you have all of the stuff on hand and you're an avid DIY-er, yes, this will take you an hour (or two) and will cost $15. If you are a beginner, and have almost no tools, materials or experience, it will take longer and will cost you more like $50. BUT this is not a reason not to do it. The tools you buy will be yours forever! You can use them again and again! And then you will have gained valuable knowledge and experience from actually getting it done. In the past I've been able to borrow any tool I needed from family, but now that I live much further away, it's time to get my own tool box.
    I have to say that building this mirror frame was liberating. Every time I walk past it, I feel so happy. I feel like now I can totally tackle something harder. But I did need to start simple! And it really was simple, just not quick. This is the best beginner DIY project ever - in my humble opinion.

     I was inspired to do this when the cheap full-length mirror that my husband bought back in his bachelor days literally fell apart. One day, with the help of my 3-year old nephew, the frame became completely detached from the mirror part. They were both still in-tact though so I thought this was the perfect opportunity to try to build something. I found this post at Shanty2Chic so I followed her tutorial but like I said... it took me a little longer. Mostly because I was waiting for things to dry and hunting down the tool I didn't realize I needed until I needed it. So I geared this tute for beginners like me, listing every tiny thing you might need.
    Stuff you need:
    cheap mirror
    1x3 boards
    miter saw or miter box and hand saw
    measuring tape
    wood glue
    loaded staple gun
    wood filler (just in case!)
    sandpaper
    paint or stain
    gold spray paint for "dipping"
    painter's tape
    liquid nails & caulk gun (here is a great video on how to use one if you never have)
    *if you are staining rather than painting the first layer you will also want one or two clean rags that you don't mind ruining...
    Step 1: Separate cheap mirror from cheap frame. I was fortunate enough that my mirror and frame were already broken apart which is what inspired the project in the first place. This post explains how to best remove one.
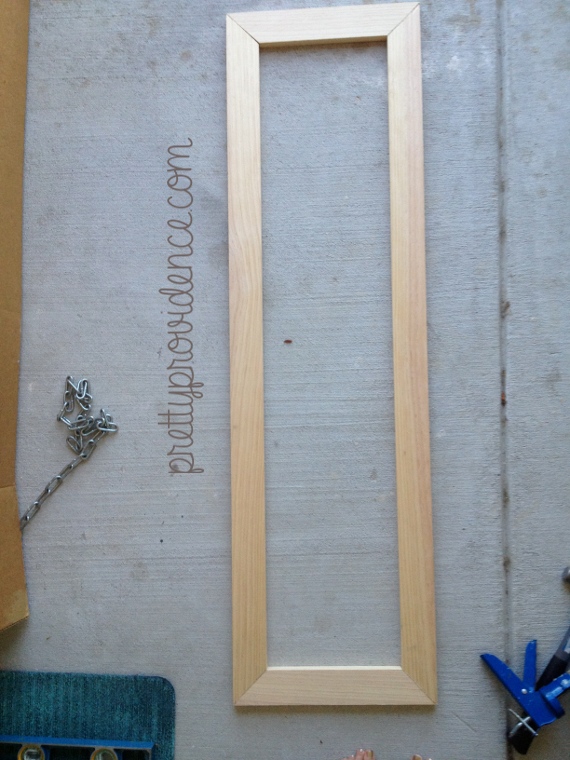
    Step 2: Measure and cut your boards. Since you want it to fit your mirror perfectly, measure your mirror. Mine was 1' x 4' so I cut two pieces 14" ¾ long point to long point and two 48" with the ends at 45 degree angles. I'm not going to lie, the sawing was more difficult than I expected and I had to ask my husband to help me with it. Using the basic miter box and hand saw will take two people, one to hold the box and board steady and one to cut.
    DIY gold-dipped mirror frame. This is the best beginner's DIY project ever, and the tutorial is geared for beginners! An upgrade to that cheap full-length mirror we all have. www.prettyprovidence.com
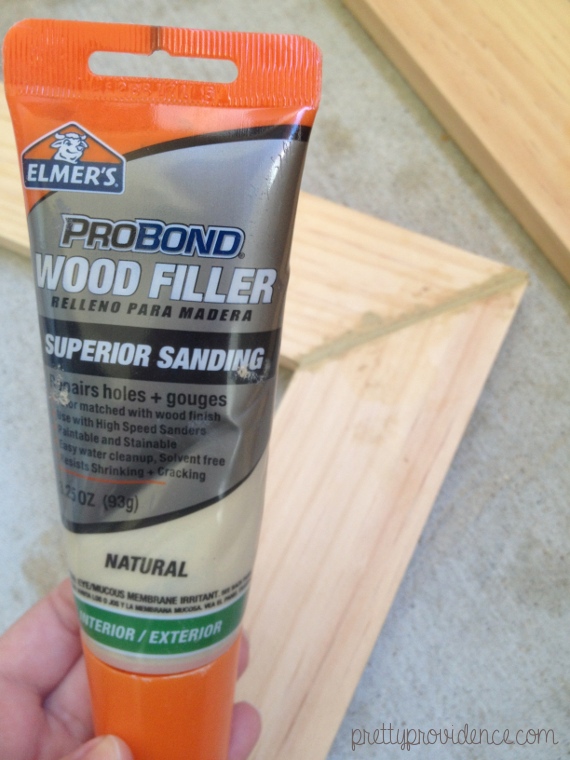
    Step 3: When your four pieces are cut, lay them on a flat surface with the sides you want to be the back facing up. Use wood glue to glue the pieces together, and then staple them in place too. It's best if your staples are at least an inch from the inside so that they don't get in the way when it's time to glue your mirror on. Let it dry. It may look perfect, but in my case, there were a couple gaps that I wanted to fill in so I used wood filler.
    DIY gold-dipped mirror frame. This is the best beginner's DIY project ever, and the tutorial is geared for beginners! An upgrade to that cheap full-length mirror we all have. www.prettyprovidence.com
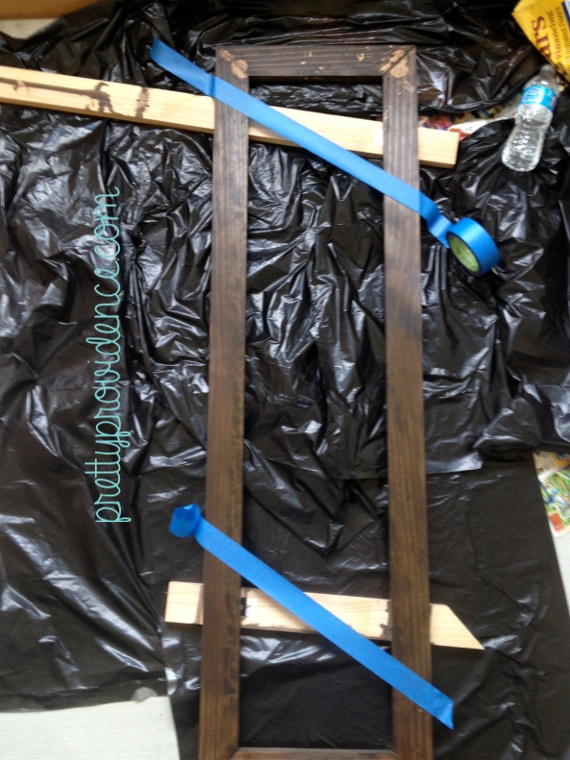
    Step 4: Prep for staining or painting. Just in case you are a staining newbie like me: wood glue will not stain, so you need to make sure you sand any remnants of wood glue down before you begin. Wood filler however, will stain. So there you go. Stain or paint your frame following directions on the package. I used this stain in espresso (got it at home depot in a super small container) and left it on for 15 minutes. Let sit for a few hours.
    Step 5: Use painter's tape and newspaper tape off and cover the part of your frame that you don't want to change from your original color. Leave only what you want "dipped" exposed.
    DIY gold-dipped mirror frame. This is the best beginner's DIY project ever, and the tutorial is geared for beginners! An upgrade to that cheap full-length mirror we all have. www.prettyprovidence.com
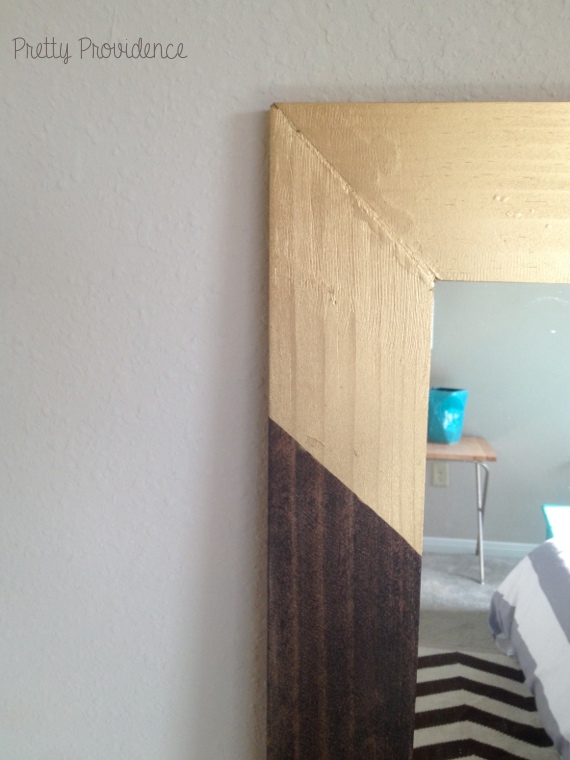
    Step 5: Spray paint gold. Let dry for at least an hour. This Rust-oleum gold spray paint is my favorite. I've tried them all but I think this one is the classiest.
    Step 6: Lay frame facing down and apply liquid nails right around the inside edges of your frame. Carefully lay the mirror over it, face up. Let dry.
    DIY gold-dipped mirror frame. This is the best beginner's DIY project ever, and the tutorial is geared for beginners! An upgrade to that cheap full-length mirror we all have. www.prettyprovidence.com
    DIY gold-dipped mirror frame. This is the best beginner's DIY project ever, and the tutorial is geared for beginners! An upgrade to that cheap full-length mirror we all have. www.prettyprovidence.com
    Step 7: Admire your new mirror that you totally built yourself! Ooohhh. Ahhhh.
    Also, if you love frugal and AMAZING DIY projects as much as we do, check out our awesome DIY Sliding Barn Door video tutorial!

    href="http://3.bp.blogspot.com/-1gAo4xUfofA/UeAH9xCNB1I/AAAAAAAAGHU/3HQc0_K2NnI/s1600/sarah-signature.jpg">

    If you're into this DIY home decor stuff, you will love this super easy geometric wall art and these 15 DIY ottoman ideas!

    this post may be linked up
    this post has been featured by our friends at:
    Whipperberry

    DIY gold-dipped mirror frame. This is the best beginner's DIY project ever, and the tutorial is geared for beginners! An upgrade to that cheap full-length mirror we all have. www.prettyprovidence.com

    Tweet
    Pin2K
    Share
    Email
    2K Shares

    More Home Decor Ideas on a Budget

    • A photo showing how to hang a gallery wall with text overlay for pinterest.
      Easy Photo Gallery Wall
    • Three plant pots that look like vintage pyrex bowls with a white and green daisy pattern.
      Vintage Pyrex Inspired Plant Pots
    • Girls bedroom with light blue walls, bunk bed, velvet curtains, stuffed animal hammocks and light purple bedding.
      Shared Girls Bedroom
    • cute under the stairs reading nook
      Under the Stairs Reading Nook

    Reader Interactions

    Comments

      Leave a Reply Cancel reply

      Your email address will not be published. Required fields are marked *

      Recipe Rating


    1. Julie Wilson

      October 08, 2013 at 9:39 pm

      can you explain a little more how the mirror is attached to the wood? I see in step 6 you laid the frame face down and put glue on the wood, but is there a "lip" of wood that the mirror is resting on? Can you see any of the glue?

      Reply
    2. Christine @ theDIYdreamer

      September 17, 2013 at 8:39 am

      Seriously rocking mirror!!

      Reply
    3. Carissa Ashby Rasmussen

      September 12, 2013 at 8:43 am

      it's definitely worth the extra time and effort it took you because it turned out FABULOUS! i've found that having a chop saw on hand is extra nice in short projects like this:) can't wait to try one for my room

      Reply
      • Sarah @ Pretty Providence

        September 13, 2013 at 8:20 am

        Thank you! Ah. I know I love it. Good luck!

        Reply
    4. Sumo

      July 26, 2013 at 1:39 am

      Super impressed that you actually made the frame yourself! Totally loving the gold dipped; that is a neat effect! I'll be featuring this on my blog on Saturday!

      http://www.sumossweetstuff.com

      Thanks for linking up!

      Sumo:)

      Reply
      • Jessica @ Pretty Providence

        July 26, 2013 at 9:12 am

        Approve!

        Reply
    5. JenCraftOManiac

      July 22, 2013 at 7:59 am

      Love this! Great job!

      Reply
      • Jessica @ Pretty Providence

        July 22, 2013 at 8:11 am

        Thanks Jen! We love you ????.

        Reply
    6. Selene

      July 15, 2013 at 10:57 pm

      Love love love your gold dipped mirror!!! Makes me want to make one for myself! So glad I found your blog and I can't wait to browse through it! Following on Bloglovin!

      Selene @ Restoration Beauty

      Reply
      • Jessica @ Pretty Providence

        July 22, 2013 at 8:12 am

        Thanks Selene! You totally made our day!

        Reply
    7. Cassidy Woodbury

      July 12, 2013 at 7:00 pm

      I am so beyond impressed with this, Sar. You are the bees knees.

      Reply
      • Sarah @ Pretty Providence

        July 12, 2013 at 9:20 pm

        Thanks Cass!

        Reply
    8. Yvonne @ TriedandTasty

      July 12, 2013 at 6:05 pm

      That looks like something you would buy for lots of money - GREAT job!! Thanks for sharing, I'm definitely going to pin it.

      Reply
      • Jessica @ Pretty Providence

        July 12, 2013 at 6:20 pm

        what a compliment!!! thank you!

        Reply
    9. Miranda Pridgeon

      July 12, 2013 at 4:17 pm

      I love that look! So unique and not very difficult either! Thanks for sharing!

      Reply
      • Sarah @ Pretty Providence

        July 12, 2013 at 9:20 pm

        Thank you!

        Reply

    Primary Sidebar

    Hi, we're Sarah and Jessica, and we're so glad you're here! We created this site to share recipes, crafts, DIY projects and free printables.

    More about us →

    Most Popular Posts

    • Breakfast casserole with sausage, eggs, cheese and bell peppers on a white plate
      Sausage and Egg Casserole (Without Bread)
    • DIY desk made from two storage cube bookshelves and IKEA desk top with marble look
      DIY IKEA Desk Hack
    • Iron-on t-shirt with Cricut collage of supplies needed, iron-on cut and weeded, and then the final shirt that says "#tired" in gold iron-on letters
      How to Make a Shirt with Cricut
    • The Office birthday party table with decorations, food, balloons and "it is your birthday" sign
      The Office Theme Birthday Party - "It Is Your Birthday."
    • Teepee style blanket fort made with bedsheets and clothesline hung from a light fixture.
      How To Build The Best Blanket Fort
    • German Pancakes just out of the oven, dusted with powdered sugar in a glass baking dish.
      Dutch Baby Pancake Recipe
    See more Most Popular Posts →

    Father's Day

    • Yogurt Toppings on a table for brunch bar, granola, coconut, strawberries, blueberries, oranges, pineapple, kiwi.
      Yogurt Toppings Bar
    • Breakfast charcuterie board with crepe toppings, fruit, spreads, bacon and powdered sugar
      Crepe Toppings Breakfast Charcuterie Board
    • World's Best Pop tie shaped gift tags, one tag taped on a bottle of root beer
      Soda Pop Shirt and Tie - Father's Day Printable & Gift Idea
    • Collage of DIY Father's Day Gifts
      Easy DIY Father's Day Gifts
    • DIY Breakfast In Bed Tray and Kit
    • DIY vinyl tumblers for grandparents
      DIY Grandma and Grandpa Tumblers
    See more Father's Day →

    Summer Recipes

    • two glasses of watermelon slush with lime slices and sugar on the rims
      Watermelon Slushie
    • creamy apple dip in a white bowl with granny smith apple slices surrounding it.
      Creamy Apple Dip
    • 4th of July snacks on a charcuterie board with red, white and blue foods - crackers, meat, cheeses and fruit.
      4th of July Snacks Charcuterie Board
    • Collage of three photos: creamsicle fluff salad, fruit salad with whipped topping, and seven-layer bean dip.
      30+ Easy Potluck Dishes
    • Watermelon feta salad with cucumber and mint in a white bowl.
      Watermelon Feta Salad
    • Marinated grilled chicken thighs on a white platter.
      Best Chicken Thigh Marinade
    See more Summer Recipes →

    Kids Activities

    • An image of a Harry Potter word search next to a wand and a griffindor cloak.
      Harry Potter Word Search
    • A printable summer reading chart with a young girls hand filling in the bubbles.
      Summer Reading Chart Printable
    • Taylor Swift bracelet ideas lots of bead bracelets with taylor swift song names on them on a wrist.
      Taylor Swift Friendship Bracelets
    • Tie-dye sugar cookie with neon pink, purple, turquoise and orange swirled together
      Tie Dye Cookies
    • Olympic-Themed Party Ideas, Crafts and Recipes
    • Blind taste test printable worksheet with chocolate chips and a pen
      Blind Taste Test
    See more Kids Activities →

    Footer

    ↑ back to top

    About

    • Privacy Policy
    • Disclaimer
    • Accessibility Policy

    Newsletter

    • Sign Up! for emails and updates

    Contact

    • Contact
    • Media Kit
    • FAQ

    As an Amazon Associate, we earn from qualifying purchases.


    Copyright © 2023 Pretty Providence LLC