• Skip to primary navigation
  • Skip to main content
  • Skip to primary sidebar
  • Skip to footer

Pretty Providence

  • Home
    • Newest Blog Posts
  • About
  • Recipes
    • Appetizers
    • Beverages
    • Breakfast
    • Dessert
      • Cookies
    • Dinner
    • Salads
    • Side Dishes
  • DIY & Crafts
    • Cricut
    • T-Shirts
    • Crafts
    • Decor
    • DIY Projects
  • Holidays
    • Halloween
    • Thanksgiving
    • Christmas
    • New Years Eve
    • Valentine’s Day
    • St. Patrick’s Day
    • Easter
    • Mother’s Day
    • Father’s Day
    • 4th of July
  • TIPS
    • Tips
    • Organization
    • Family Life
      • Baby
      • Fun
      • Family
    • Travel
  • OCCASIONS
    • Gifts
    • Parties
  • Navigation Menu: Social Icons

    • Facebook
    • Instagram
    • Pinterest
    • YouTube

IKEA Clock Makeover

Home » All » IKEA Clock Makeover

Published August 11, 2016 Last Updated June 10, 2019 / By Pretty Providence 1 Comment

Tweet
Pin163
Share
Email
163 Shares


Check out this great IKEA clock makeover. It looks super easy and I love the custom text at the bottom. So fun. Time really flies by!

Whenever I meet someone and I have the kids with me….they will inevitable see the tired look on my face with my messy bun and say something to effect that….time flies.  Before you know it they will be graduating high school they say to me.  I think to myself and remember the sleepless night I had or the mess after mess I cleaned up.  And then I stop, and realize that my first baby is already 3…. I cannot believe how fast she has gown up.

Hello Pretty Providence readers! This is Shonee from Hawthorne and Main here to share with you another fun DIY.  It’s so fun when you can take something that is plain  and not so unique and quickly change it into a piece that is custom and fits with your home decor.  Today I am going to show you how to take this IKEA PUGG clock from plain to awesome.

Check out this great IKEA clock makeover. It looks super easy and I love the custom text at the bottom. So fun. Time really flies by!

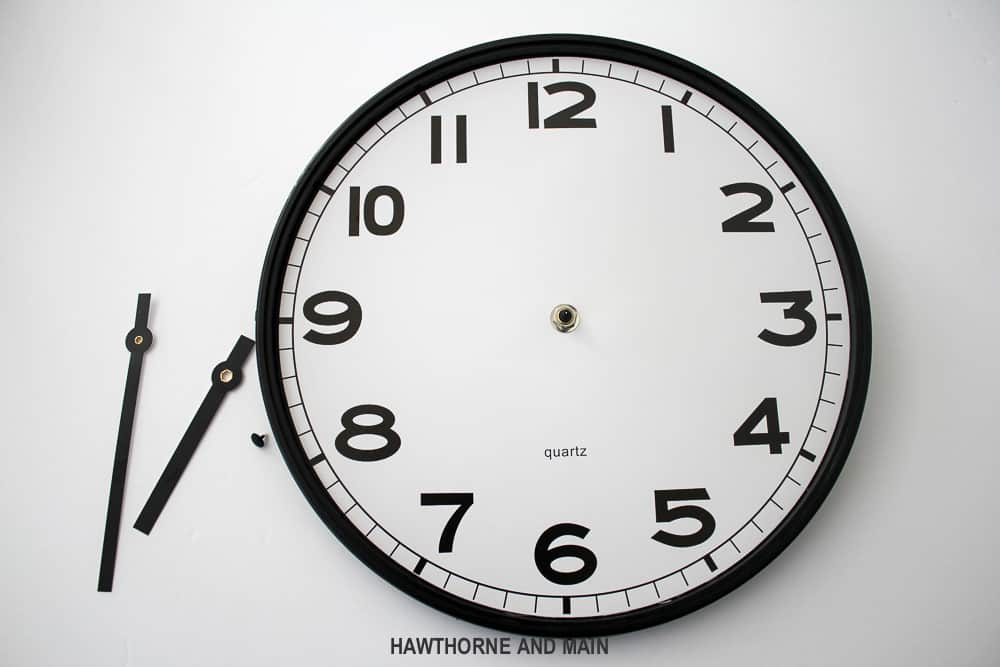
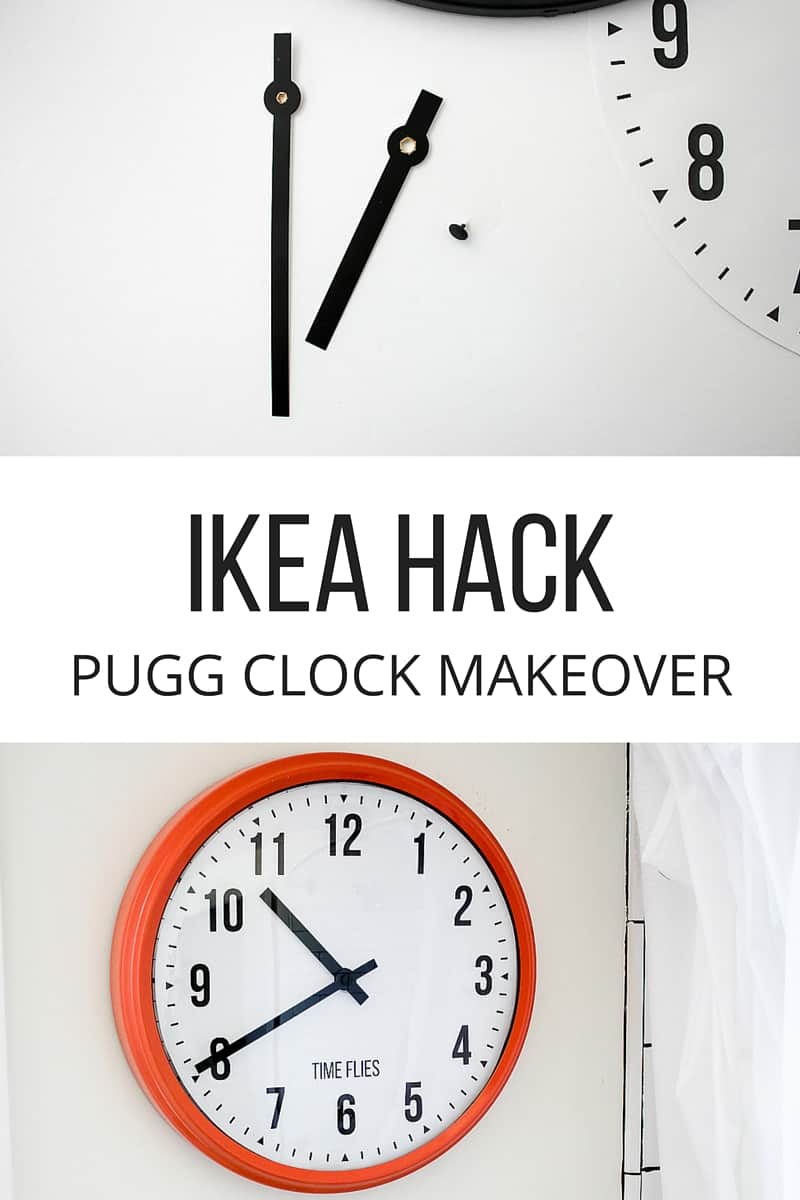
The first thing you will need to do is take the clock apart.  There a 4 metal V shaped pieces, on the back of the clock that are holding it all together.  Remove all 4 metal pieces.  Take the clock face out.  Now, you need to remove the clock hands.  There are three pieces, the finishing button and two hands.  All three pieces can easily be removed just by pulling up gently.  Be careful when you pull up on the hands as not to bend the hands.  Set them aside in a safe place for later.

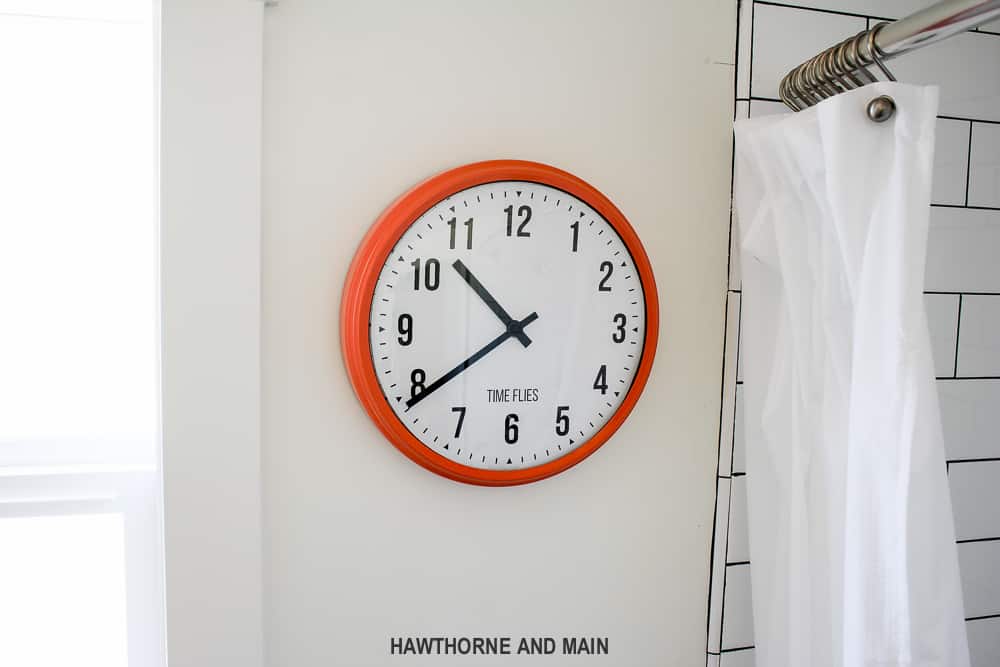
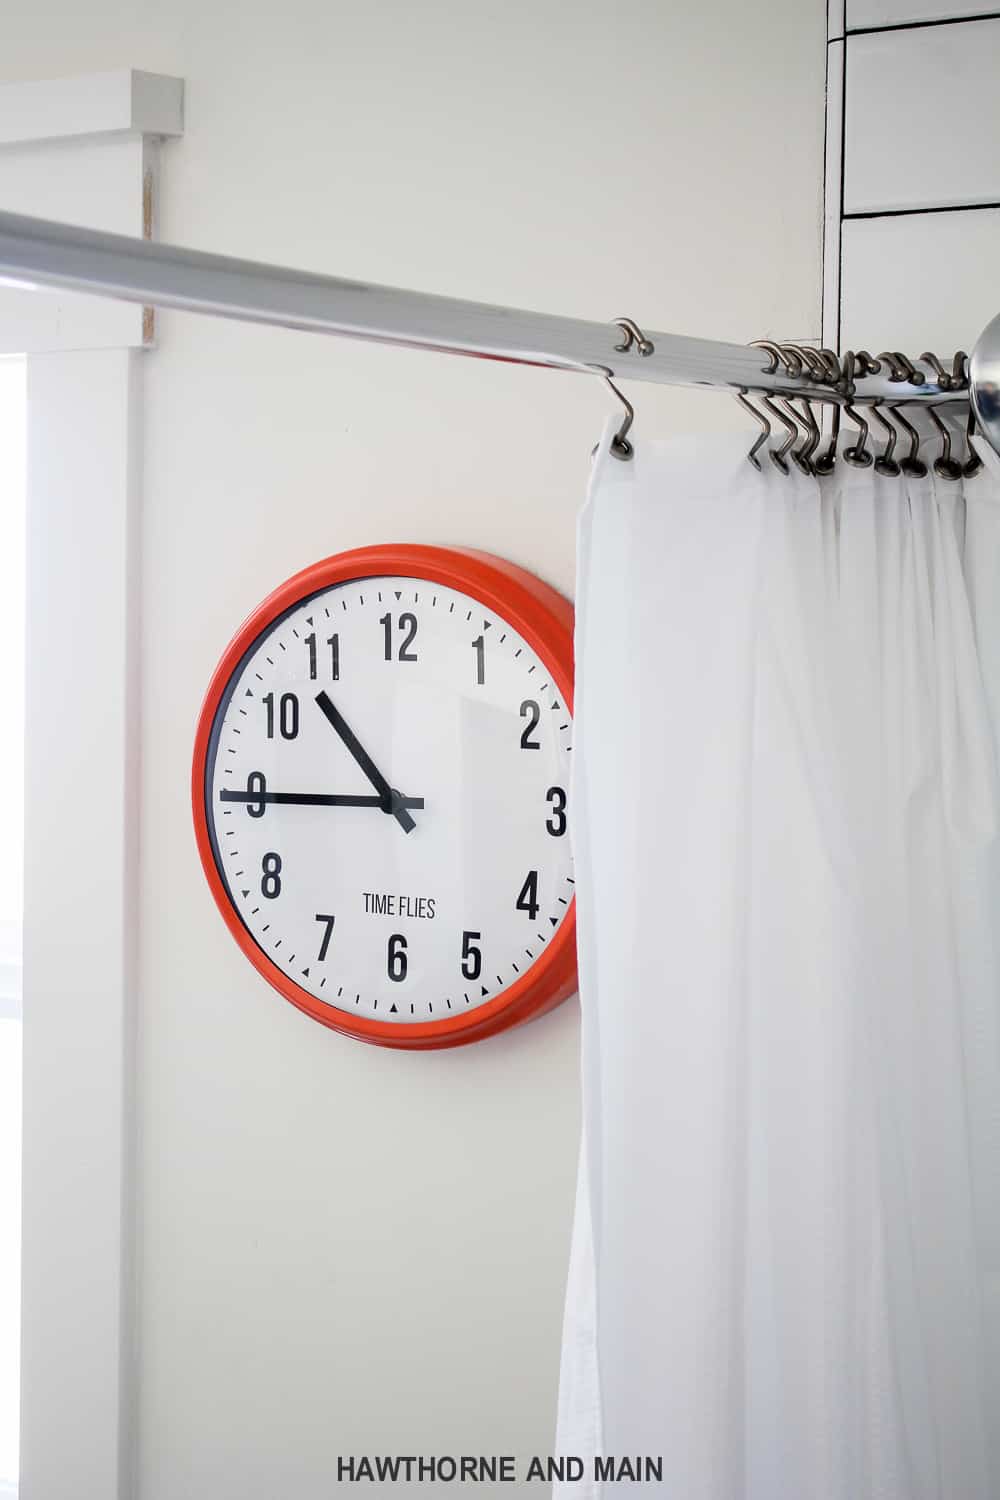
The metal frame of the clock  can now be painted with your favorite color.  I picked a fun coral spray paint color.

Check out this great IKEA clock makeover. It looks super easy and I love the custom text at the bottom. So fun. Time really flies by!

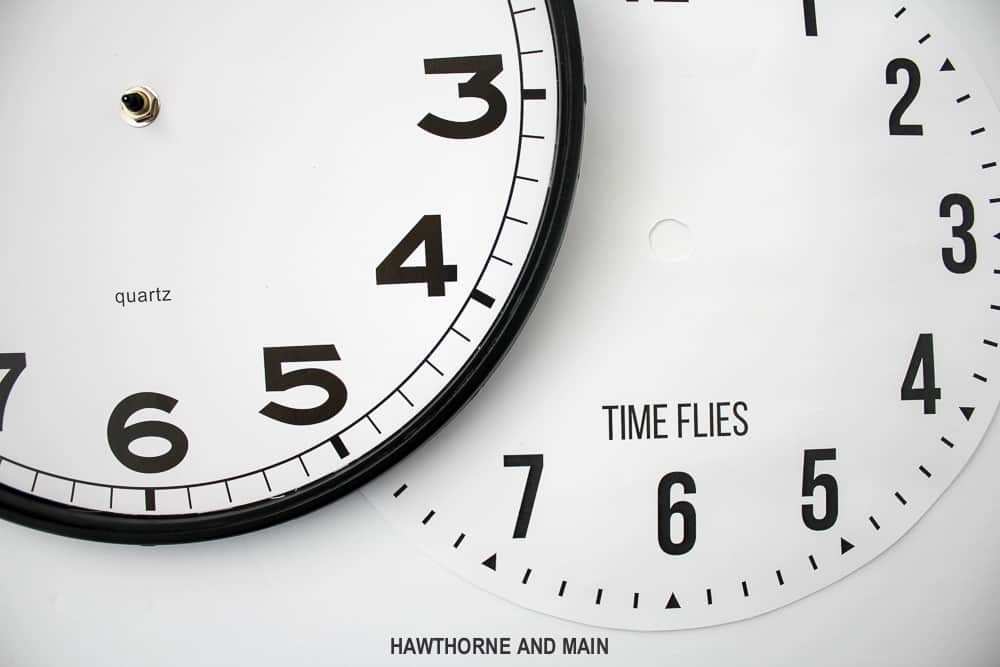
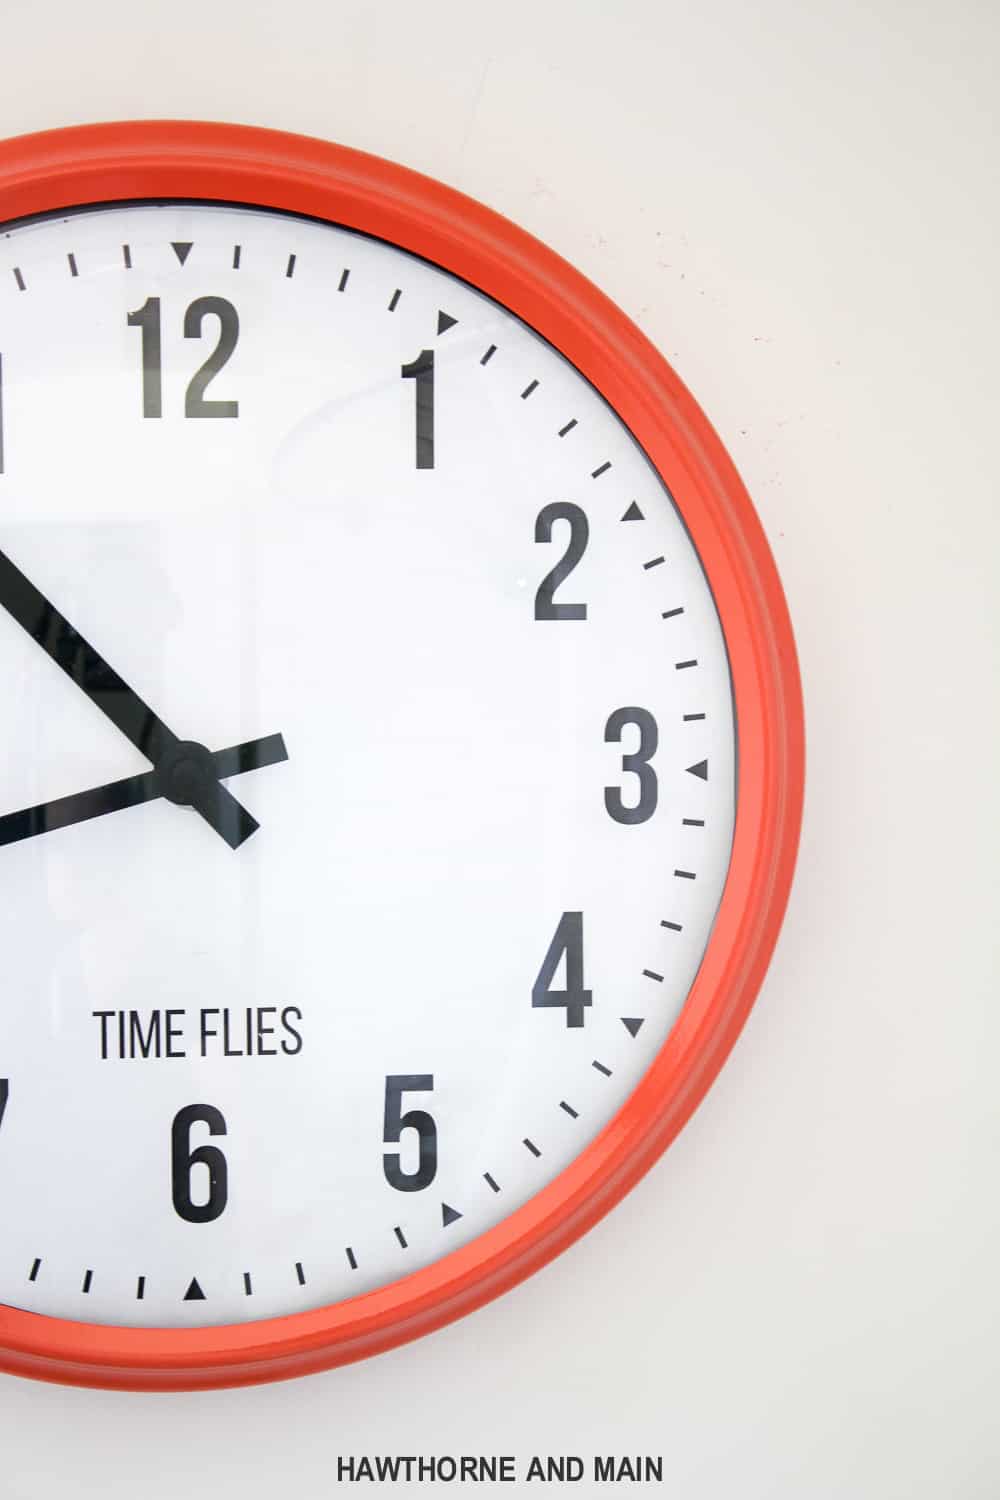
I wanted to update the clock face with a font that was a little bit more modern and simple.  I also added a fun saying to the bottom of the clock face.  I  created 8 different clock faces so you can pick the perfect saying for your clock.  Be sure to scroll down to the bottom to print out your clock face.

When you get ready to print out the clock face have it printed at a local print shop and ask them to print it on 11×18 size paper.  This will be the perfect size.  Once you have the new clock face printed,  cut around the gray line.  You can find the center of the circle by using a ruler or you can quickly find the center by laying the new clock face over the clock and gently press the paper into the metal part sticking up. This will make an indention in the paper. You can then use a pair of small scissor to cut out a small circle.

Keep in mind the original clock face is glued down so you will be adding the new clock face over top.  After the clock is painted and the new face inserted, replace the clock hands and the button.  Reinsert the metal V’s and it is finished.

Check out this great IKEA clock makeover. It looks super easy and I love the custom text at the bottom. So fun. Time really flies by!

Check out this great IKEA clock makeover. It looks super easy and I love the custom text at the bottom. So fun. Time really flies by!

Check out this great IKEA clock makeover. It looks super easy and I love the custom text at the bottom. So fun. Time really flies by!

I can’t say for sure if time flies…. what I can say is that it doesn’t stop. Here is my reminder to make everyday count!

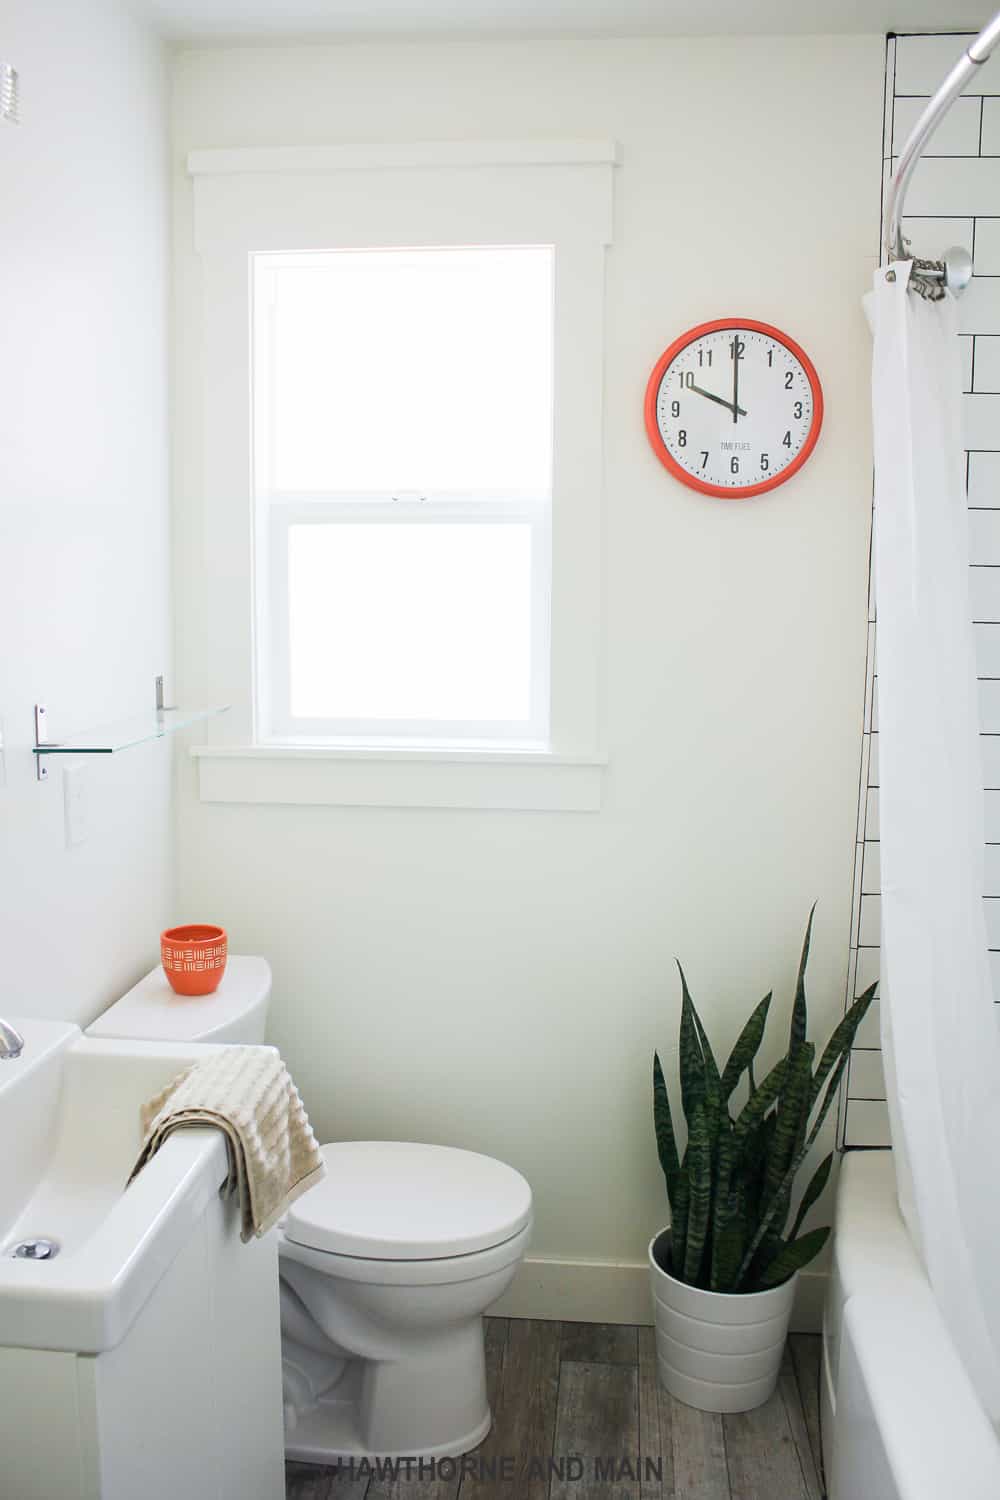
I  love how my new clock turned out.  It looks much more stylish and up-to-date.  Our little bathroom is really coming along and I cannot wait to get it finally finished.

What is your favorite clock saying?

PRINT CLOCK FACES HERE

Check out this great IKEA clock makeover. It looks super easy and I love the custom text at the bottom. So fun. Time really flies by!


Tweet
Pin163
Share
Email
163 Shares

Reader Interactions

Comments

  1. Carol

    August 16, 2016 at 6:02 am

    Love this idea! Time does fly when you have kids. My babies are now 24 and 19. Getting ready to send my youngest off to his 2nd year of college and making lists for his first year in an apartment. Yikes!

    Reply

Leave a Reply Cancel reply

Your email address will not be published. Required fields are marked *

Recipe Rating


Primary Sidebar

about-pretty-providence  

Hey! We're Sarah and Jessica. We're BFF's and have known each other since we were 5 years old. This blog is our place to share all of our best recipes, tips, crafts and DIY projects.

You can read more about us on our about page and find us on instagram! We love making new friends.

  • Email
  • Facebook
  • Instagram
  • Pinterest
  • TikTok
  • YouTube

Most Popular

Breakfast casserole with sausage, eggs, cheese and bell peppers on a white plate

World’s Best Breakfast Casserole

DIY desk made from two storage cube bookshelves and IKEA desk top with marble look

DIY IKEA Desk Hack

Iron-on t-shirt with Cricut collage of supplies needed, iron-on cut and weeded, and then the final shirt that says "#tired" in gold iron-on letters

How to Make a Shirt with Cricut

The Office birthday party table with decorations, food, balloons and "it is your birthday" sign

The Office Birthday Party

Teepee style blanket fort made with bedsheets and clothesline hung from a light fixture.

How To Build The Best Blanket Fort

German Pancakes just out of the oven, dusted with powdered sugar in a glass baking dish.

German Pancakes

Organization

a habit tracker with pink squares next to a rose gold pen

Free Printable Habit Tracker

collage image of four different laundry hacks to make laundry easier

The Best Laundry Hacks

art supplies organized and labeled on a white IKEA kallax shelf

School and Art Supply Organization

Weekly cleaning checklist and routine, and checklist for kids too with pictures and check boxes!

Weekly Cleaning Routine + Checklist

Laundry Care Symbols Explained

pantry organization at it's finest! great tips and tricks in this post!

Home Organization Ideas

CRICUT

Light blue Cricut Maker 3 with an assortment of colors of vinyl and iron-on vinyl fanned out under it and behind it.

The Best Iron On and Vinyl to Use with a Cricut

custom hats with cricut iron-on, baseball cap style

How to Make Custom Hats with Cricut

light blue Cricut maker 3 next to vinyl and art on shelves

Cricut Materials – Everything You Need to Know

cute first/last day of school whiteboard on a light blue background

Back to School Photoshoot Board

DIY tote bag canvas with a rainbow and the words 'I'll walk with you' in gold iron-on vinyl

Rainbow DIY Tote Bag

DIY Custom Napkins

Footer

Copyright © 2012-2019 Pretty Providence | Contact Us | Privacy Policy | Disclosures