DIY Accent Wall Tutorial for Beginners
This post brought to you by FrogTape. All opinions are 100% mine.
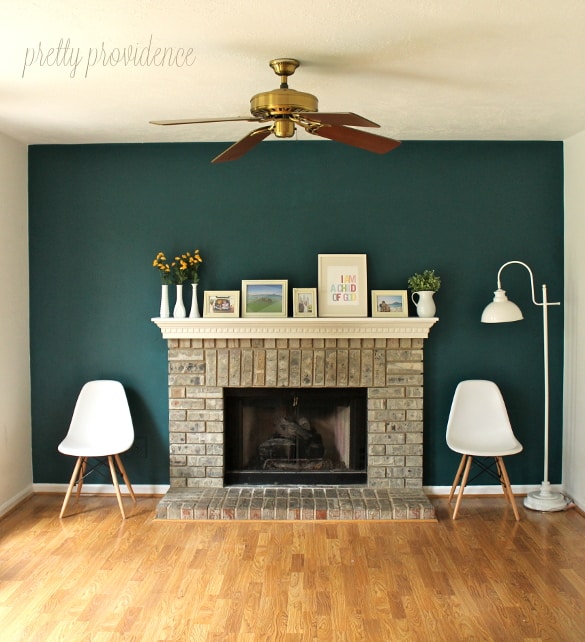
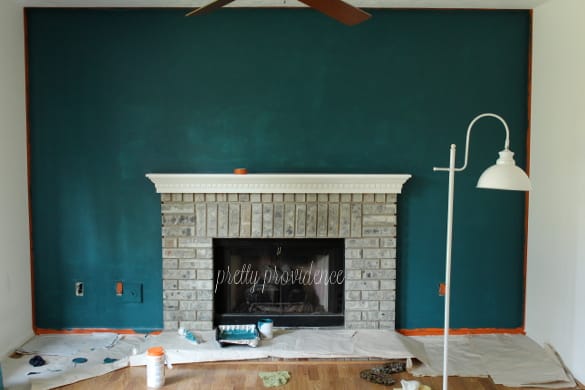
I finally painted a wall you guys. I had almost made up my mind that I would keep all the walls in my house white because a) white is in right now and b) all my walls are crazy textured and I have painted a textured wall before and it was kind of a mess. I mean it was fine as long as you didn't look at the edges.... haha but yeah I was a little intimidated. Then I heard that FrogTape® has a textured surface kit - basically a stronger, more accurate painters tape that works on not so smooth surfaces or walls. The kind people there wanted to let me give it a go. I figured, what the heck? I had been DYING to paint something, anything, in my house this color: Benjamin Moore Oasis Blue. I'm a fangirl of stylist Emily Henderson and she has used that color a few times (like here) and I just want my house to look like one of hers. So an accent wall it would be. If you have never done an accent wall before this is the tutorial for you. I'm going into the details, because even though it's not rocket science, if you haven't done it before it can be intimidating.
Gather your supplies. You'll need:
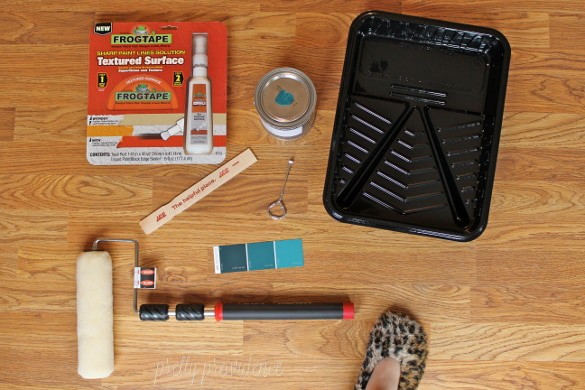
FrogTape Textured Surface Kit (or regular FrogTape® if you don't have textured walls... lucky you.)
Paint roller
Smaller paint brush for corners (not pictured)
Paint dish (what is that thing called!)
2 quarts of the paint of your choice (I had 1 quart here but it only covered the wall once, ended up going back for a second.)
Dropcloths or newspaper to put on the floor around where you'll be painting
Comfortable footwear, of course
The most important part of painting a wall is not painting the wall, it's prepping.
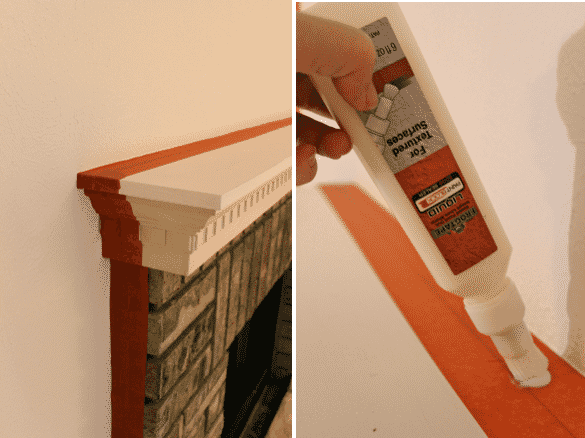
Start by cleaning your wall. Wipe it down with a damp cloth to remove any dust and dirt then let it dry. Tape along the edges of the ceiling and adjoining walls. Get your lines straight and as close to the edge as possible!
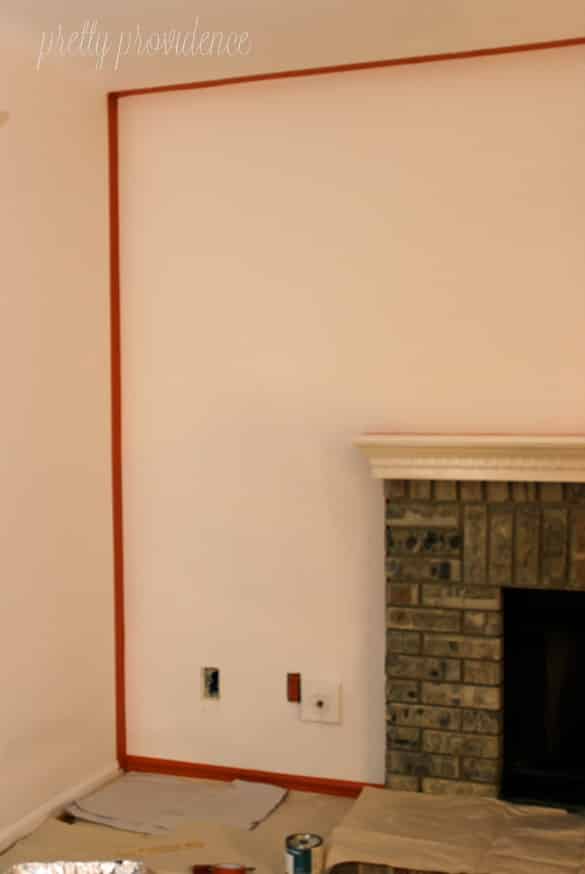
This is time-consuming but it's worth it. The better you do at this, the better your paint job will look. You do not want to have to do touch ups if you don't have to. The textured surface kit comes with an adhesive that you put on the edges of your tape and your wall, to make sure no paint seeps in and ruins through the edges!
Once that's done, paint away! Here's what my wall looked like after the first coat.
Here's where I made a mistake. The FrogTape® Textured Surface kit directions say to remove the tape as soon as the paint is dry to the touch. I did my first coat at night, went to bed and let it dry overnight and then did my second coat the next day. Since it was totally dry before my second coat, my paint stuck the the painters tape! So even though the tape worked great at keeping the paint inside the lines, it took the paint off with it in some spots. But like I said, I didn't follow the directions and when I fixed those spots that didn't happen again.
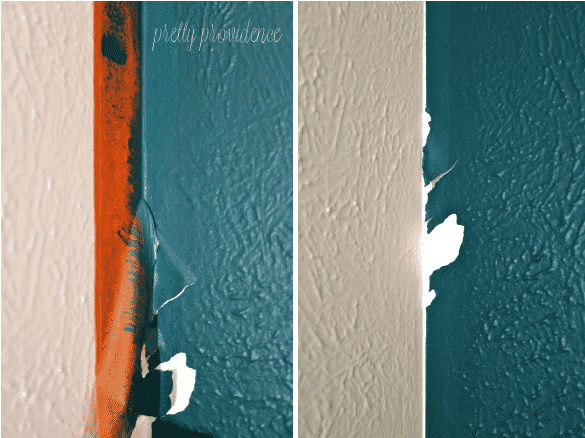
Fixing this wasn't too hard. I just put the tape next to the spots I needed to touch up (this was the only BIG rip but there were five or six tiny ones too.) I didn't even need to use the adhesive this time. I took the tape off right when the paint was dry to the touch and voila.

Totally straight lines right? Pardon the bragging. I am pretty proud of this.

So, my conclusion about FrogTape® Textured Surface is two thumbs up. I will definitely be using it again! If you're looking for more cool paint ideas they are always tweeting cool projects (@FrogTape) and have you seen the project I did with their scallop tape?! By the way, if any of you use this tape, I want to see it! Pin it with the hashtag #TexturedSurface!

Hey,
That looks gorgeous! We also have textured walls; and I'm uncertain of the finish I want. I like what you have there! Is it eggshell/satin?
Painter's Tray
Absolutely LOVE that color! Makes everything pop! :) We have some textured walls here too...Ugh! :)
Textured walls are the hardest to paint, they soak up the paint to much and clean edges are impossible. I wish I knew about the product before:) your wall looks awesome, I love the color!
looks great! love the color