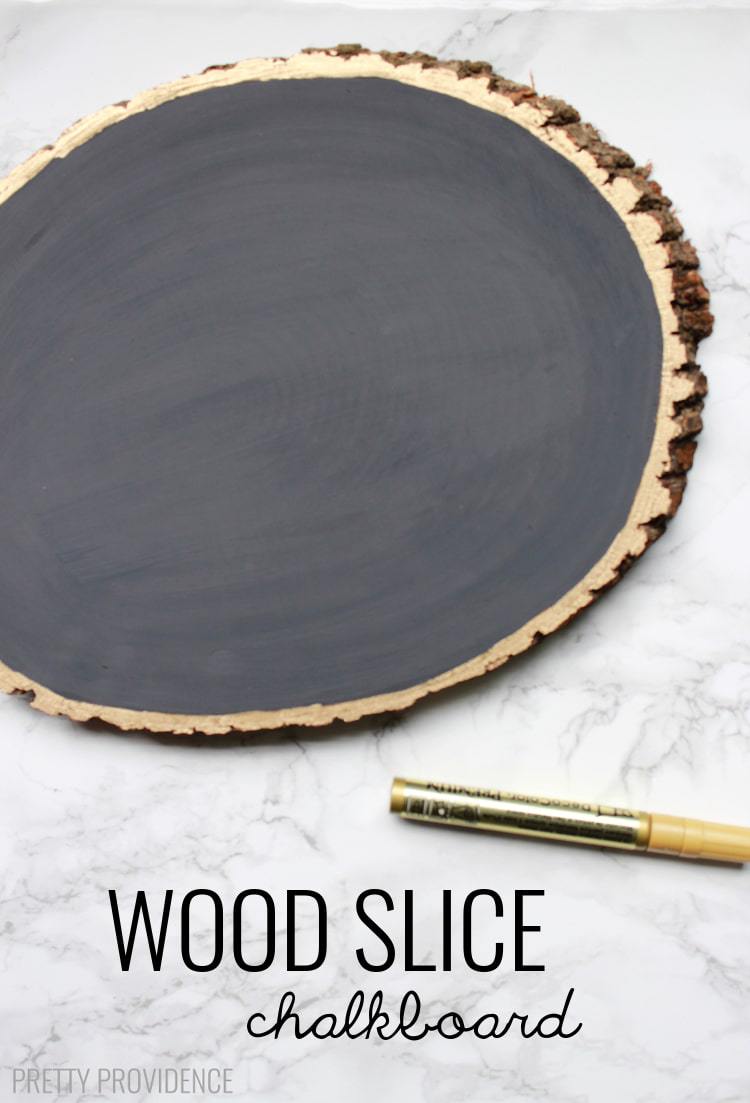
Hey you guys! I have a fun and simple DIY to share today. I made a couple wood slice chalkboards back in October and I am in LOVE with them. I hadn't even planned on blogging about these but as I keep using them I realized I really should share the wealth. Haha. They are so easy, you can make them in an afternoon and use them all year long! You can do any color you want, I decided to do one with black chalkboard paint as well as a turquoise one, because that's my favorite color and it matches everything in my house. For the turquoise one I actually just used regular acrylic paint that I had lying around and then I found this cool clear chalkboard coating -- so I used that.
 Probably my favorite thing about these is that I can change them up for each holiday or occasion but they aren't overly festive. I love to decorate for some holidays, but for others I prefer to keep my house looking normal and these add a fun bit of festivity for those times when I just want a tiny bit! I also like to write inside jokes on it for my husband to notice at his leisure. Haha. Here's the full how-to:
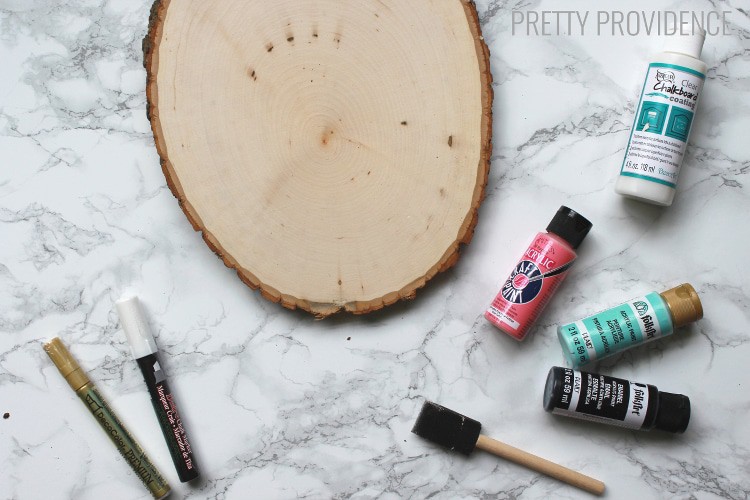 Materials:
Wood Slice
Foam paintbrushes
Chalk marker
Acrylic paint + Deco Art clear chalkboard coating
or Chalkboard paint
Gold leafing pen (optional)
I purchased all of my items from Michael's, you can find them at other craft stores or on amazon as well! It cost me about $20 to make two slices, using coupons and some things I already had at home.
Instructions:
Following the instructions on your specific bottle, paint at least two coats of chalkboard paint or acrylic paint onto your wood slice. After that is fully dry, if you used acrylic paint add your layers of chalkboard clear coating. It will usually take 24 hours to fully dry after this. Trace the edges with a gold leafing pen if you like to add gold to all the things like I do. Once everything is dry, you are done!
I like to display mine with a little easel but you could also hang it on your wall with some twine or command strips - this would be a fun addition to a gallery wall! Here are a few of the ways I've used mine since having them: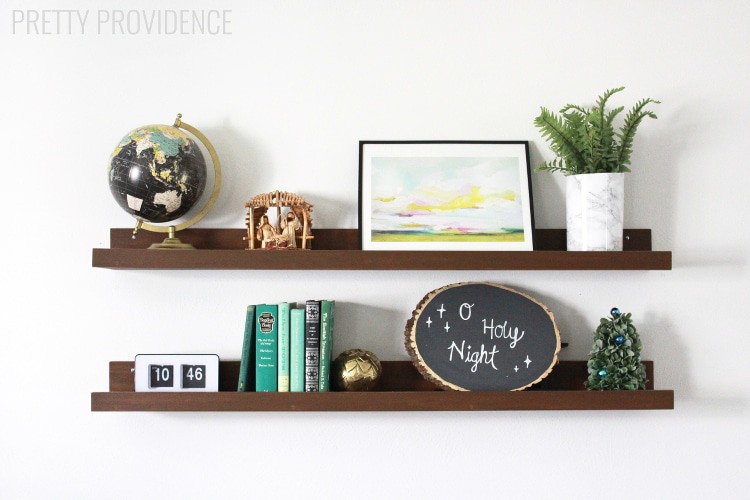
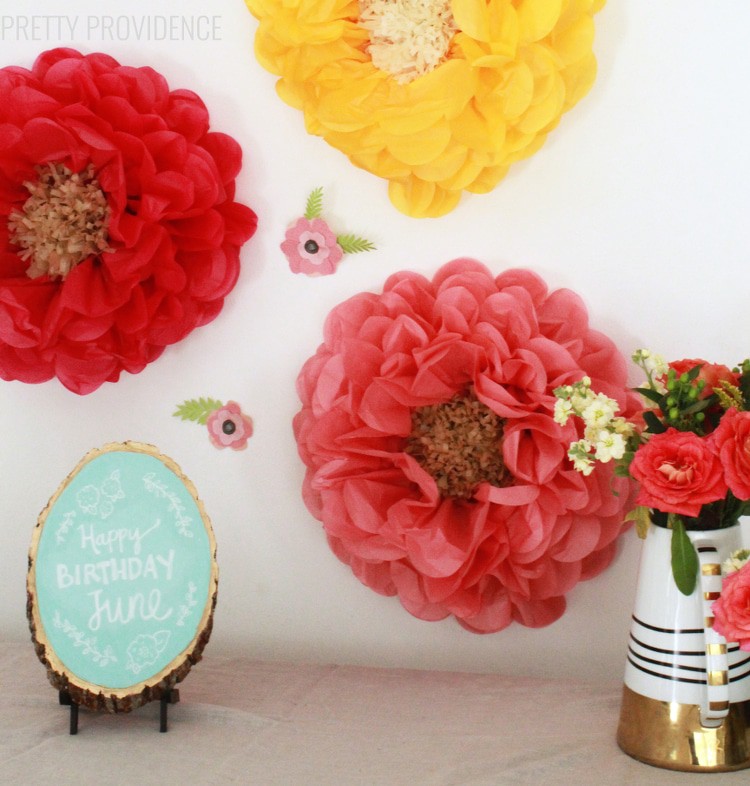
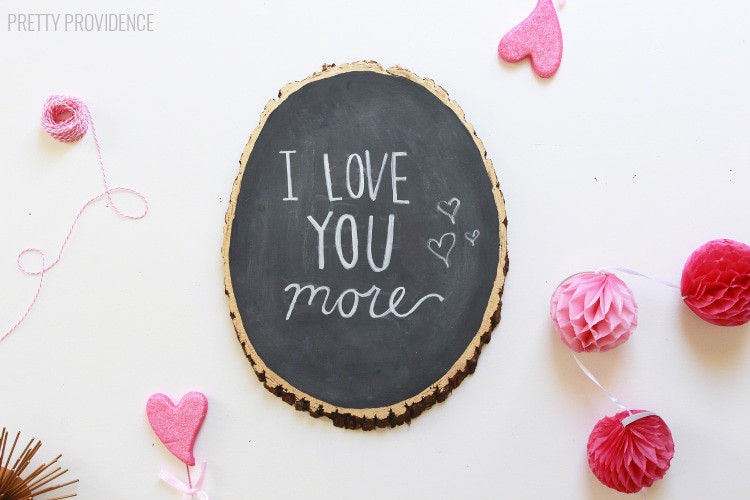
See!? So versatile. I love the touch of gold the gold leafing pen gave too. Now I want to gold leaf ALL THE THINGS.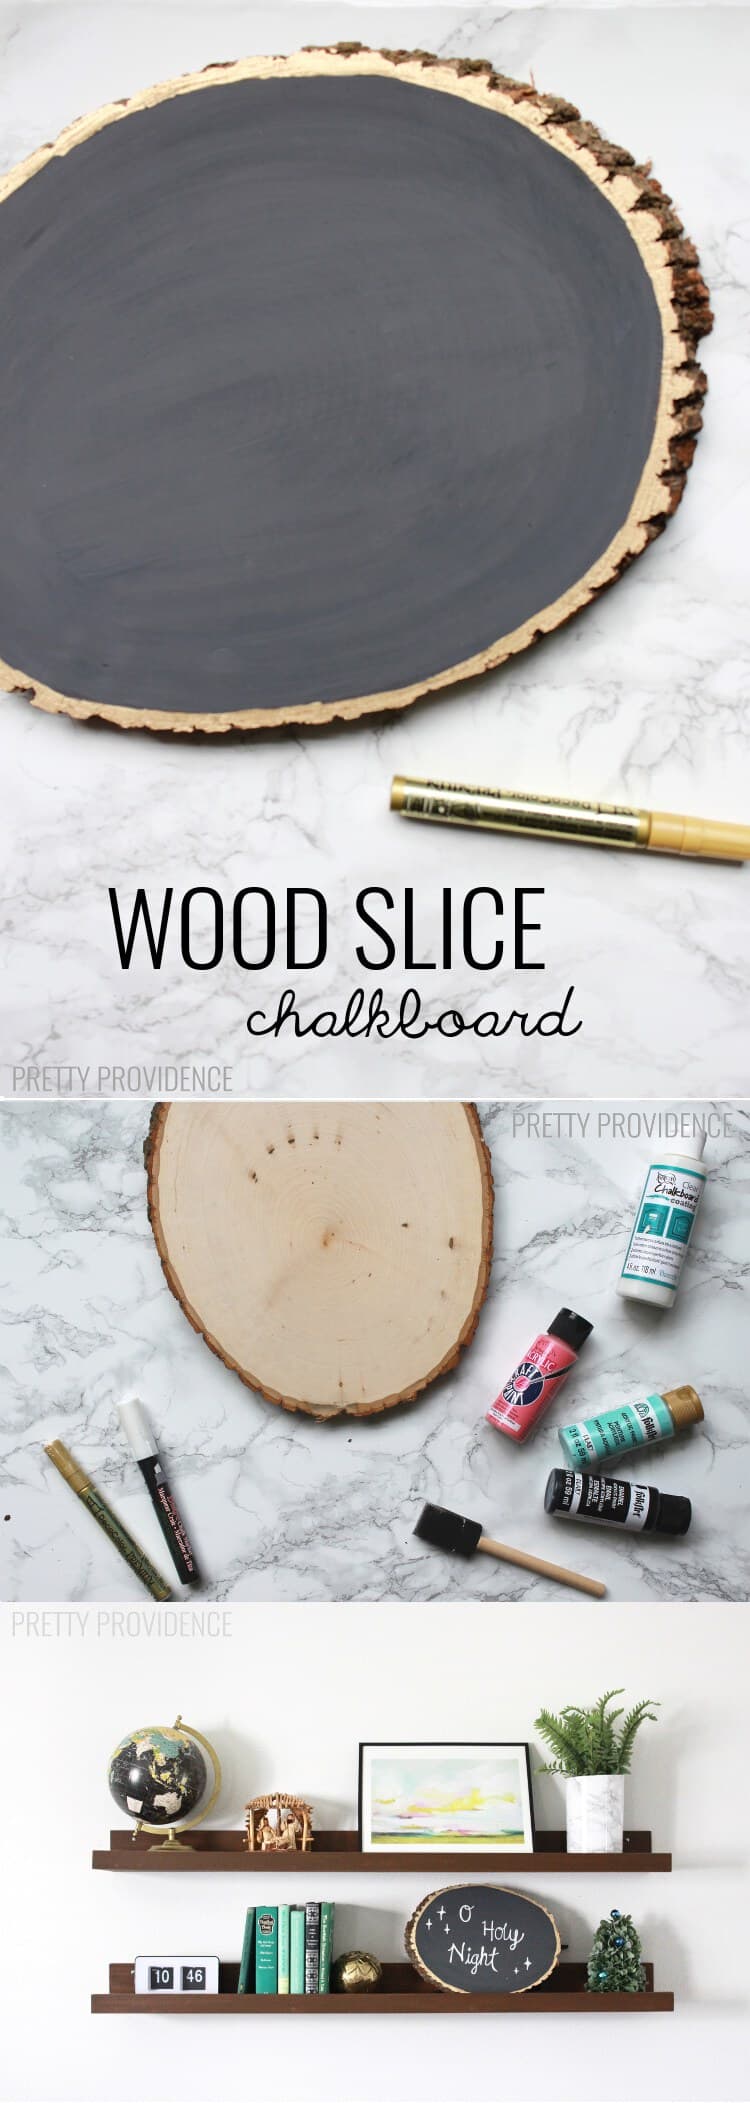

 |
 |
 |
Dar
How did you get tge edges so neat? Did you tape it off? And, did you have to sand your wood first? Age it or season it?
Sarah
Nope, I just painted it with the craft brush. I wasn't too worried if something was a little out of place. And no, didn't sand it! They come already nice and smooth, ready to paint!
Haley
How do you erase the chalk marker? Do you wet a towel and wipe it off? I recently bought some BAsswood slices and I've been so anxious about painting them and I love the idea of using one as a chalkboard I can continually change. I just want to know how to erase the chalkboard each time and if it leaves any residue everytime.
Jessica
Yes that's all you do! If it does leave any residue I run the long side of a regular piece of chalk over the board and it's just like new again!