Personalized Makeup Caddy Made with Cricut Joy - Perfect for Holiday Gift Giving
Our personalized makeup caddy and makeup bag are the perfect gift for any young makeup lover in your life! So easy to whip together using the Cricut Joy.
I recently shared about the reasons why the Cricut Joy would make a perfect gift, and this post is a good example of what you can create in just a few minutes with your Joy... a personalized makeup caddy!
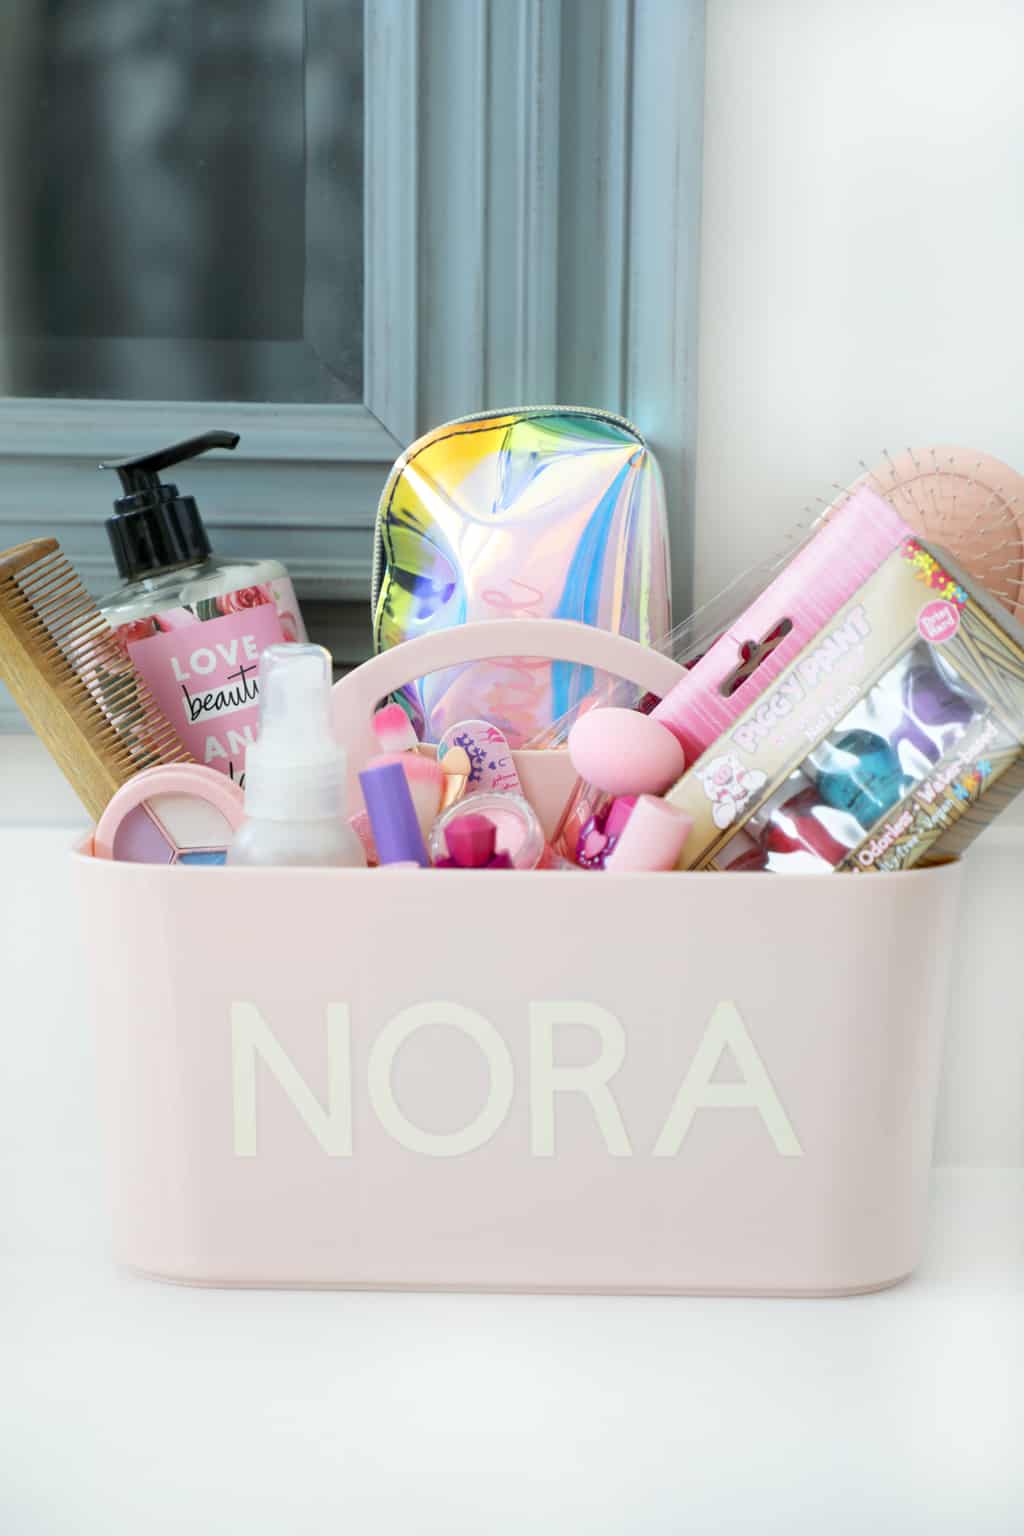
My daughter Nora is so into makeup and everything girly, and I am so sick of her stuff being left all over her room and bathroom! I can't really blame her though, because she really didn't have a designated spot for her makeup stuff to go. I knew that a makeup caddy would be a perfect birthday or Christmas gift for her this year.
I knew I wanted to personalize it using my Cricut Joy, because it is such a fun and easy step that will make the gift that much more special for her. Plus, the more she loves it the more likely she is to use it! Right?
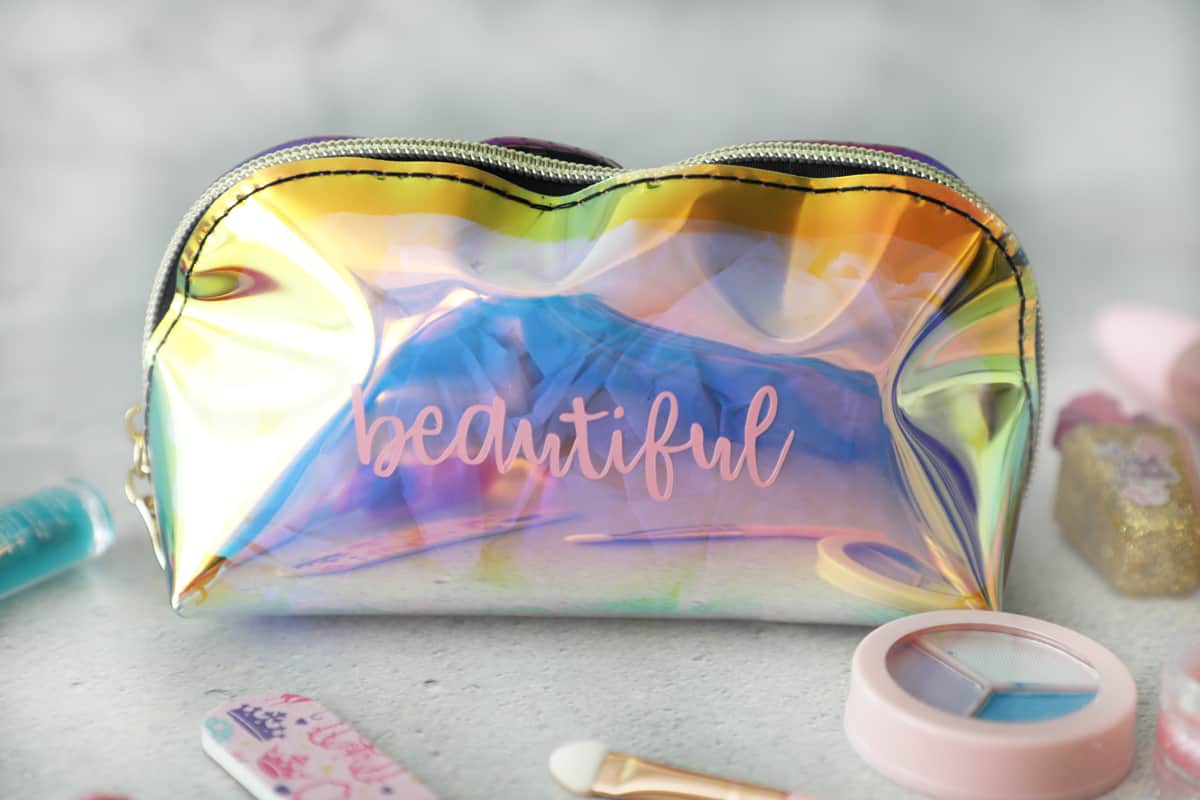
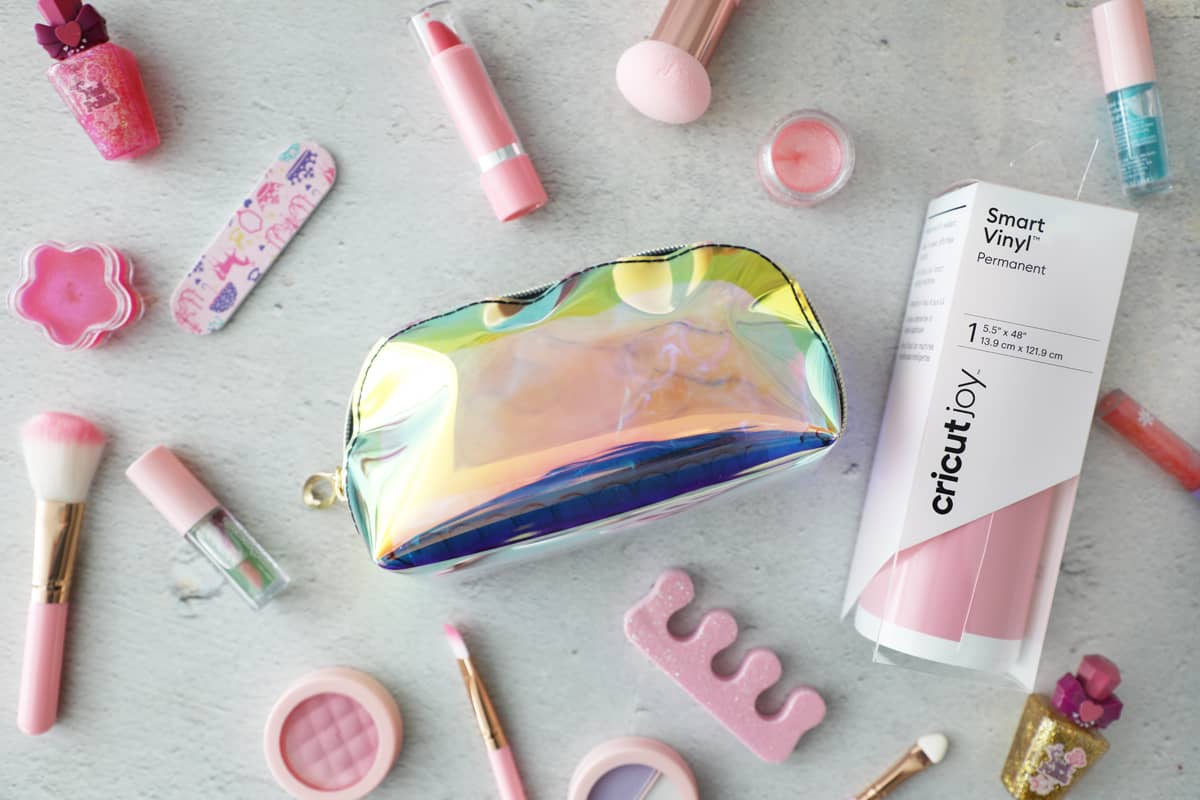
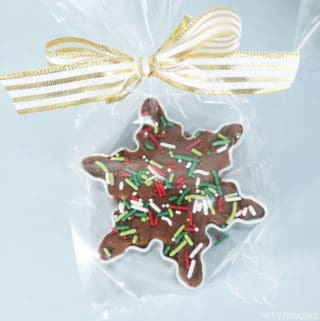
I also added a little portable makeup bag for when she is wanting to bring her makeup on vacation or to a friends house so that it doesn't get lost.
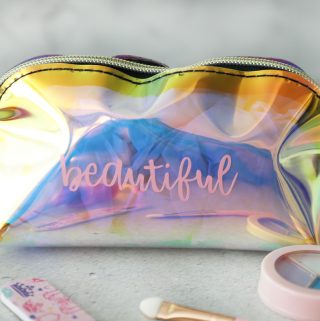
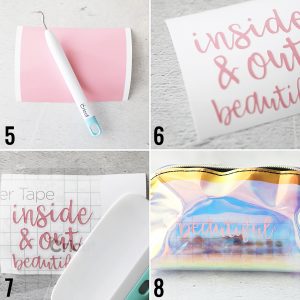
One side of the bag says "beautiful" and the other side says "inside and out." I wanted her to always remember that she is beautiful with or without makeup, and internal beauty is really the most important thing anyway.
Personalized Makeup Caddy
Let's get down to business and show you exactly how easy these things are to make! Let's start with the personalized makeup caddy.
First step, gather your supplies! I used this makeup caddy and this removable smart vinyl! You will also need your Cricut Joy.

Personalized Makeup Caddy
Equipment
Materials
Instructions
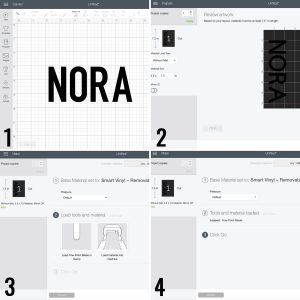
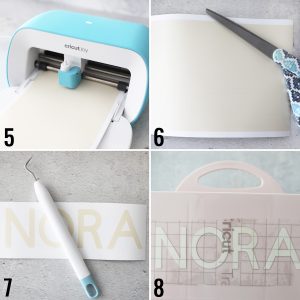
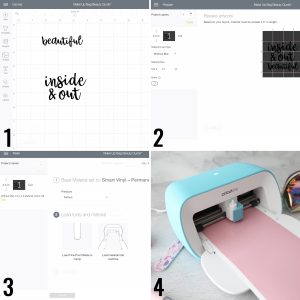
- 1) Open design space and type the name you want to use. I used the font DIN for Nora's name. 2) Make sure your machine is set to Cricut Joy and click "make it." Make sure you have enough vinyl to complete the project. 3) Set your material to smart vinyl and load your vinyl into the machine. 4) Click go.

- 5) Allow your Cricut Joy to cut your design. 6) Unload your vinyl and cut the unused vinyl from your design. 7) Weed excess vinyl away from the name. 8) Apply transfer tape to the name, and then transfer the design onto your makeup caddy!
Notes
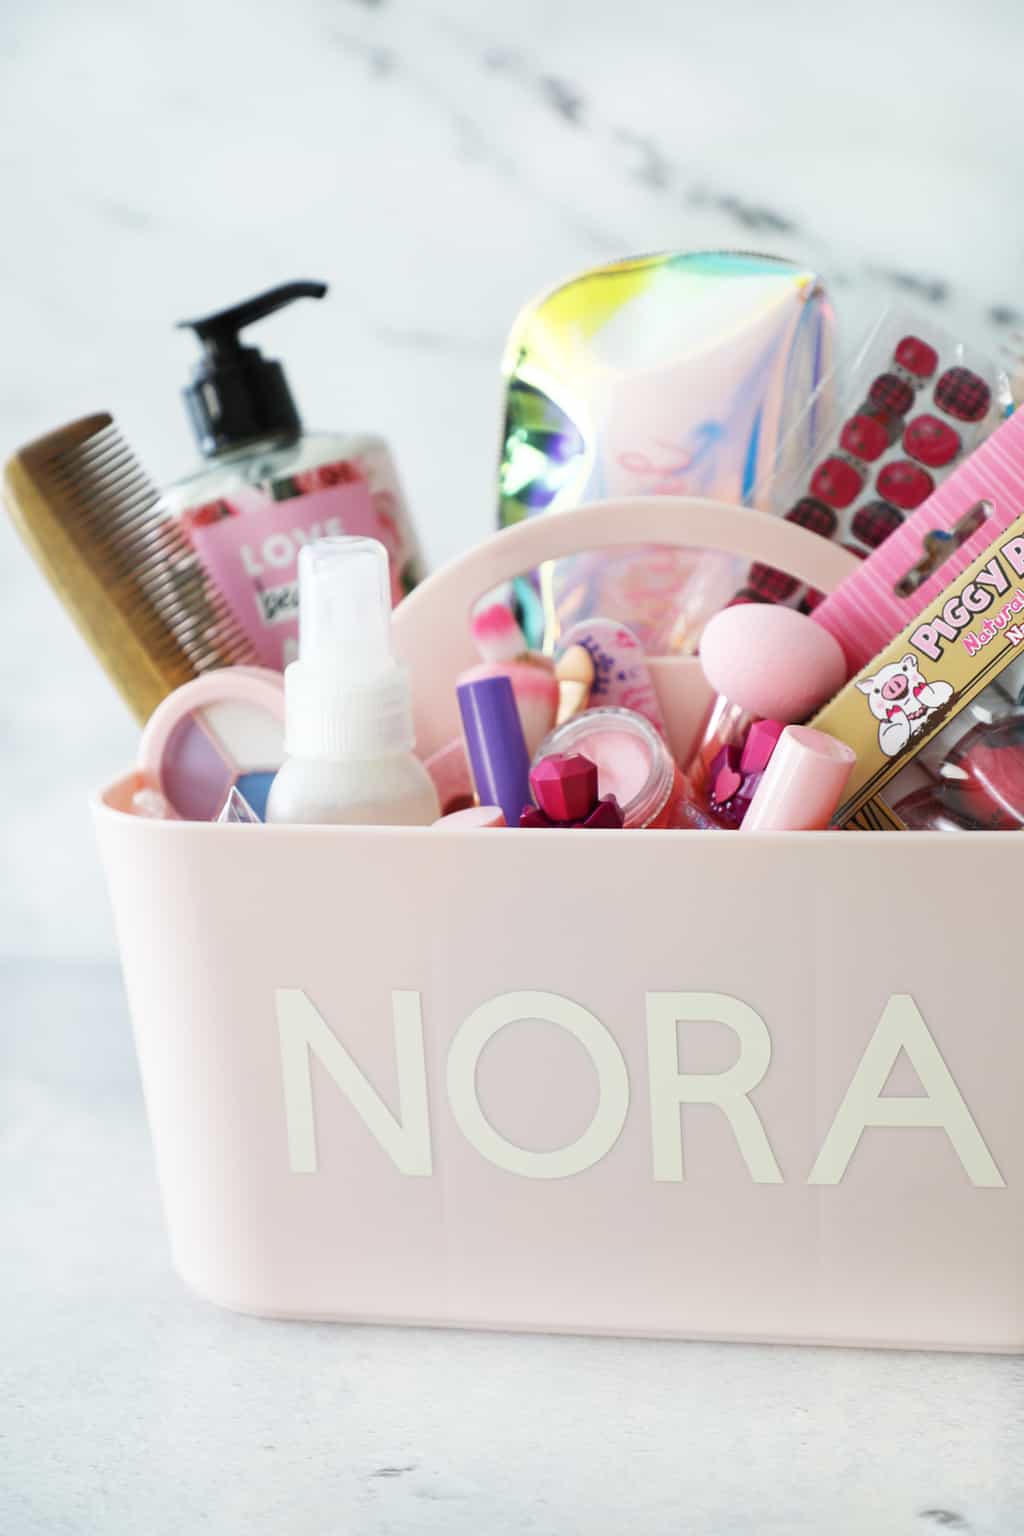
How cute is that?! I love how easy it is to use my Joy for quick projects like this! The mat-less vinyl has been such a game changer for me, I find myself way more likely to do quick simple projects then I used to be.
Personalized Makeup Bag
On to the makeup bag! This cute bag came in a set on Amazon with a lot of the makeup pictured here! It was such a great deal. I decided to use Permanent Smart Vinyl on the bag since it is going to travel around with her, I wanted it to be more durable.
Personalized Makeup Bag
Equipment
Instructions
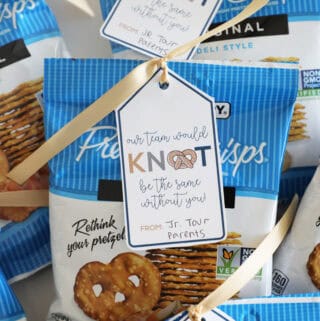
- 1) Create the design you want to cut in design space. I used the font babette and brought the letters a little closer together. See notes below for info on how to do this. Size your design to fit your bag. 2) Make sure you have enough material to cut your design. 3) Set your material to Smart Vinyl Permanent and load your vinyl into your machine. 4) Watch as the Cricut Joy cuts your design.
- 1) Cut your design away from the excess unused vinyl. 2) Weed your design. 3) Apply transfer tape. 4) Apply design to bag.
Notes
Voila! Your adorable personalized makeup bag is complete! I love this one too because it slides right into the makeup caddy so she can store them both together.

What do you think? Will you try personalizing a gift for your loved ones this holiday season?
If you liked this post you might also like this "We're Your Biggest Fans" dance team gift idea.
xo,


This is the cutest idea! My 7-year-old girl would die for it! I'm going to use your tutorial to make one for her! Thanks!