Vintage Pyrex Inspired Plant Pots
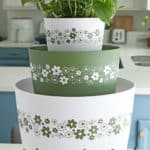
Make some plant pots inspired by vintage Pyrex bowls with a vinyl daisy pattern. Perfect for your mid-century modern decor!

Are you a fellow mid-century modern decor lover? I have been obsessed with it for a long time. It will feel like my house is complete when someone walks in and tells me that my house reminds me of their grandma's house circa 1970. The benefit of this style is that you can find amazing vintage home decor at thrift stores or estate sales if you're willing to search. The hunt is half the fun.
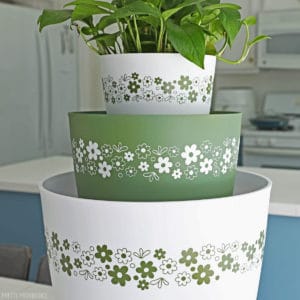
Speaking of Grandmas, my Grandparents had green Pyrex bowls and dishes when I was a kid. I have always loved the daisy pattern on it, and recently it gave me an idea. I wanted to make some plant pots that look like the Vintage Pyrex bowls that I love so much! If you like plants as much as I do, you might want to also check out our Vertical Herb Garden, DIY Plant Markers, or this Pretty Coquette Face Planter. Browse more ideas on our Cricut projects page.
*This post contains affiliate links.
How to Make Vintage Pyrex-Inspired Plant Pots
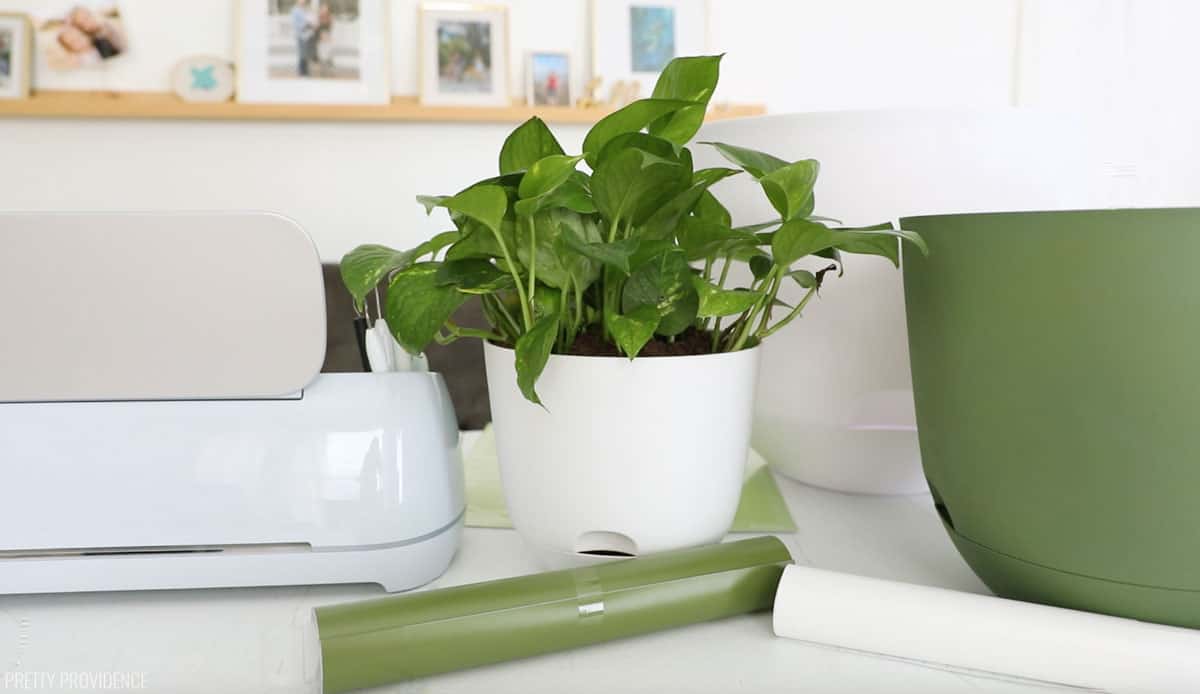
Materials Needed:
- White Planter Pots I used 8 in. 12 in. and 16 in. wide pots
- Rustoleum Spray Paint, Moss Green
- Rustoleum Spray Paint, Eden
- Permanent Vinyl, White
- Vinyl, Olive Green I used Hobby Lobby four-oh-five vinyl, but this vinyl from Amazon looks pretty close too
 First step - find the right vinyl and paint colors.
In my mind, there needed to be three Vintage Pyrex-like planters so that I could have a set, and I decided I wanted two white and one green.
I could not find a plant pot in the right color I wanted - avocado or olive green. For me, getting close to this color was essential. I ended up buying two white plant pots and one mint green one. I spray-painted the mint pot until it was a close match to the olive green vinyl I would be using for the pattern on the white pots.
After visiting many stores, the only vinyl I found in the color I wanted was Hobby Lobby's four-oh-five brand removable vinyl. I would have preferred to use permanent, but I think it will stay on fine since these pots won't be handled very often.
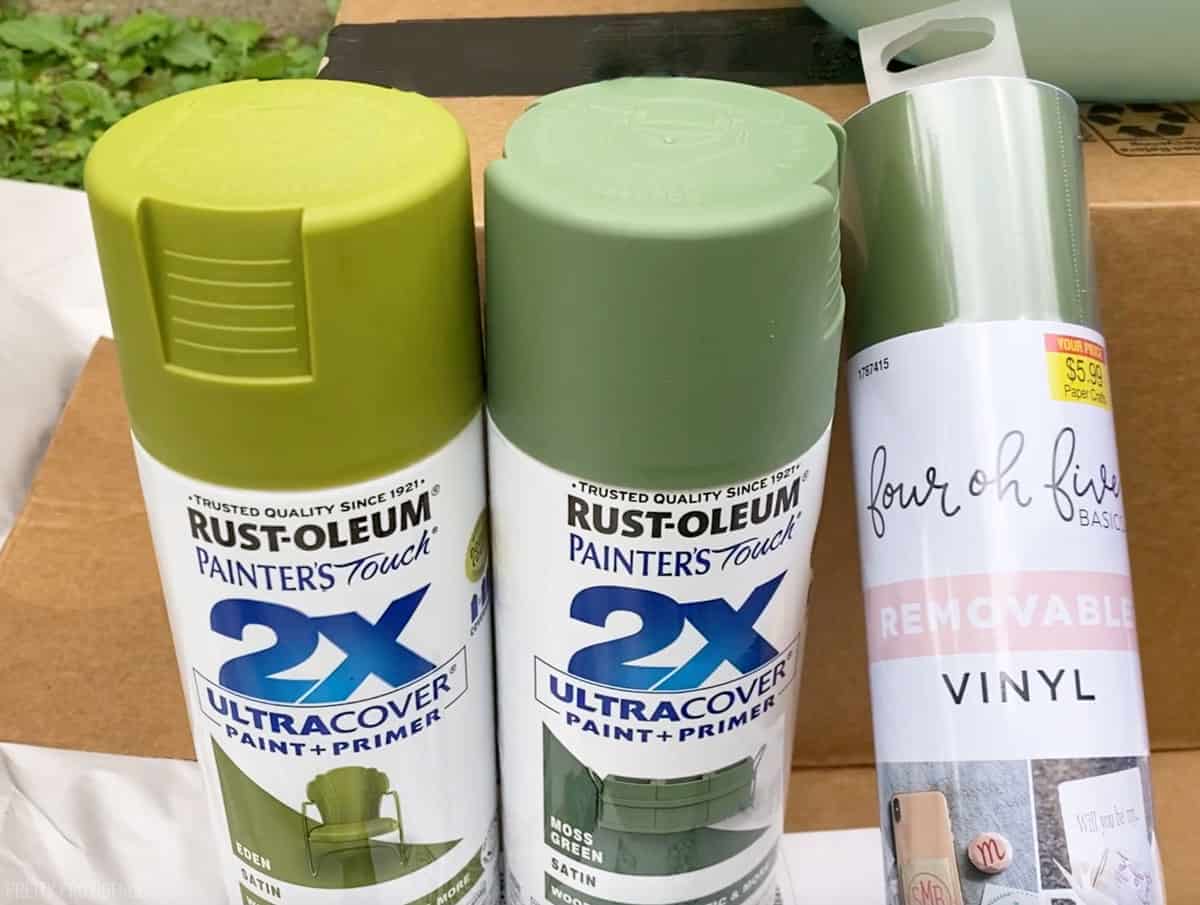 Then, I took my vinyl to the hardware store to match the paint. There wasn't a perfect match, so the two spray paint colors I bought were Eden and Moss Green.
I usually use Rustoleum spray paint, and I read that this 2x Ultracover paint + primer would work well on the plastic my planters are made of (polypropylene.)
If you want to make these, I have linked the exact products I used above, and again in the printable instructions.
How to Spray Paint a Plastic Plant Pot
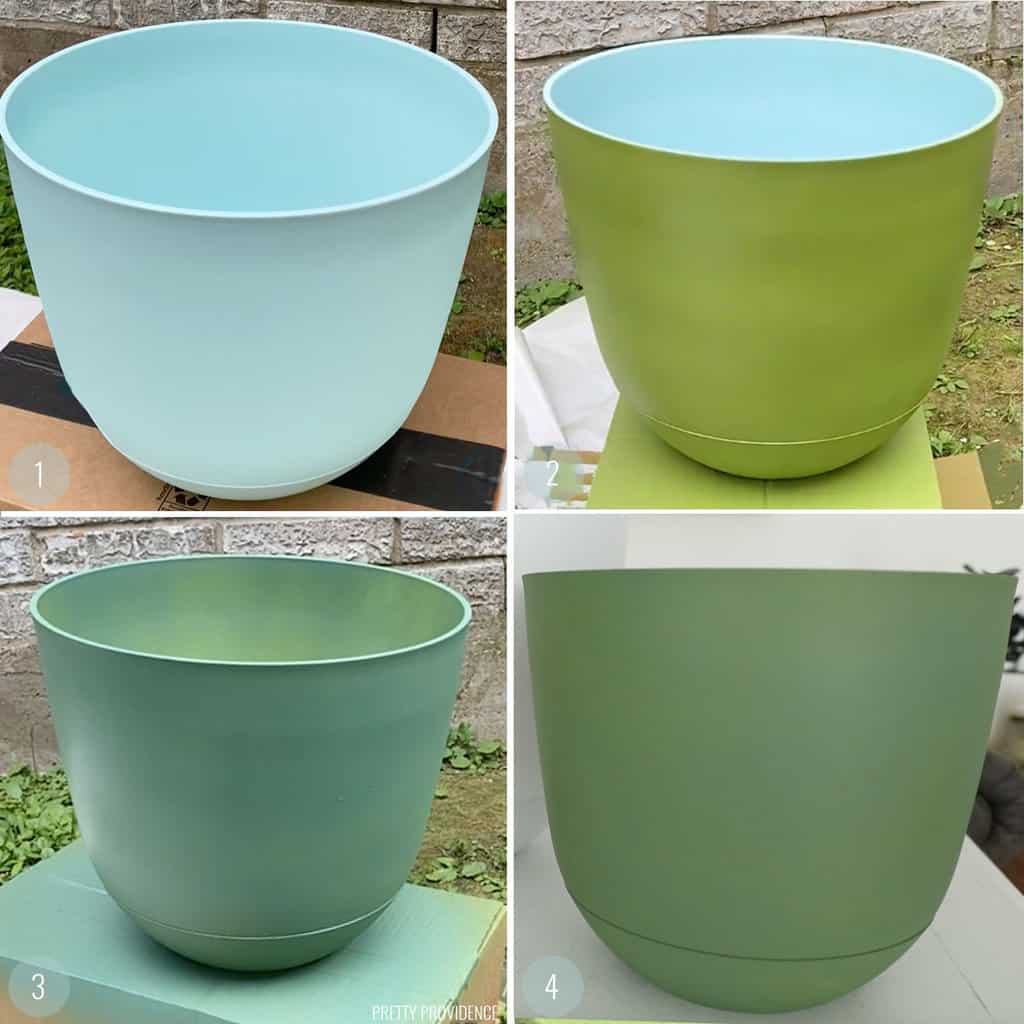
- Thoroughly clean the plastic pot and place it on top of a box or sawhorse so that you can paint it evenly, all the way around.
- Slowly paint on a layer of Eden spray paint. Allow the paint to dry thoroughly before adding the next coat.
- Cover the pot with Moss Green spray paint and allow the paint to dry again.
- Stand a few feet away and very lightly mist the pot again with Eden. Allow to dry for a few hours or overnight before adding vinyl.
How to Cut Daisy Pattern with Vinyl
If you use a Cricut machine you can access my vintage daisy pattern design in Cricut Design Space.
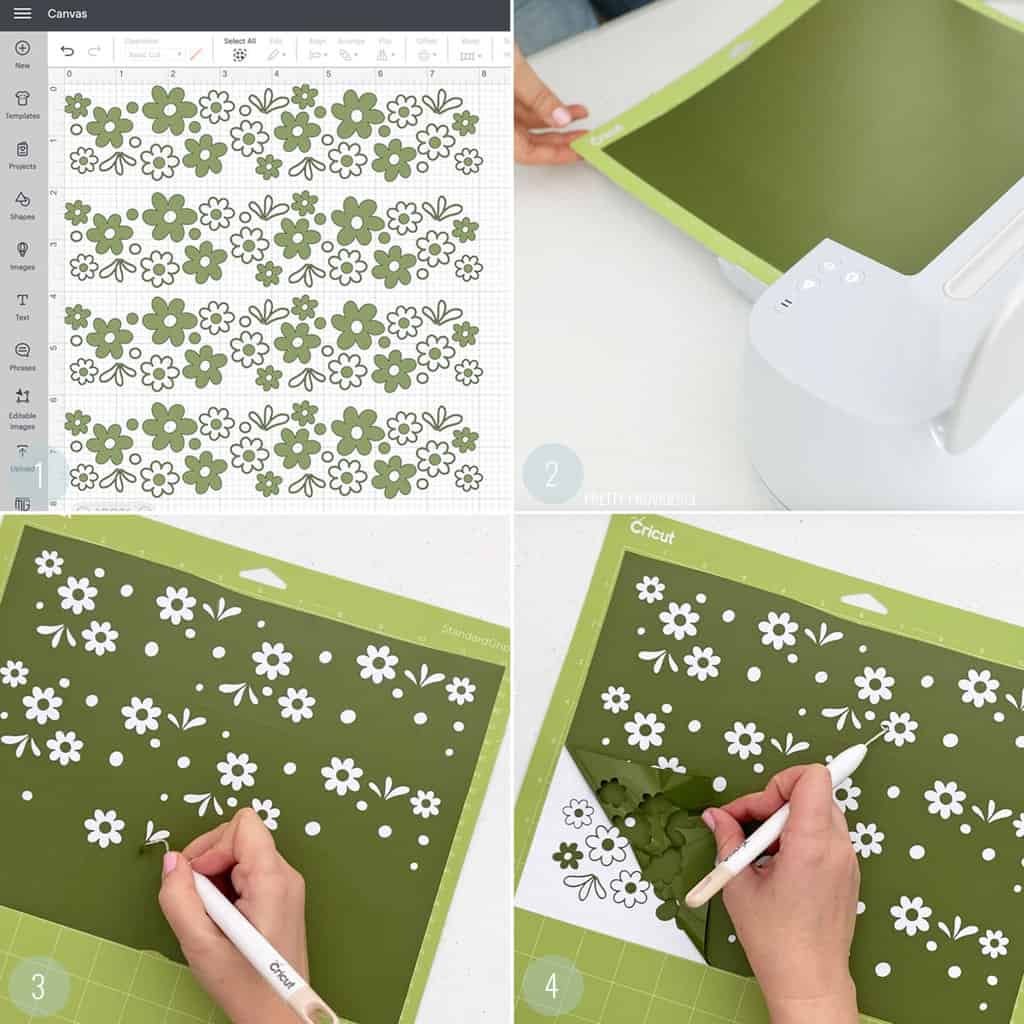
- Open the daisy pattern in Design Space. Re-size the patterns to how you'd like them to be on your planters. (See below for notes on the sizing I used.)
- Put vinyl face-up on your mat and load it into the Cricut machine. Follow the instructions in Design Space to cut the vinyl.
- Weed out the inside pieces of the flowers, dots, etc.
- Peel the outside vinyl off slowly, leaving just the pattern visible.
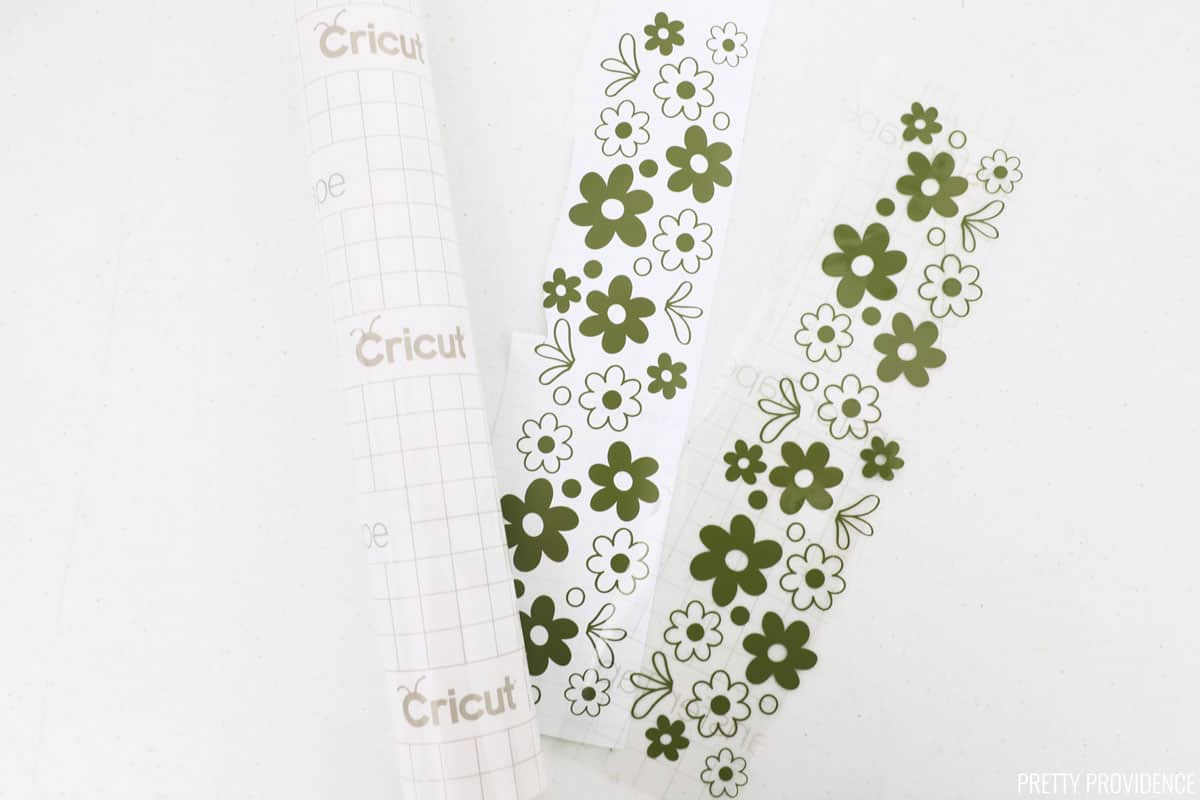
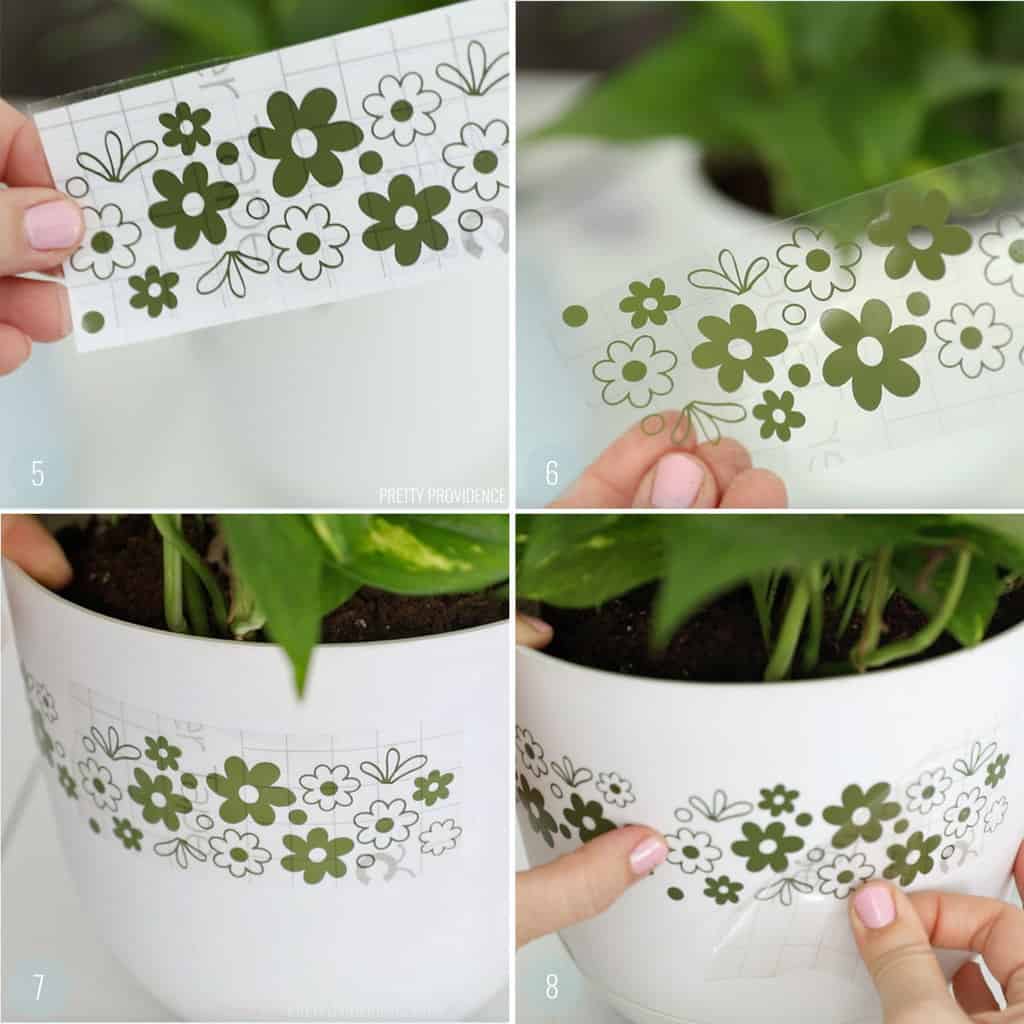
- Cut the vinyl design into strips, then cut transfer tape to fit the strips and press them onto the vinyl designs. Burnish (aka rub) the transfer tape onto the design very well.
- Peel the white backing paper off, slowly separating it and leaving the design stuck to the transfer tape.
- Press the design onto the planter and burnish (aka rub) the outside of the transfer tape to adhere the design to the planter.
- Slowly peel the transfer tape away diagonally. If a piece of the design comes with the transfer tape, press it back down and burnish more. Try peeling the transfer tape away again. Slow and steady wins the race.

Vinyl Craft Pro Tips:
- Using permanent vinyl will work best for this project. It adheres more easily to the plastic.
- The plastic pots are a slicker surface than I usually use for vinyl projects. Go slowly when you are pulling the transfer tape off. You may need to use one hand to pull the tape, and another hand to stick some of the more stubborn pieces onto the planter while you are removing it.
- If you aren't familiar with transfer tape, here is a complete tutorial: How to use Cricut Transfer Tape
If you make these planters inspired by vintage Pyrex, please leave us a comment and a positive review! And we'd love to see a picture on Instagram.
Vintage Pyrex Inspired Plant Pots
Video
Equipment
- 1 Cricut cricut maker, maker 3, explore air 2, 3, or cricut joy
- 1 StandardGrip Mat https://amzn.to/3X8aoYC
- 1 Weeding Tool https://amzn.to/462vYC2
- Pair of Scissors
Materials
- 1 Plant pot white or green
- 1 roll Vinyl green or white (contrast color of your pot)
- 1 roll Transfer tape
- 1 can Rustoleum spray paint Eden
- 1 can Rustoleum spray paint Moss green
Instructions
- Open the daisy pattern in Design Space. Re-size the patterns to how you'd like them to be on your planters. (See below for notes on the sizing I used.)
- Put vinyl face-up on your mat and load it into the Cricut machine. Follow the instructions in Design Space to cut the vinyl.
- Weed out the inside pieces of the flowers, dots, etc.
- Peel the outside vinyl off slowly, leaving just the pattern visible.
- Cut the vinyl design into strips, then cut transfer tape to fit the strips and press them onto the vinyl designs. Burnish (aka rub) the transfer tape onto the design very well.
- Peel the white backing paper off, slowly separating it and leaving the design stuck to the transfer tape.
- Press the design onto the planter and burnish (aka rub) the outside of the transfer tape to adhere the design to the planter.
- Slowly peel the transfer tape away diagonally. If a piece of the design comes with the transfer tape, press it back down and burnish more. Try peeling the transfer tape away again. Slow and steady wins the race.
Notes
- Using permanent vinyl will work best for this project. It adheres more easily to the plastic.
- The plastic pots are a slicker surface than I usually use for vinyl projects. Go slowly when you are pulling the transfer tape off. You may need to use one hand to pull the tape, and another hand to stick some of the more stubborn pieces onto the planter while you are removing it.
- If you aren't familiar with transfer tape, here is a complete tutorial: How to use Cricut Transfer Tape


I love just about everything you share but I don't have a cricut. So many sites/blogs have projects that require one, and I'd love to see options. Can this process be stenciled/can you suggest or offer a stencil that's similar?
Thank you!
Hey Laura!
It might be possible to stencil this. We just love our Cricut machines, and vinyl is my preferred craft supply. I can't recommend stencils since I don't personally use them. I have done freezer paper stenciling on t-shirts though. (Here is the link: https://prettyprovidence.com/diy-freezer-paper-stencil-shirt/ ) If you do make something similar to this with a stencil, I would LOVE to see it!