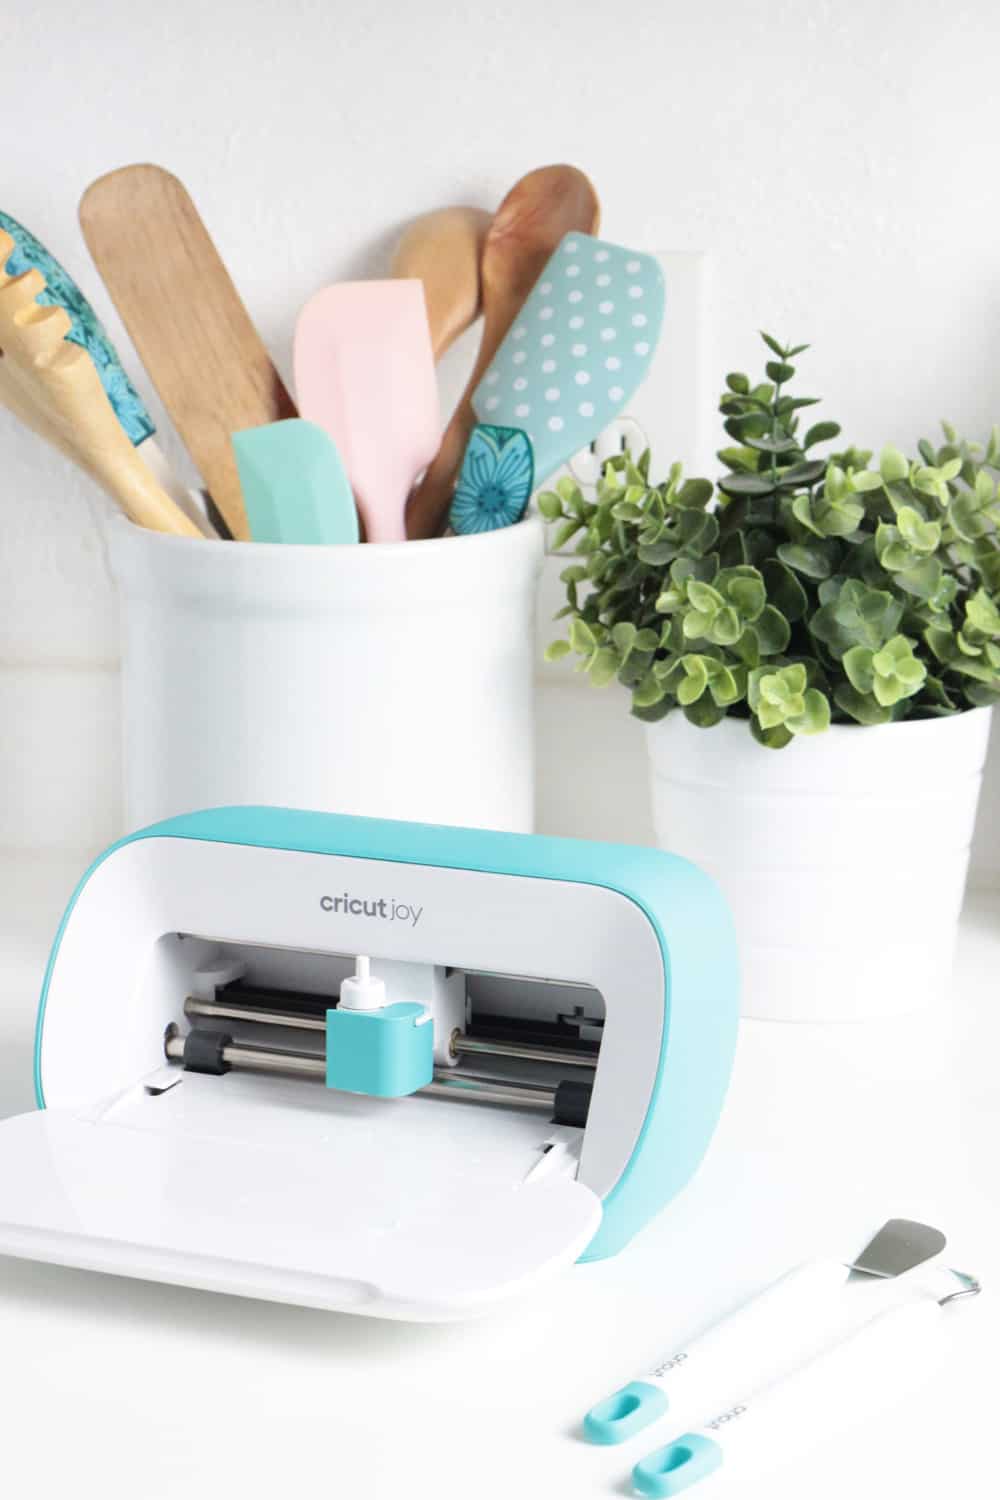
Everything you need to know about Cricut Joy! This small but mighty Cricut machine is great for cutting all kinds of materials and making fun projects!

Friends! Today is an amazing day because we finally get to share all our excitement over Cricut Joy with you! Believe me when I say, this little machine is a powerhouse! I can already tell it is going to be my new favorite machine... why? Let me tell you all about it!
Which Cricut Machine Should I Buy?
First though, if you are on the fence about buying a machine, go contrast this review of Cricut Joy with our Maker Review, or our Explore Air 2 Review. Or you can find all our Cricut Projects here! As you can see we are major Cricut fans, haha.
The Cricut Joy is actually the perfect companion machine if you are already a Cricut lover! I have already used it multiple times alongside my other machines when making bigger projects! Plus, it is nice to have a machine that is so easy to bring around with me to work events!
After the review I will give you a quick tutorial of this personalized sticker tumbler I made using Cricut Joy!
Okay, let's get down to business.
Everything You Need To Know About Cricut Joy
Mat-less Cutting
- With the release of Cricut Joy will come a whole new line of smart products that are able to be cut without a mat! Smart Iron-On, Smart Label Paper and Smart Vinyl.
Long Cuts
- Cricut Joy can cut repeated shapes up to 20 feet in certain colors, and repeated images up to 4.5 inches wide and up to 4 feet long! Making larger repetitive projects (like our tree wallpaper) so easy now!
New Card Mats
- I have never been a Cricut card maker because it has always felt too time intensive for me... not anymore! Cricut Joy comes with a new Cricut Joy card mat and Cricut Joy Card Sets that make cutting cards on the go super fast and easy.
Cricut Joy Can Draw and Write
- This machine comes with a whole line of pens and markers for all your written needs! Plus, the writable vinyl makes professional looking labels quick and easy.
Small and Compact
- The size of Cricut Joy is one of it's most compelling qualities in our opinion. It is perfect for apartment dwellers, teens, people who would like to bring their machines with them to their classrooms, and really anyone who likes things easy and awesome!
Price Point
- As frugal people we totally get how tough it can be to spend your hard earned money on a non-essential item. Cricut gets that too and wants everyone to have access to their incredible machine system. Plus, at this price Cricut Joy is the perfect companion machine to the Maker or Explore Air 2. Making a pendant banner? Cricut Joy can cut the vinyl letters while Maker cuts the wooden pendants!
Cutting Materials
- Don't let the small size fool you, Cricut Joy can cut so many materials!
Have a huge stock pile of vinyl and hesitant to buy more. You can use the normal size vinyl it with the cricut joy! Just cut it to fit the machine mats and you are ready to roll!
Create Anywhere
- The mobility of Cricut Joy is my favorite feature! I even took it with me on a work trip last week in it's cute Cricut Joy Tote. Now it is easier than ever to bring your cutting machines to work, to volunteer in your kids classes, on vacation, to girls night-- literally anywhere you may need a cutting tool.
Pretty amazing right?! You guys are going to LOVE this machine.
Now are you ready to see a quick tutorial of the first project I made with my new fave machine??
Personalized Sticker Tumbler
Gather Your Materials
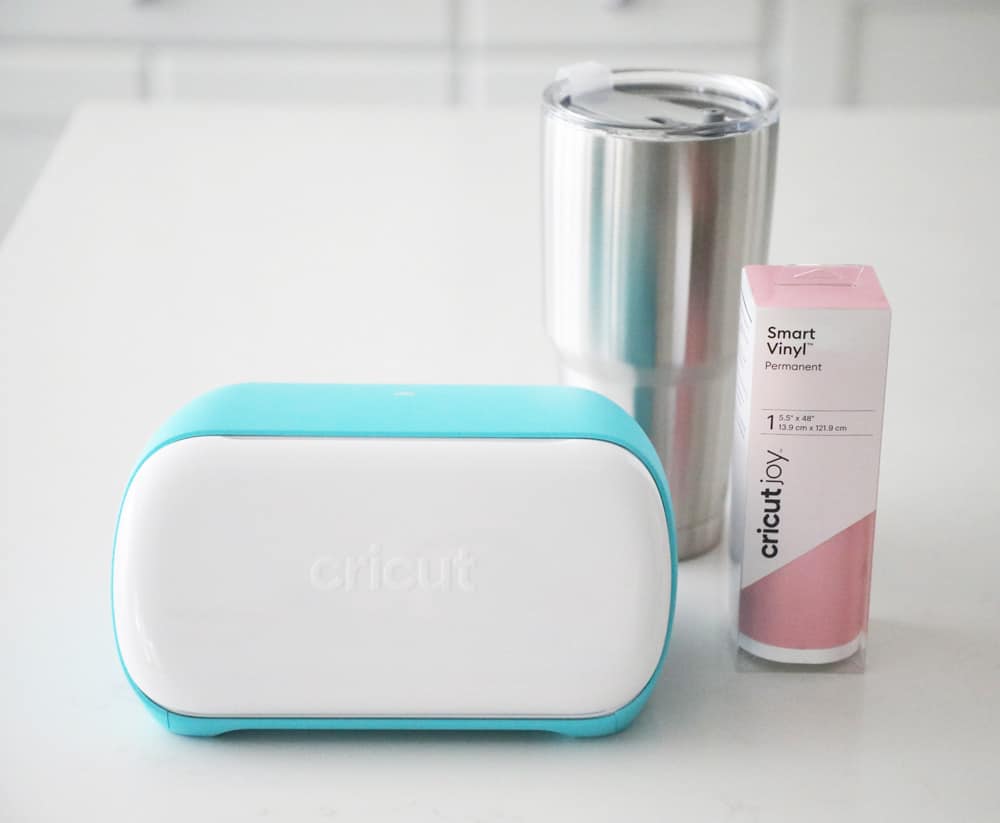
All you need to make these cute stickers is the Cricut Joy, any color of permanent Smart Vinyl, and a plain tumbler or hydro flask! Oh, and a computer to design your stickers on!
Design Your Stickers
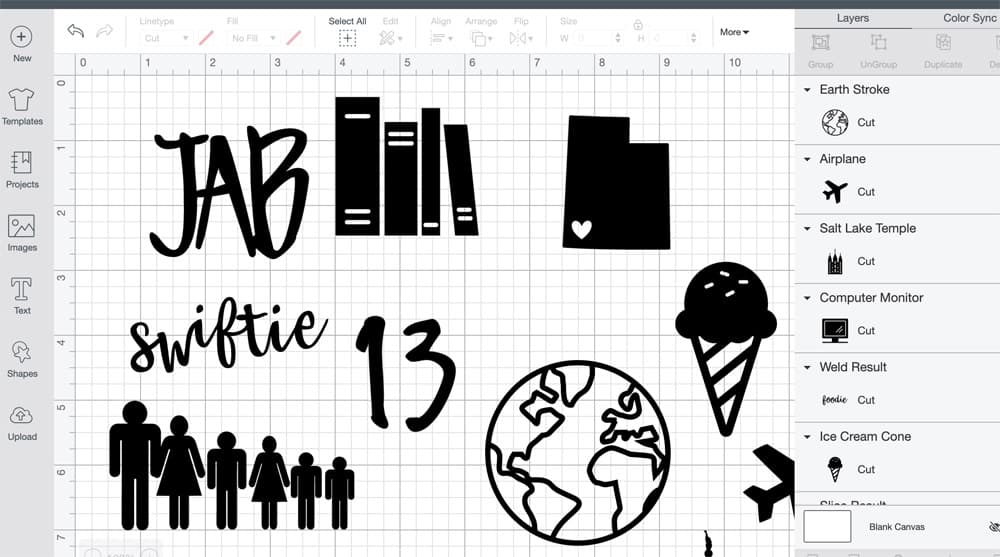
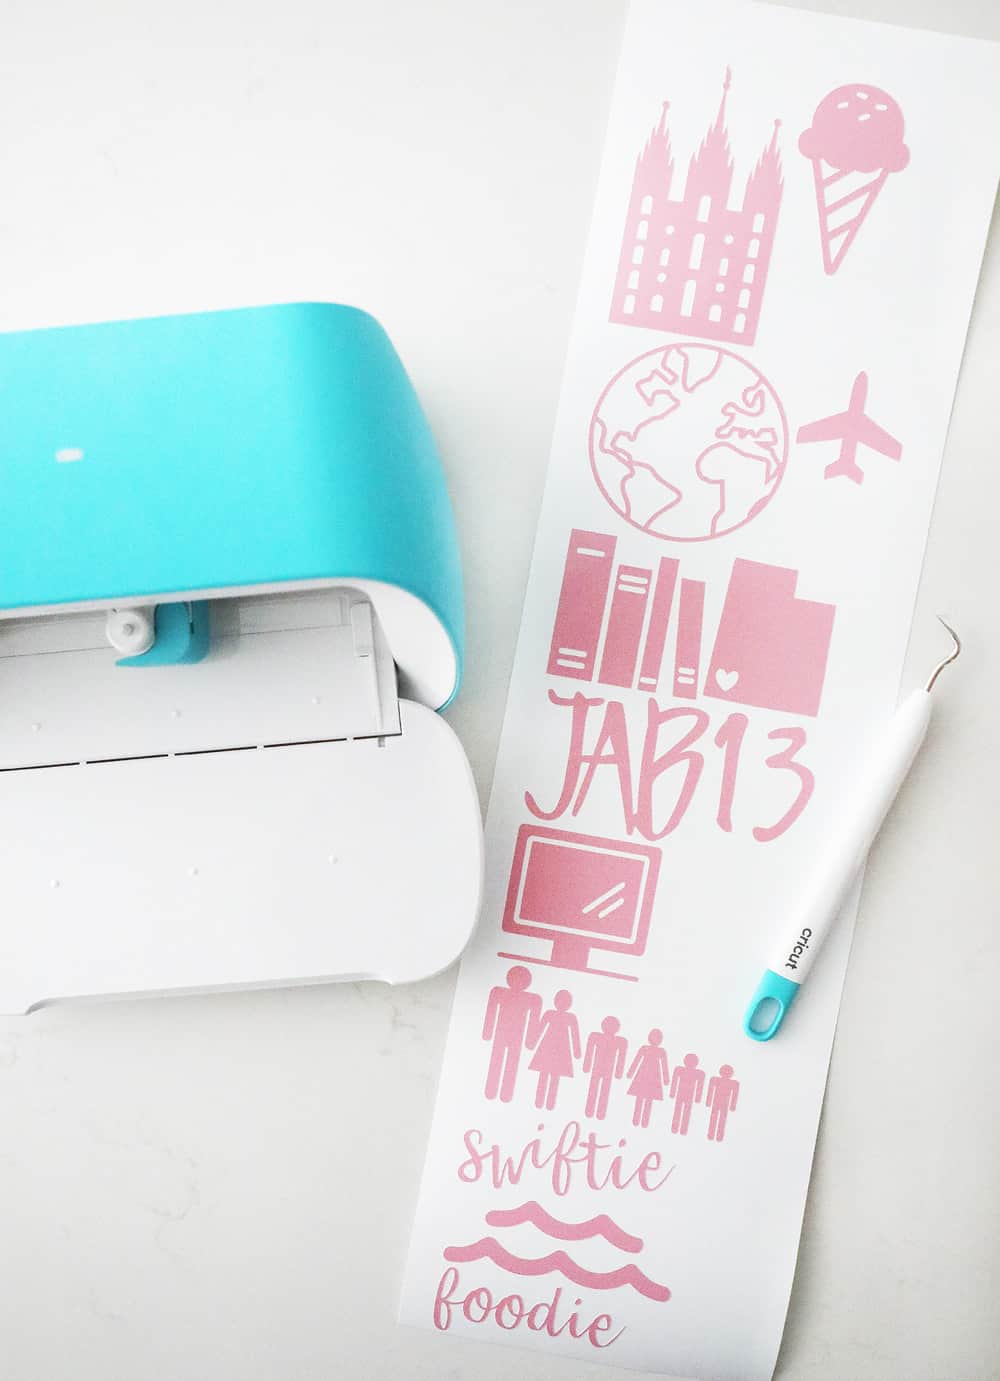
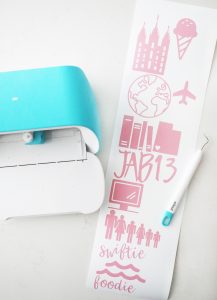
I wanted my tumbler to be super personal to me, so I made a mental list of the things that are the most important to me. Then, all I had to do was teach the design space images for pictures that corresponded with those things. I also typed up a few words to mix things up and add interest (the font I used was babette).
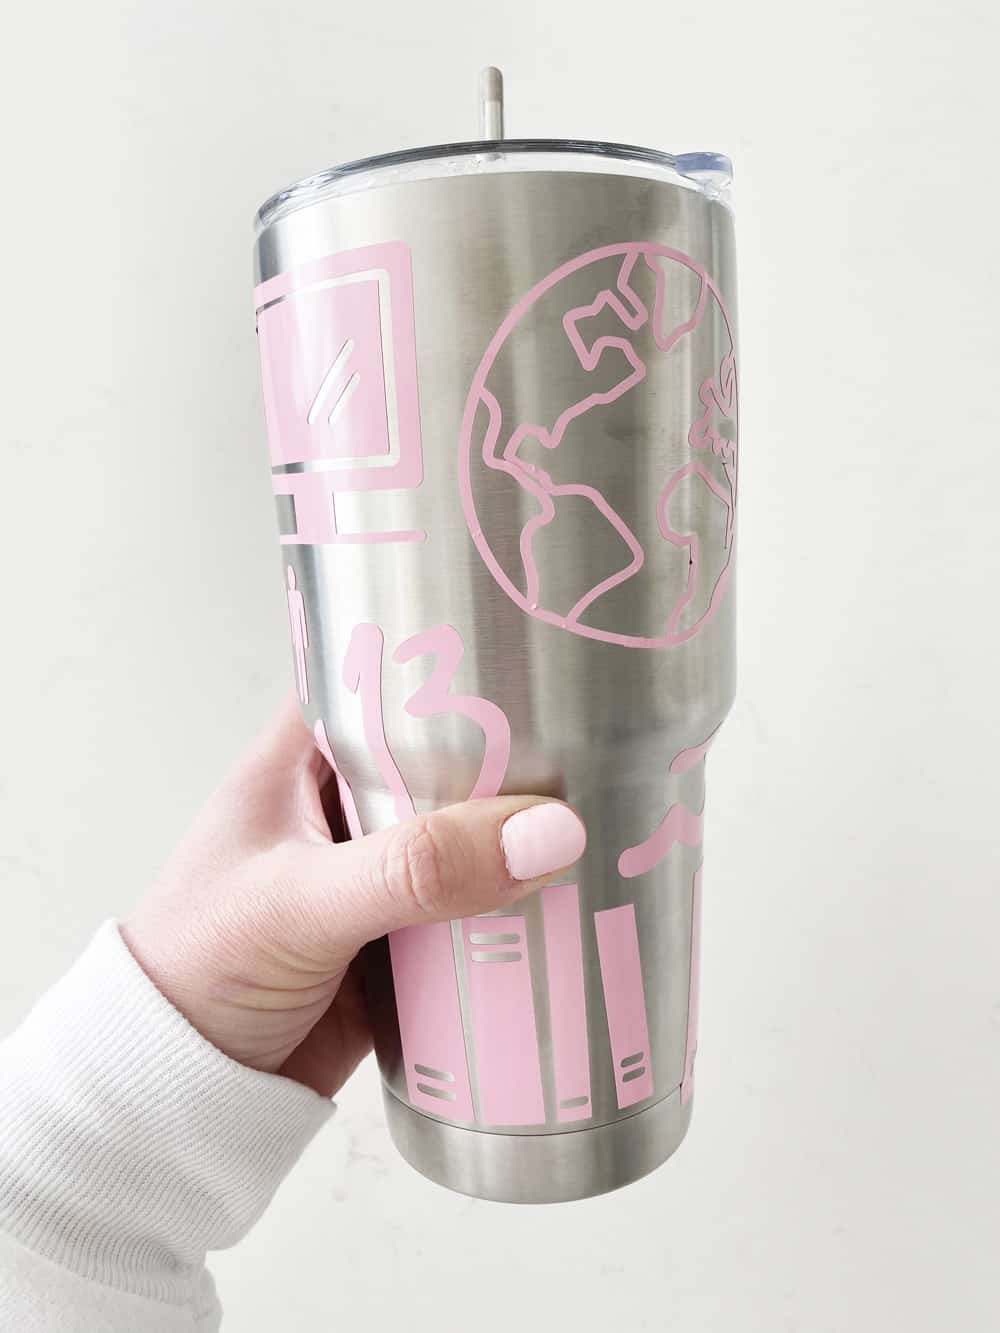
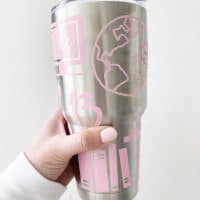
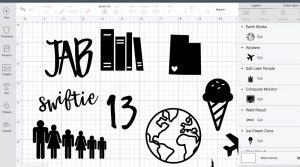
Above you can see a few of my images. The ones shown here are my initials, books because I love to read, my home state with a heart where my city is, ice cream, my lucky number, my family, a T-Swift tribute and a world to represent my love of travel.
Do whatever speaks to you-- and have fun with it!
Begin Making Your Stickers
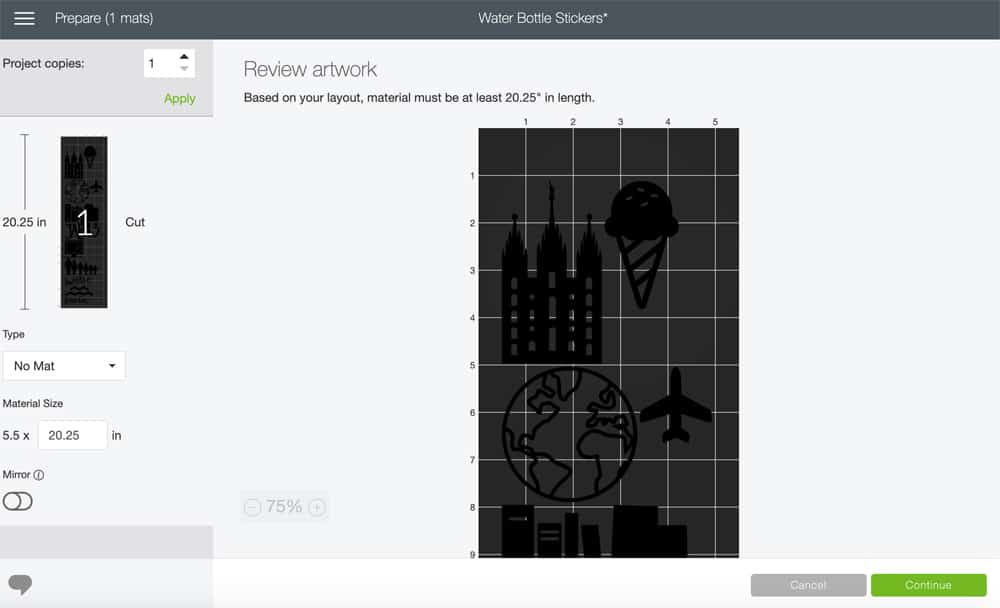
When you are done designing stickers click "make it" and it will take you to this screen. Here you can make sure all your images our the same color (cutting on one roll) and that you have enough material to cut all your designs. Make sure under Type "no mat" is selected. After this click "continue" and proceed to cut your stickers! I always like to cut on fast mode to save time!
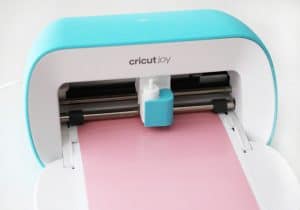
Load Your Material
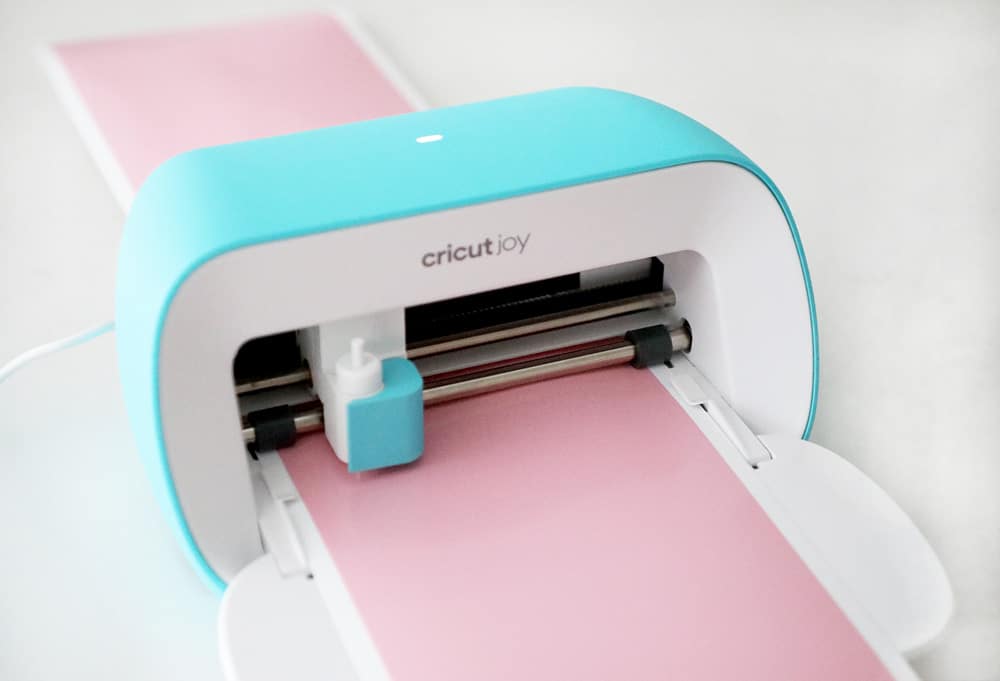
You will notice that on Cricut Joy there is no start button and no load button, making things even easier! Simply place your Smart Vinyl within the guidelines and this baby will load herself!
Cut Your Design
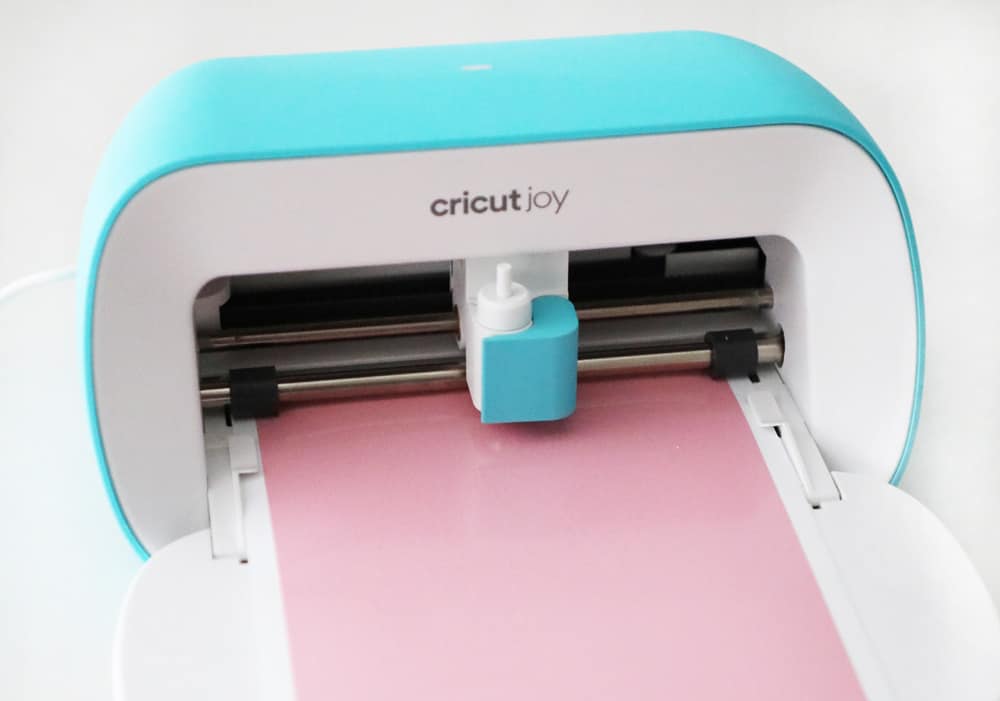
Once she is loaded go ahead at cut your design! I like to unload my dishwasher while Cricut Joy does the work at this point ;).
Weed Your Designs
Once your stickers are cut, use a weeding tool to weed excess vinyl from your designs.
Place Your Stickers
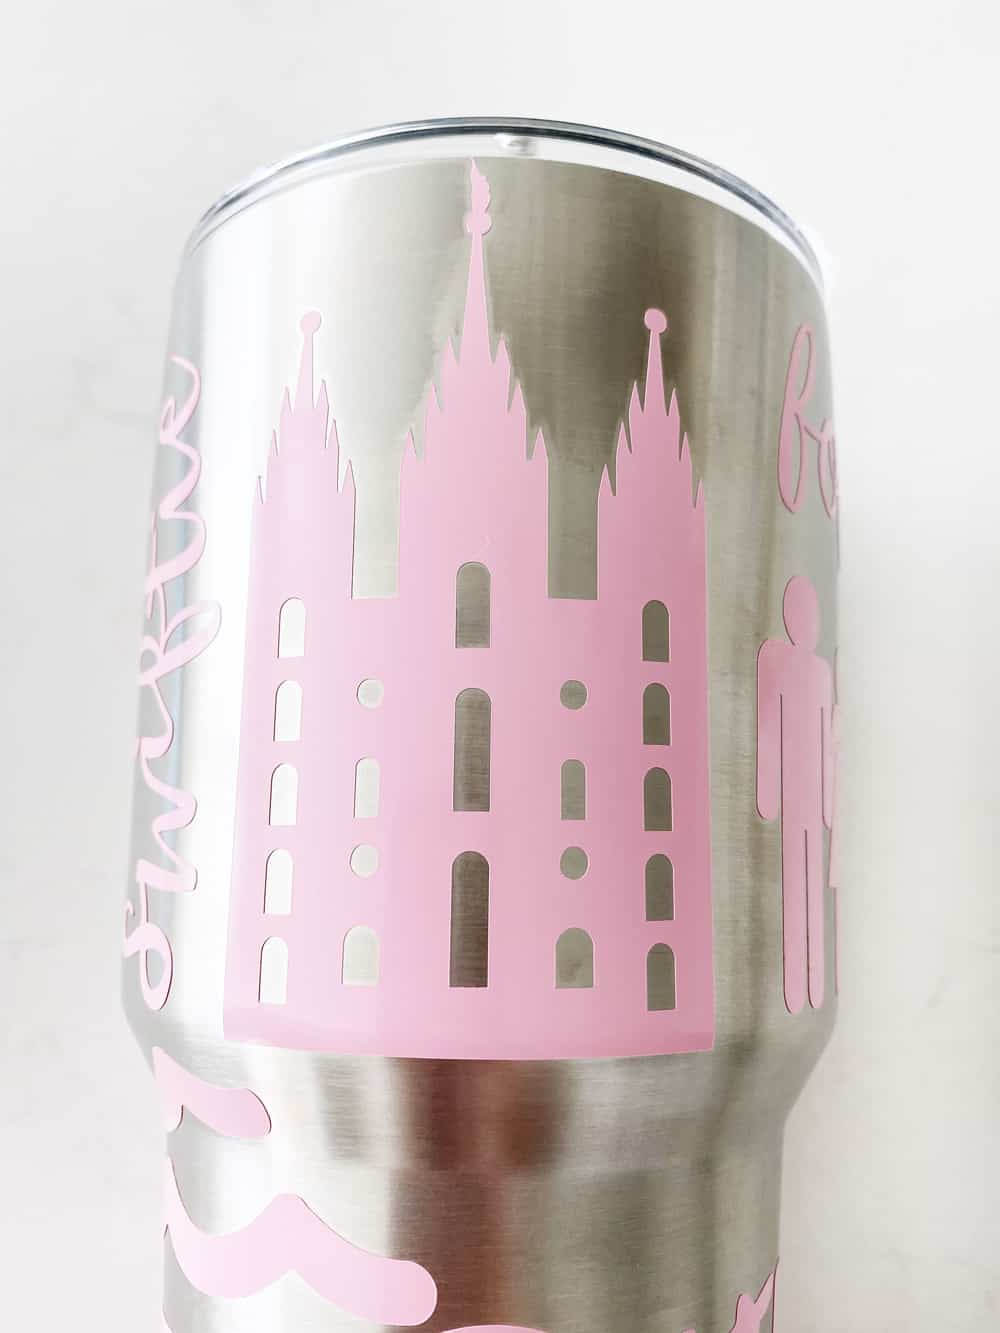
Now comes the fun part! Placing your designs on your tumbler! I peeled and placed them one at a time, starting with my biggest stickers and moving down from there. No transfer tape needed!
Enjoy Your Personalized Tumbler
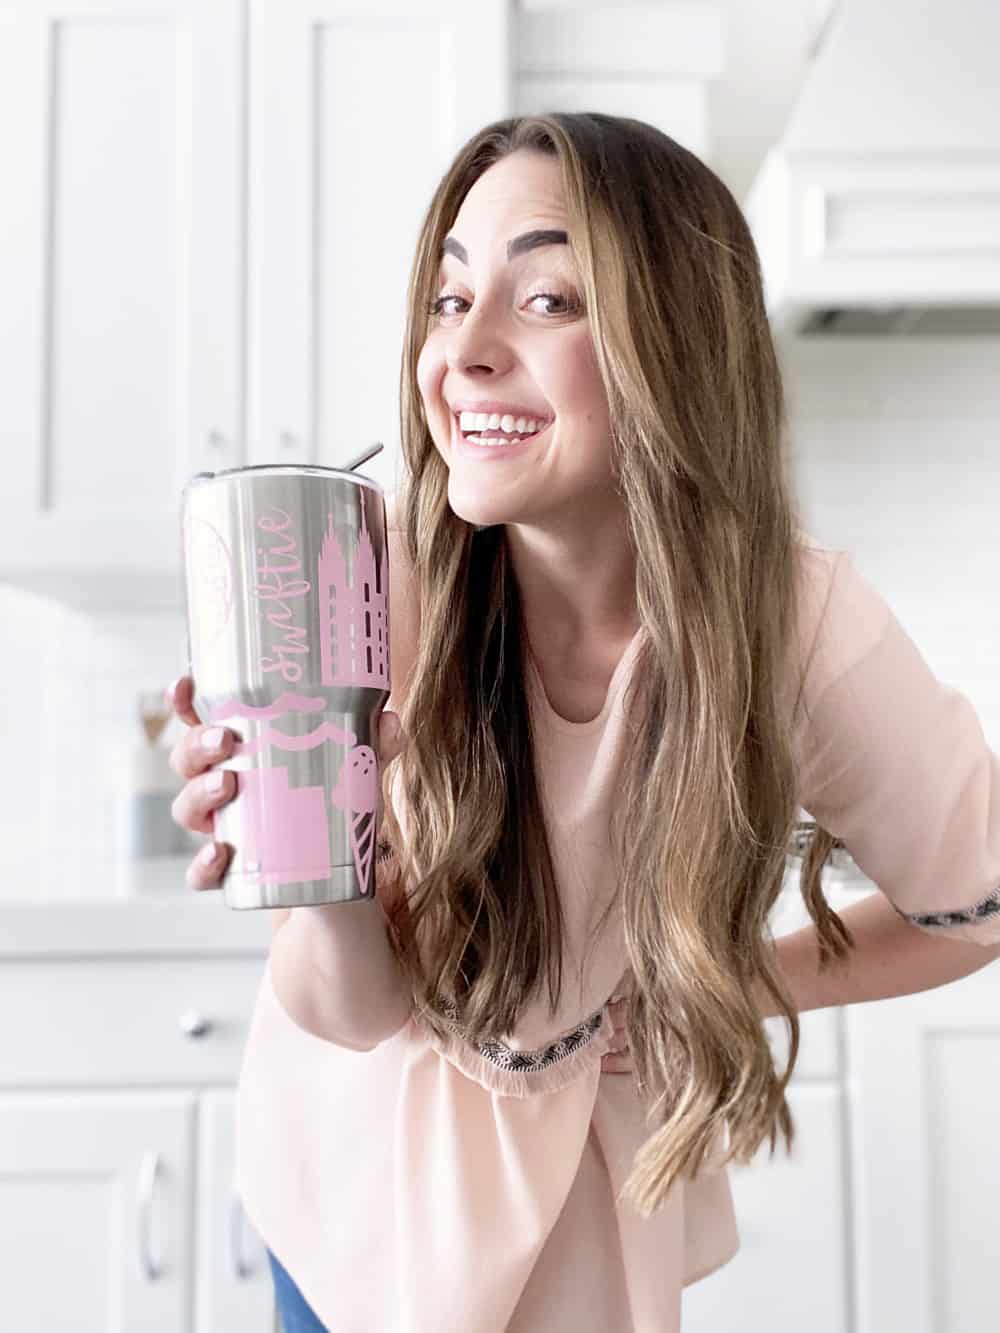
I'm not even kidding this cup makes me happy every time I see it! Plus, I've already had several friends ask where I got it! These would make such a fun gift too!
Personalized Sticker Tumbler
Video
Equipment
Materials
- 1 Roll Smart Vinyl Permanent
- Weeding Tool
- Tumbler or Hydro Flask
Instructions
- Gather your materials. All you need to make these cute stickers is the Cricut Joy, any color of permanent Smart Vinyl, and a plain tumbler or hydro flask! Oh, and a computer to design your stickers on!

- Design your stickers. I wanted my tumbler to be super personal to me, so I made a mental list of the things that are the most important to me. Then, all I had to do was teach the design space images for pictures that corresponded with those things. I also typed up a few words to mix things up and add interest (the font I used was babette). Above you can see a few of my images. The ones shown here are my initials, books because I love to read, my home state with a heart where my city is, ice cream, my lucky number, my family, a T-Swift tribute and a world to represent my love of travel. Do whatever speaks to you-- and have fun with it!

- Begin making your design. When you are done designing stickers click "make it" and it will take you to this screen. Here you can make sure all your images our the same color (cutting on one roll) and that you have enough material to cut all your designs. Make sure under Type "no mat" is selected. After this click "continue" and proceed to cut your stickers! I always like to cut on fast mode to save time!

- Load your material. You will notice that on Cricut Joy there is no start button and no load button, making things even easier! Simply place your Smart Vinyl within the guidelines and this baby will load herself!

- Cut your design. Once she is loaded go ahead at cut your design! I like to unload my dishwasher while Joy does the work at this point ;).

- Weed your design. Once your stickers are cut, use a weeding tool to weed excess vinyl from your designs.

- Place your stickers. Now comes the fun part! Placing your designs on your tumbler! I peeled and placed them one at a time, starting with my biggest stickers and moving down from there. No transfer tape needed! ENJOY!


Notes
- The permanent vinyl is dishwasher safe and I have bottles I have washed in the dishwasher multiple times with great results! That being said, many tumblers are not dishwasher recommended so make sure to read the label on your cup!
- If you have small words or other things that you worry will be hard to apply by eye, use transfer tape.
The best part about it is that the whole project (design included) took me less than a half hour, which is the simple beauty of Cricut Joy!
Do you have any questions or things that I missed? If so, please leave them in the comments and I will get back to you ASAP!
xo,


Leave a Reply