Cricut Explore Air 2 Review
The Cricut Explore Air 2 is an incredibly powerful crafting tool! It cuts and writes up to 2x faster then previous Cricut models and its powers for creation are endless. Read on for my five favorite things about Cricut Explore Air 2!
You guys know how much we love Cricut, and all the time I get asked which machine someone should buy! I have a Cricut Maker (read my Maker review) and a Cricut Explore Air 2, and the honest truth is I love them both.
Cricut Explore Air 2
Because I've talked a lot about my Maker lately I thought it was high time I gave my Explore Air 2 some love on here. There are so many incredible things about this machine! Today i'm going to share my top five favorite things about the Air 2 in hopes that it educates some of you about this machine, and of course share a fun tutorial for some fall-themed pillow covers.
Let's start with my five and end with the tutorial!
1. Cutting Speed and Variety of Cutting Materials
Not only does the Cricut Explore Air 2 cut and write much faster than previous Cricut models, it also cuts over 100 different materials! From vinyl to iron on to cardstock to paper to cork or bonded fabric, there are endless ways to get your craft on with the Explore Air 2.
Also, thanks to Cricut Design Space you can design projects anywhere you are-- whether you're on your phone, laptop or iPad. You aren't a designer? No worries! Cricut Design Space has thousands of fonts, images and even ready to make projects that will guide you step by step!
Not only is this machine incredibly capable, it is also incredibly user friendly.
2. Making T Shirts
If you were to ask me "what do you use your Explore Air 2 for the most?" My answer would undoubtedly be making T shirts! From our Disney Cruise shirts, to our Men's T shirt collection, to our Mean Girls Inspired T-shirt, the possibilities are literally endless!
Whether we are going on vacation, or to a concert, or celebrating a birthday making shirts has become a family tradition for us that we love and cherish! T-shirts can make great gifts, too. For instance, this awesome Grandma Shirt!
3. Getting Organized

After making T-shirts, my favorite thing to do with my Explore Air 2 is get organized! When I did my awesome pantry makeover a few months ago (it still may be my favorite room in my house, haha) I had both my Maker and my Explore Air 2 cutting at once, and both machines produced amazing cuts.
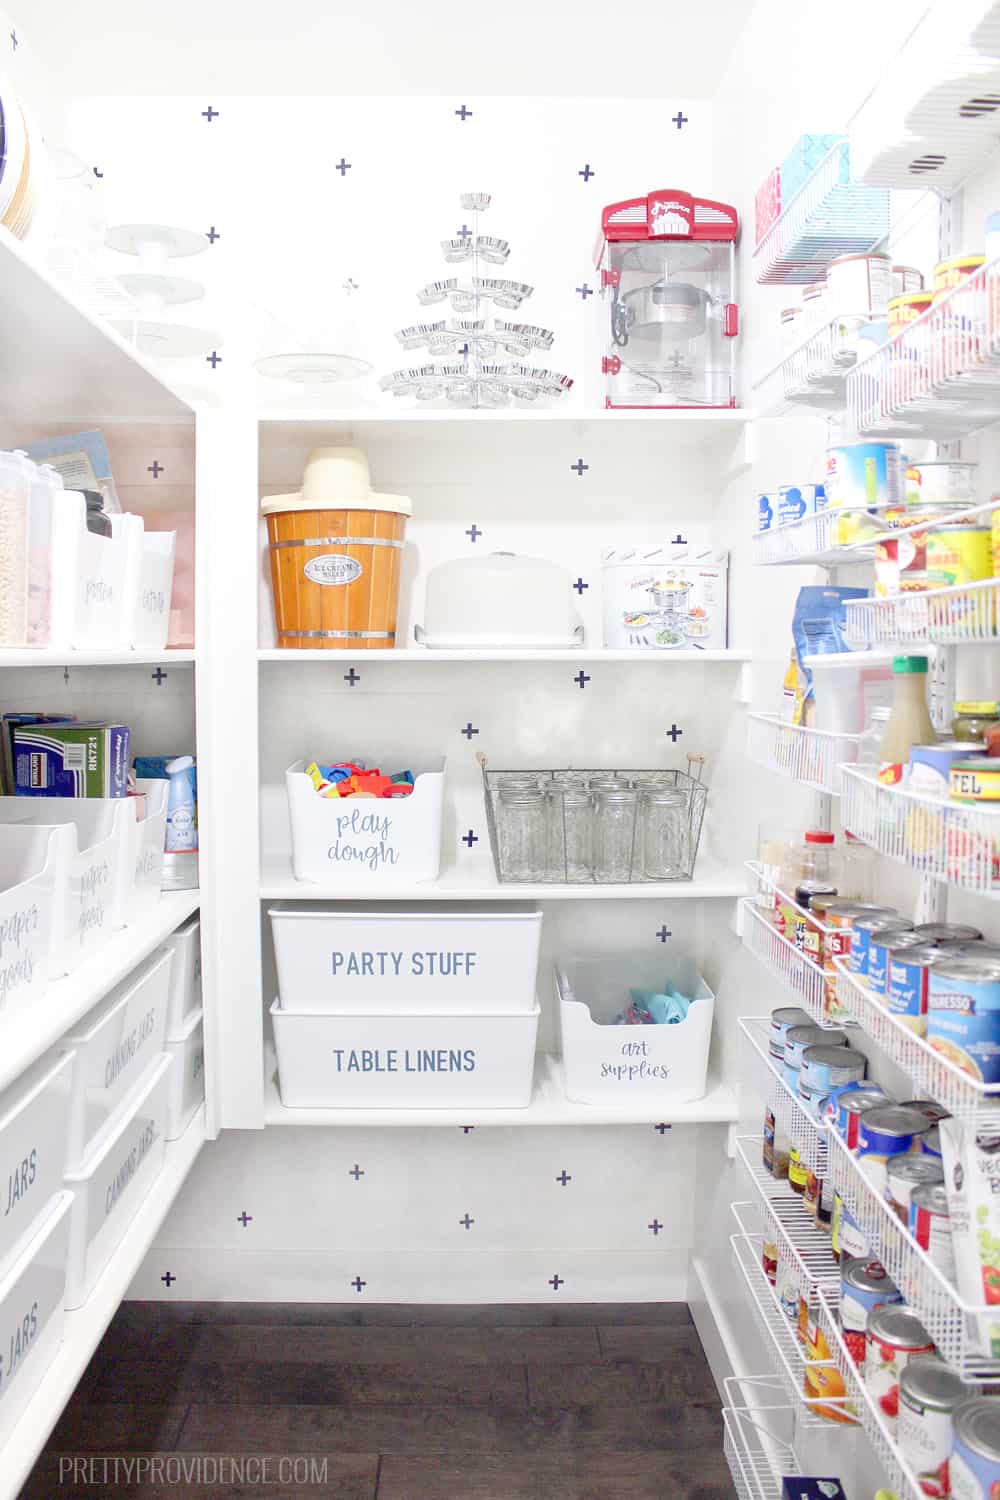
If you like organization ideas, you should also check out Sarah's under the stairs craft storage closet and her personalized backpacks and lunchboxes that she personalized using her Cricut!
4. The Price Tag and Color Options
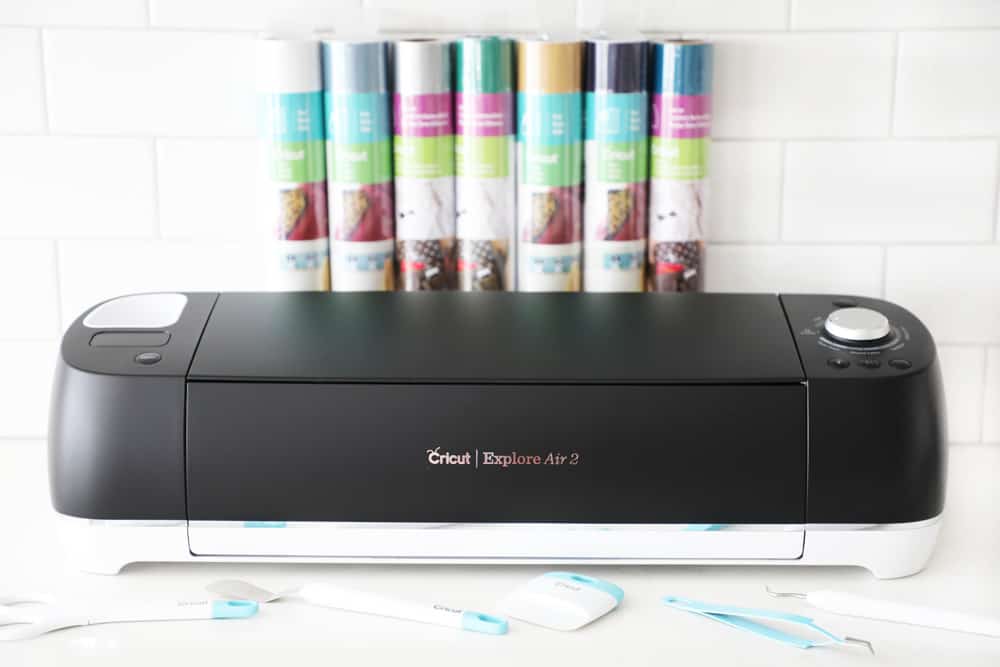
Even though the Cricut Maker is amazing and can do basically anything, I really appreciate that Cricut has another incredible option for craft lovers who may not be able to afford the Maker right off the bat. Buying the Explore Air 2 instead can save you around $150, which isn't a small chunk of change!
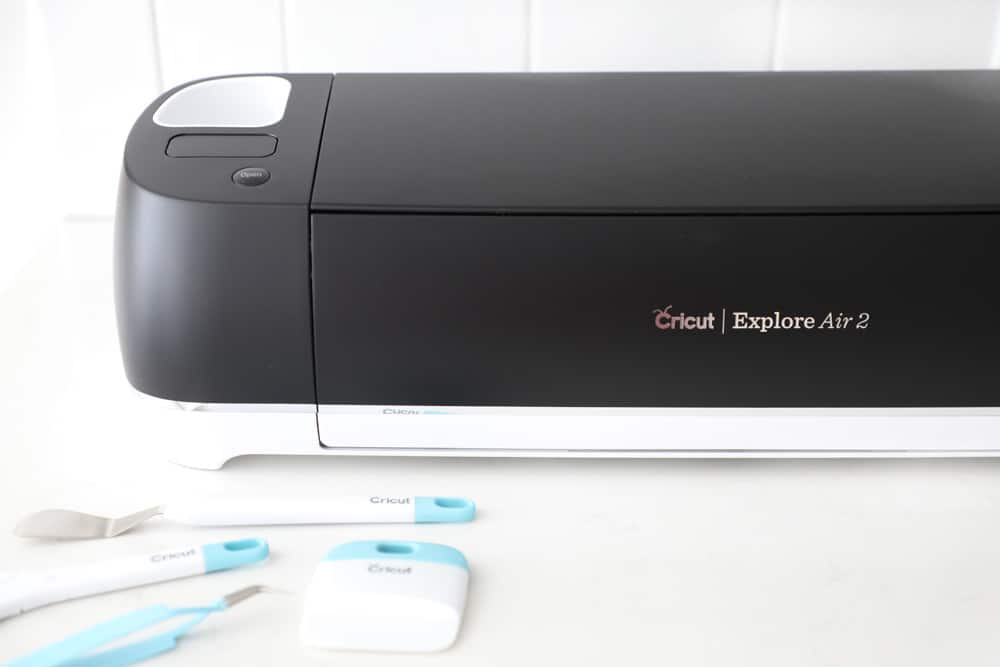
Plus, I am obsessed with all the fun color options available in the Air 2! I have been swooning over this matte black beauty pictured above! Isn't it amazing?
5. Custom Holiday Fun
Whether it's these holiday jammies, DIY Halloween Treat tote bags, or a personalized gift idea your Explore Air 2 is here to make holidays more meaningful!
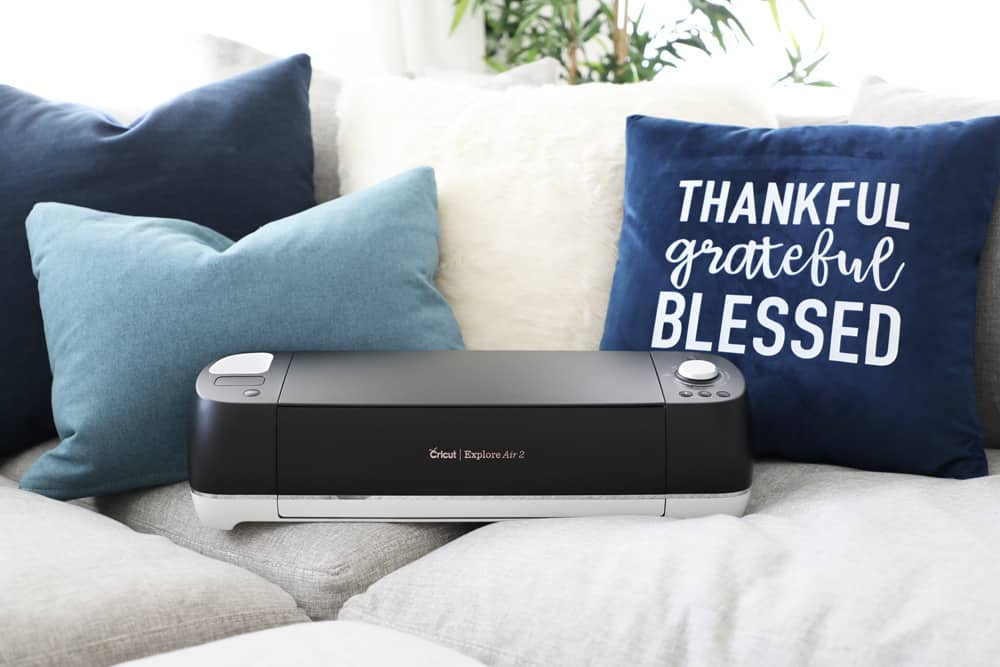
I love to switch out a few simple home decor items each holiday season to stir up some excitement and DIY pillow covers made using my Explore Air 2 are one of my favorite ways to do that!
Now that you know all the reasons why I love my Air 2, are you ready for three cute Thanksgiving Pillow designs?
Fall Pillows
Pillow covers are great rotating decor because they are cheap to make, beautiful, and small and easy to store! These pillow covers are my go to-- and these are the pillow inserts I like to fill them with!
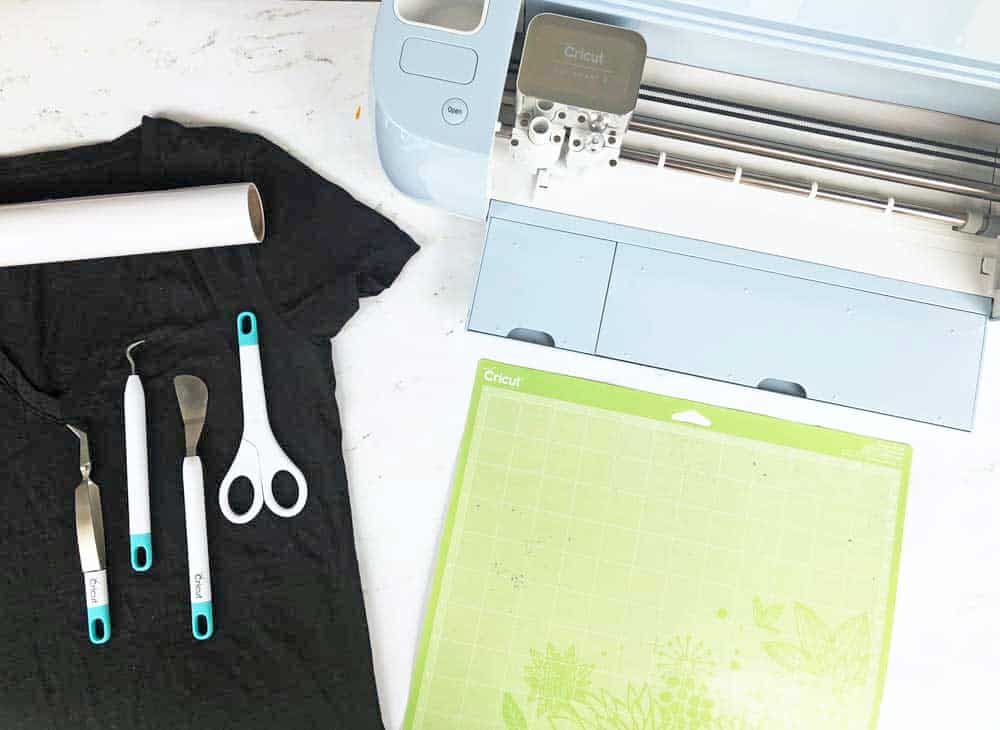
You will also need Cricut Everyday Iron On and either an Easypress 2 or an Iron to press your design onto the pillow!
Fall Pillow Tutorial
If you already know how to make a pillow on your Cricut, here are the files for easy access!
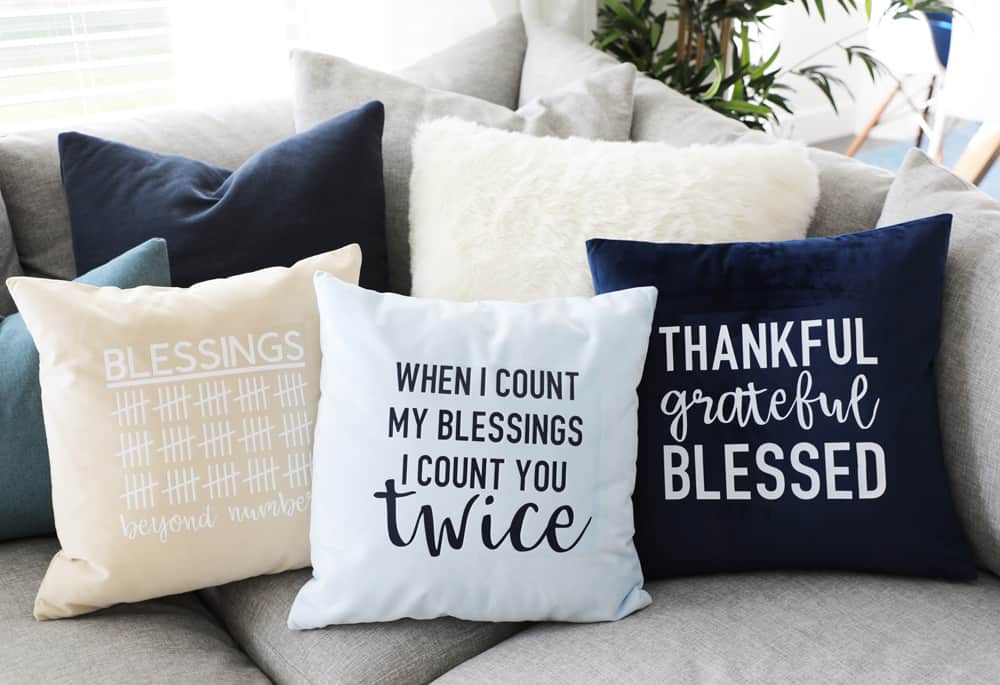
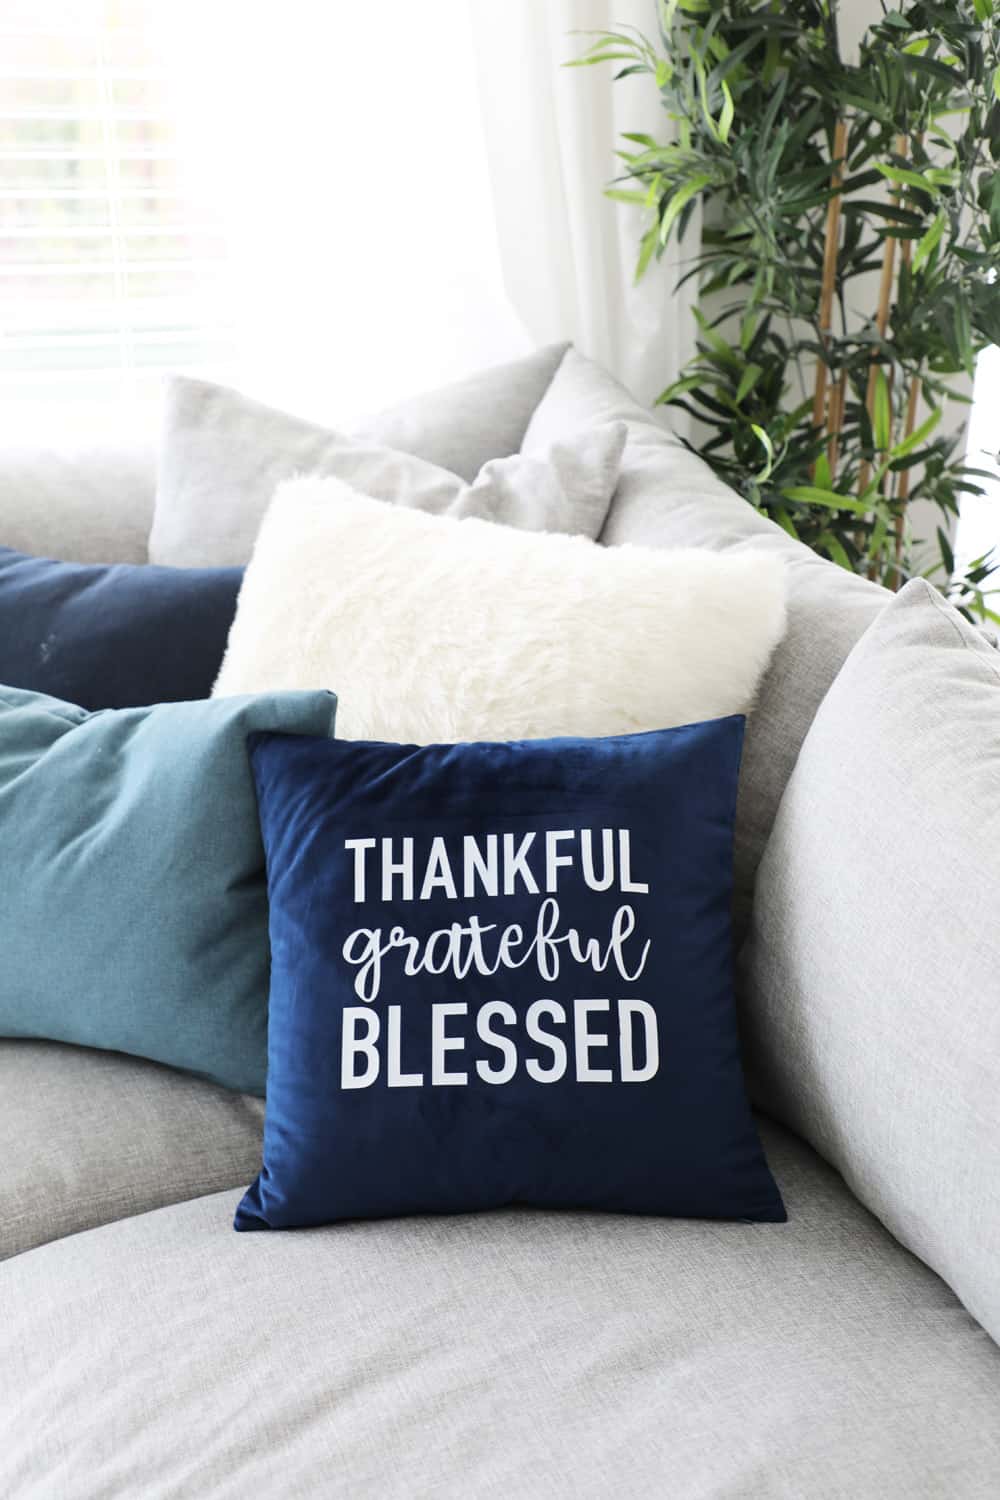
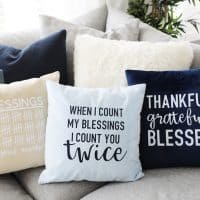
Blessings Beyond Number Pillow | Count You Twice Pillow | Thankful Grateful Blessed Pillow
If you've never made a pillow before read on for the easy tutorial!
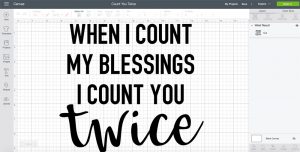
Choose Your Design
The first step is to choose your design from the three up above and click to open the file in design space.

This is what it will look like! If you are making bigger or smaller pillows than 18x18 you may need to adjust the design width to be larger or smaller. If you aren't needing to adjust anything go ahead and click the green "Make It" button.
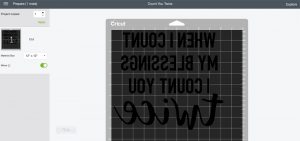
Mirror Your Image
Whenever you are using iron on you need to make sure to click the mirror on button so that your design will cut correctly.
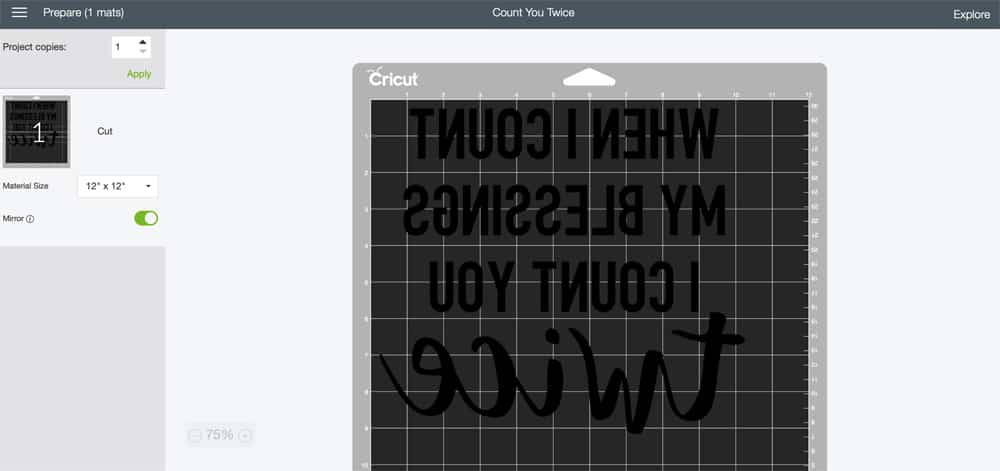
When your image is mirrored the slider will turn green, and you will be able to see that it is flipped, like shown above!
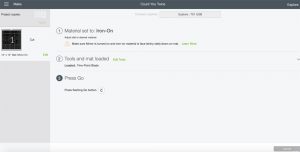
Choose Your Material and Load Your Mat
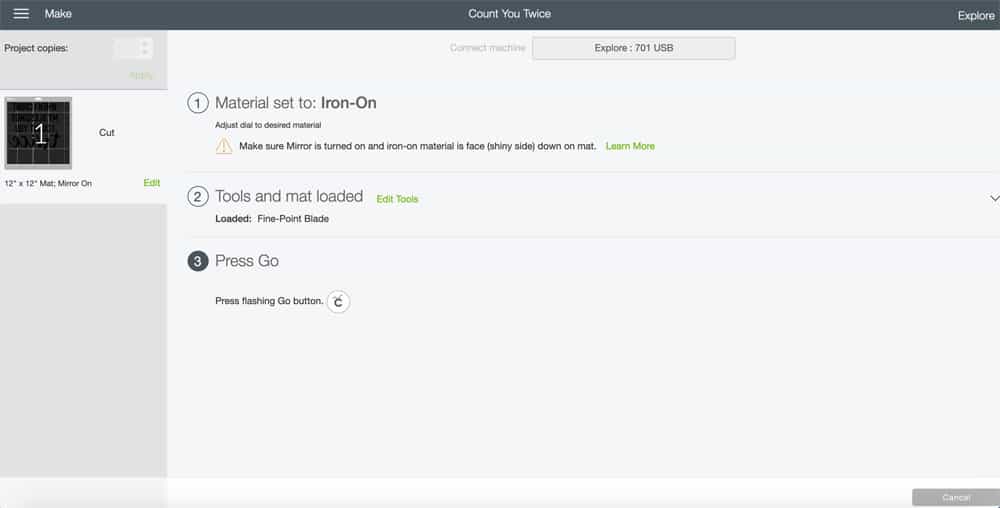
Make sure your material is set to iron-on, load your vinyl on your mat (make sure the shiny side is facing down).
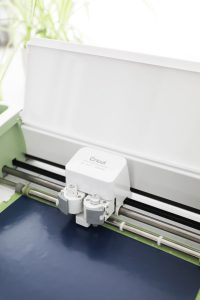
Cut Your Design
Now you are ready to cut your design! Once your mat is loaded push your "C" button to begin cutting!

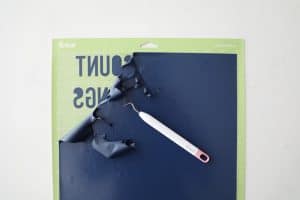
Weed Your Design
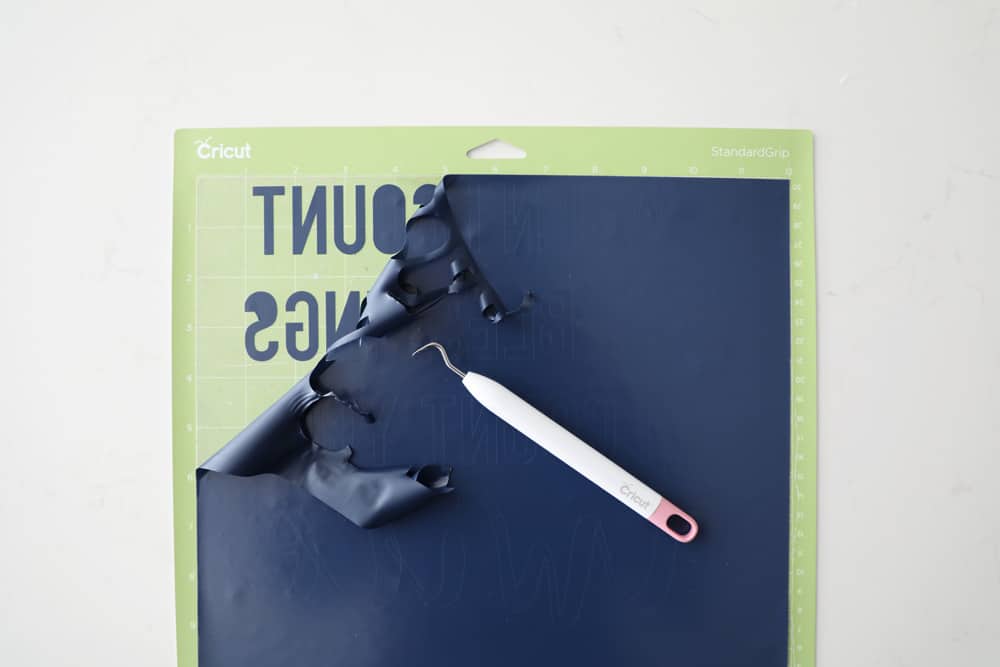
Make sure you are slow and careful during weeding so that you don't pull up any of your letters! I like to get the big stuff off and then go back through for little things I missed like middles of letters.
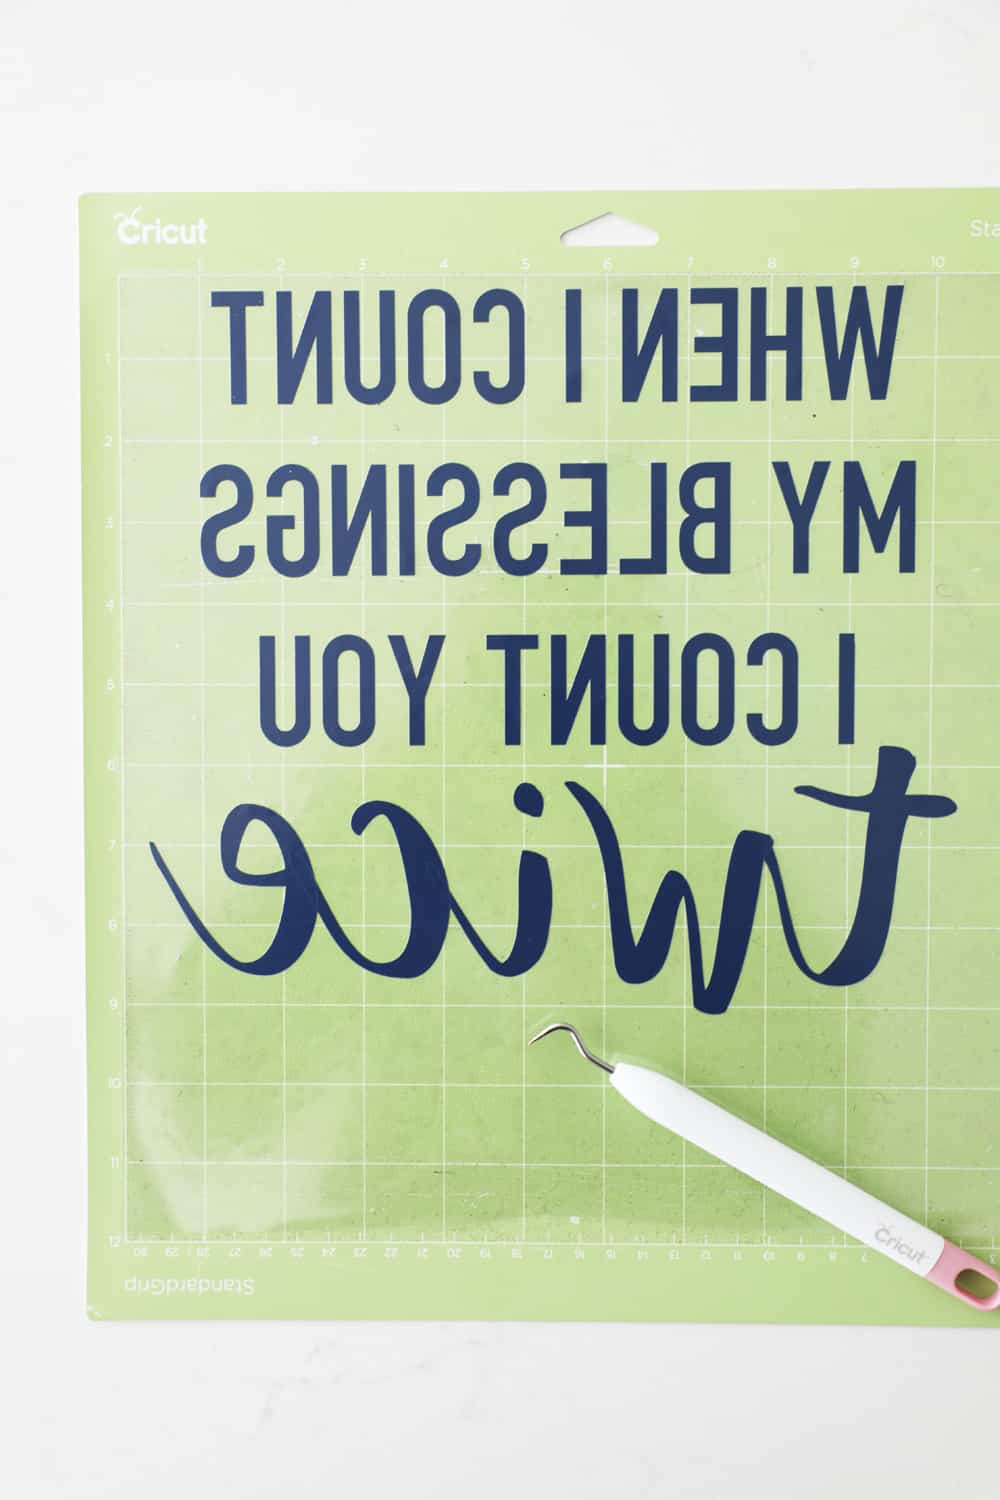
Voila! Now you are ready to iron!
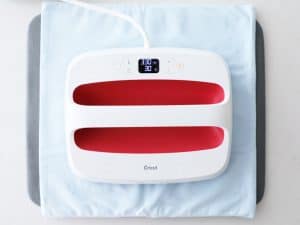
Preheat Your Pillow Case and Place Your Design
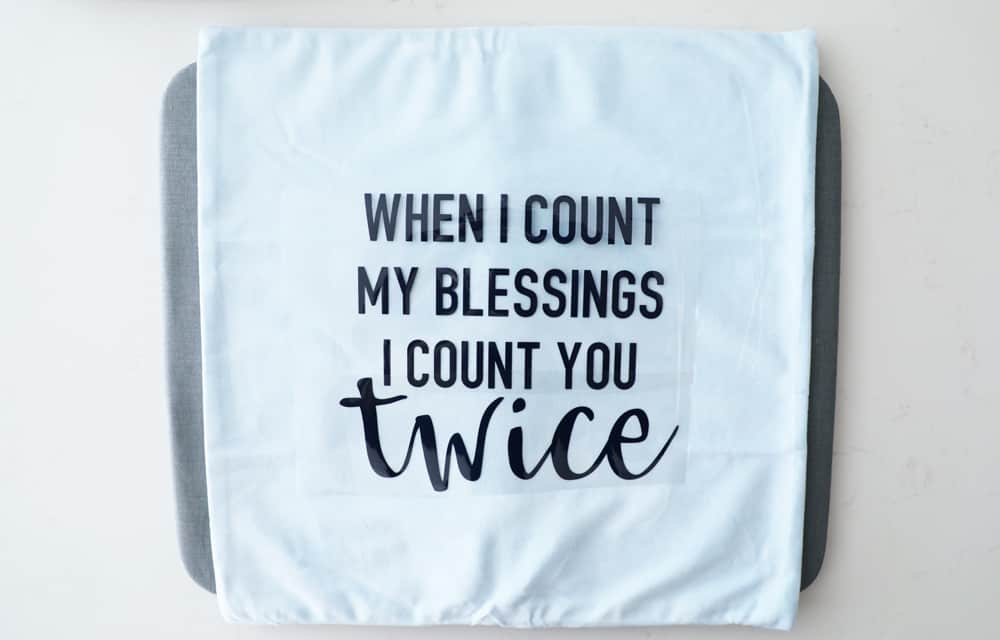
Run your iron or EasyPress 2 over your pillow case to warm it up and get out any major wrinkles. Then carefully place your design in the center of your case.
Iron On Design
Once your design is centered you are ready to iron it on!
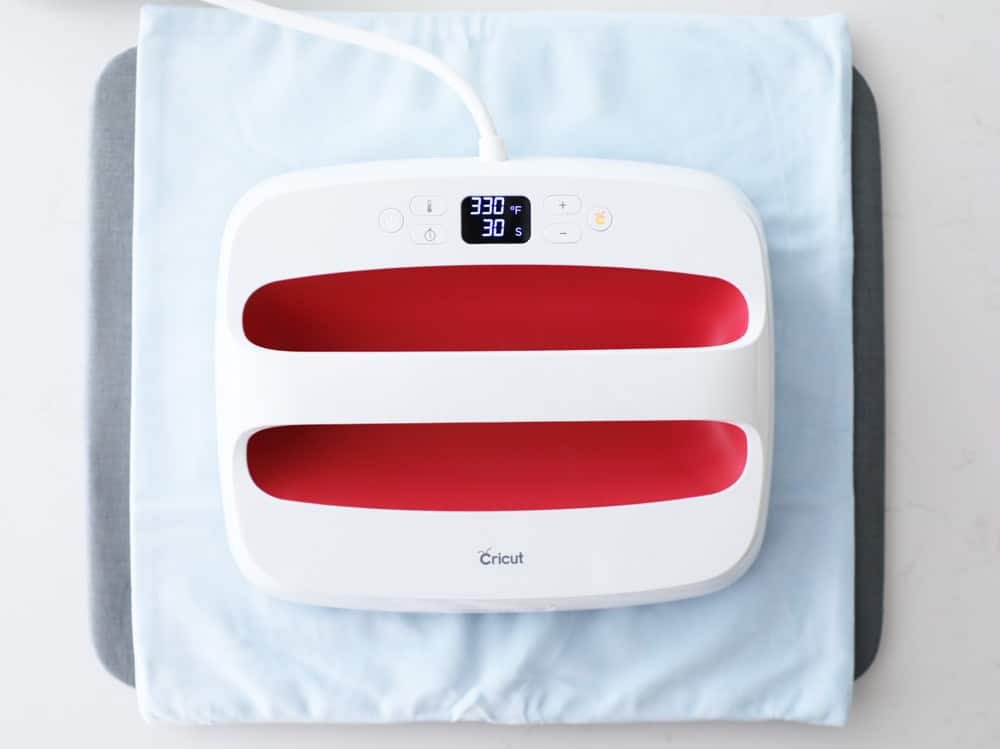
Be sure to check Cricut's temperature guidelines for the material of your pillowcase, but I ironed mine on for 30 seconds at 330 degrees. After that, flip your case over and heat the design for 30 seconds from the back side also.
Peel Off Plastic Sheeting

When peeling off your plastic sheeting make sure to test it on a little corner first to be sure the design is securely on the pillow. Then, peel back very slowly a little at a time. If you are slow and steady it is easy to press a letter back into place if it tries to come up with the plastic.
Stuff Your Pillows
Now you are ready to stuff your pillows and enjoy them!
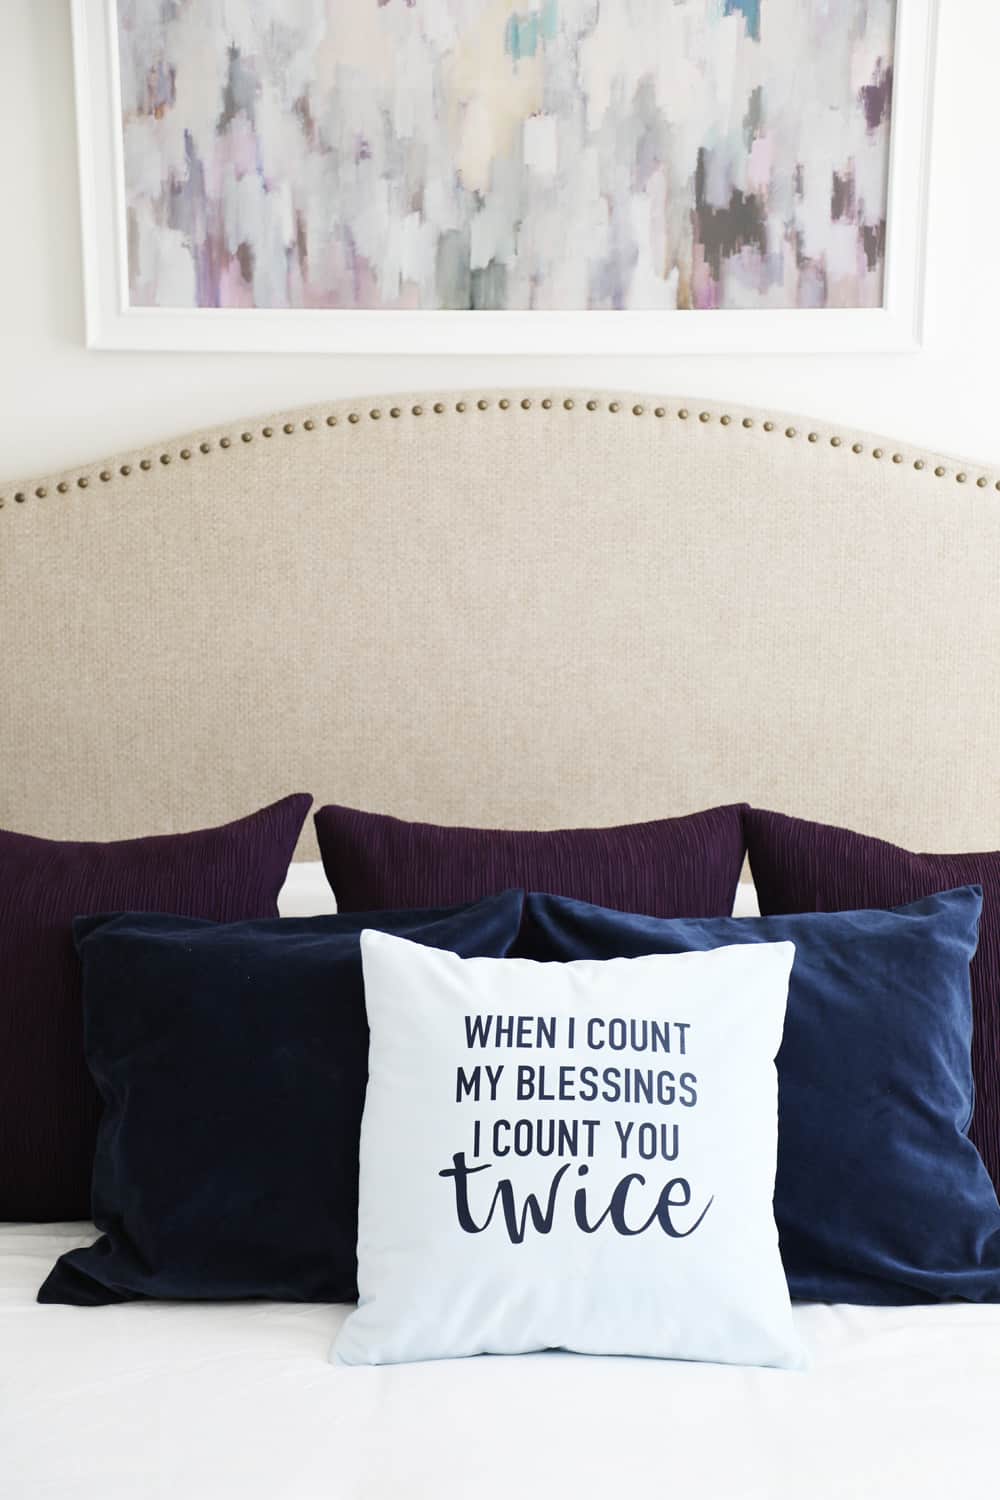
Doesn't this one look so cute on our bed? My husband and my kids all commented on it! Here are the other two designs on our couches.
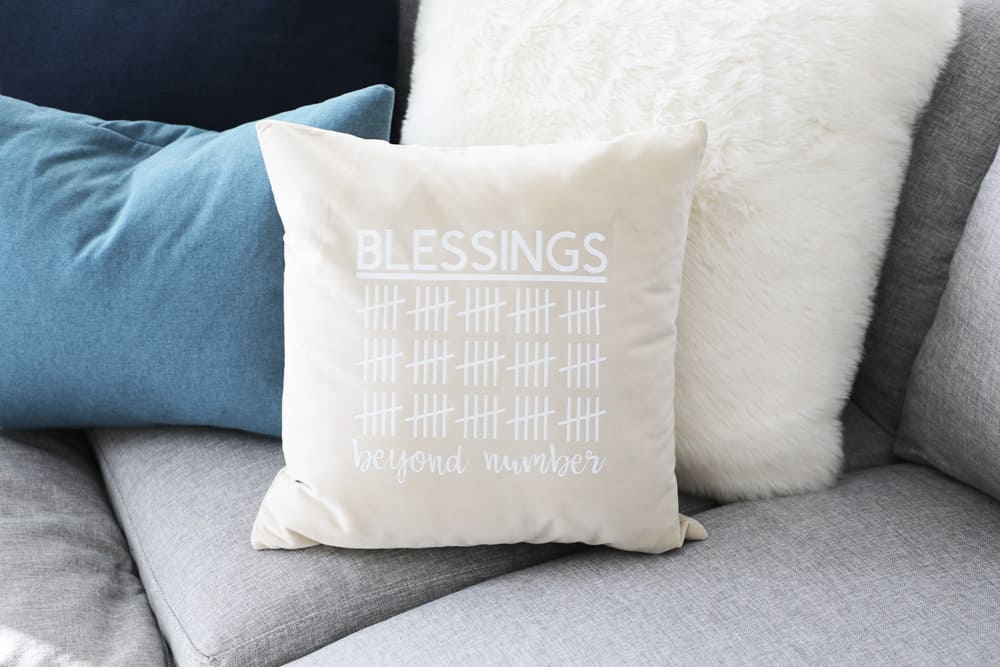
The best thing about all three of these designs is that they really could be kept up all year round, or given as a gift at any time of the year!
Which design is your favorite? Also, let me know in the comments if you have any more questions about the Explore Air 2!
Fall Pillows
Equipment
- Iron or EasyPress 2
Materials
- Every Day Iron On
- Pillow Cover
- Pillow Insert
- Weeding Tool
Instructions
- CHOOSE YOUR DESIGN - The first step is to choose your design from the three up above and click to open the file in design space.

- If you are making bigger or smaller pillows than 18×18 you may need to adjust the design width to be larger or smaller. If you aren't needing to adjust anything go ahead and click the green "Make It" button.

- MIRROR YOUR IMAGE - Whenever you are using iron on you need to make sure to click the mirror on button so that your design will cut correctly.

- CHOOSE YOUR MATERIAL AND LOAD YOUR MAT - Make sure your material is set to iron-on, load your vinyl on your mat (make sure the shiny side is facing down).
- CUT YOUR DESIGN - Now you are ready to cut your design! Once your mat is loaded push your "C" button to begin cutting!

- WEED YOUR DESIGN - Make sure you are slow and careful during weeding so that you don't pull up any of your letters! I like to get the big stuff off and then go back through for little things I missed like middles of letters.

- PREHEAT YOUR PILLOW CASE AND PLACE YOUR DESIGN - Run your iron or EasyPress 2 over your pillow case to warm it up and get out any major wrinkles. Then carefully place your design in the center of your case.

- IRON ON DESIGN - Once your design is centered you are ready to iron it on! Be sure to check Cricut's temperature guidelines for the material of your pillowcase, but I ironed mine on for 30 seconds at 330 degrees. After that, flip your case over and heat the design for 30 seconds from the back side also.

- PEEL OFF PLASTIC SHEETING - When peeling off your plastic sheeting make sure to test it on a little corner first to be sure the design is securely on the pillow. Then, peel back very slowly a little at a time. If you are slow and steady it is easy to press a letter back into place if it tries to come up with the plastic.
- STUFF YOUR PILLOWS - Now you are ready to stuff your pillows and enjoy them!


Happy Fall Friends!


