DIY Halloween Trick or Treat Bags with Cricut
*This post contains affiliate links.
Hey friends! Are you in Halloween prep mode yet? You know I am. For the past few years, I have wanted to make some fun DIY Trick or Treat Bags. This weekend I whipped some up during nap time. I love when a project can be done in just an hour or two!
My last two Cricut projects were these Floral Sneakers, and Monogrammed Backpacks for back to school. Their iron-on is amazing quality and we've used it to make t-shirts, socks, everything.
Cricut Iron-On also has a StrongBond™ Guarantee. If you use it as directed, and you're not completely satisfied with the results, they'll replace it for free!
Halloween Trick or Treat Bag Designs
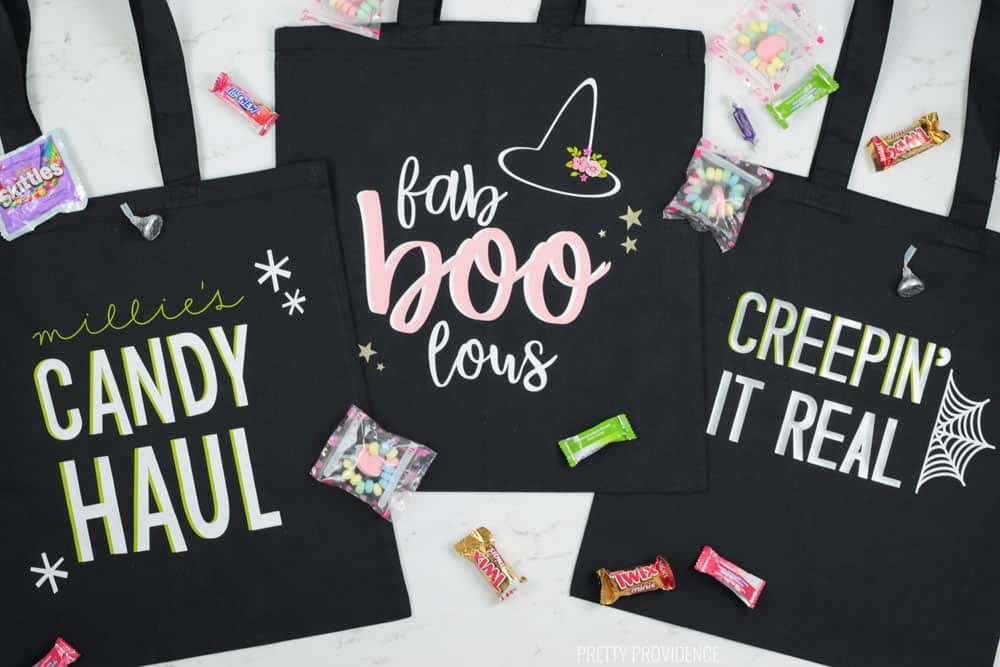
I made three different bags and I'm not sure which is my fave. It's fun to have options. This five-pack of black tote bags was such a good price so I could have made five but I went with three... for now.
If you're going to design your own project, first check out this post on Cricut Fonts! It has everything you need to know about using Cricut Fonts in Design Space, with lists of my favorite cursive fonts, bold fonts and font pairings!
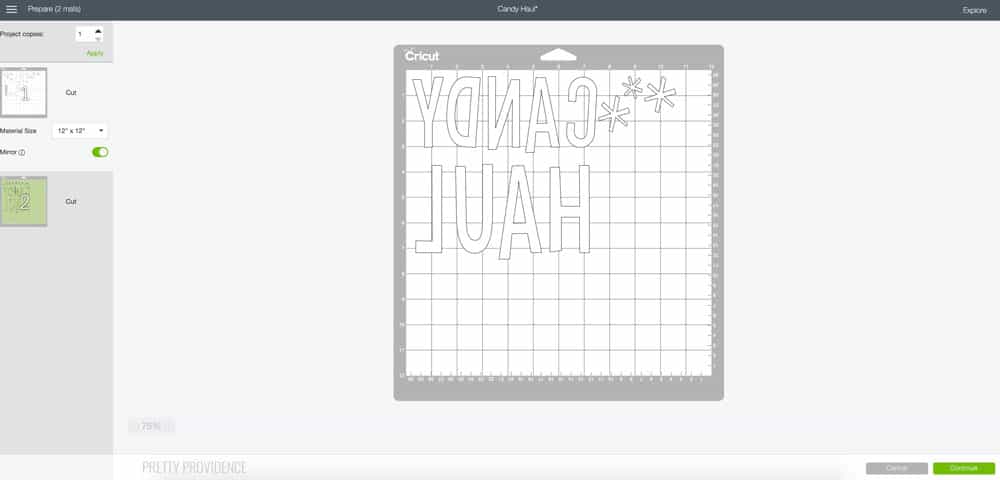
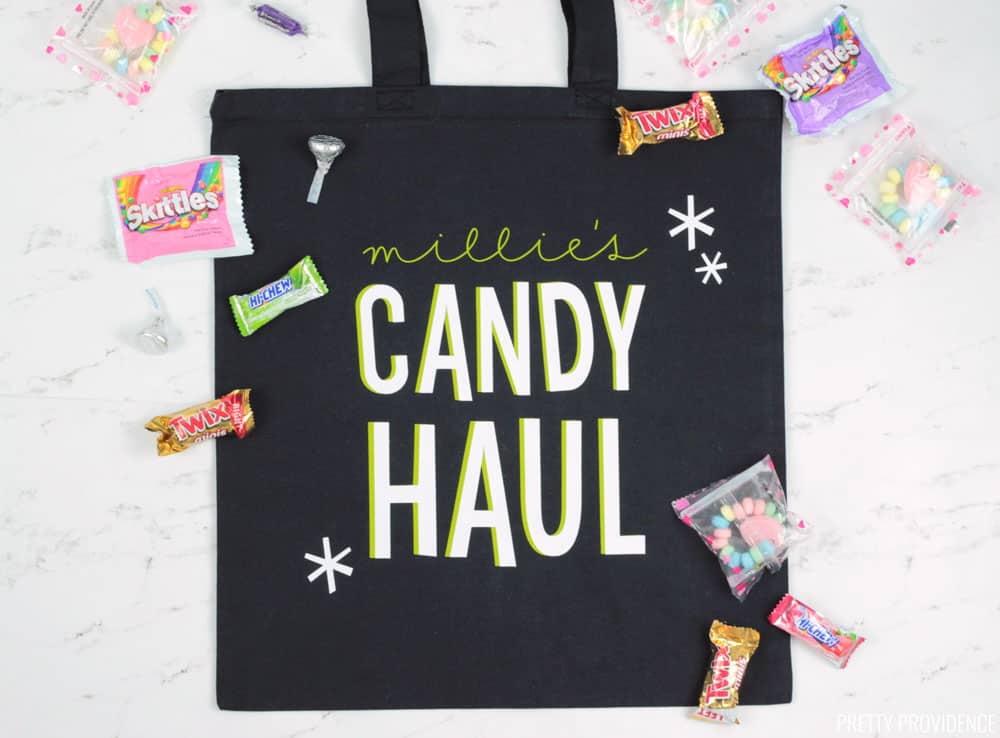
Candy Haul
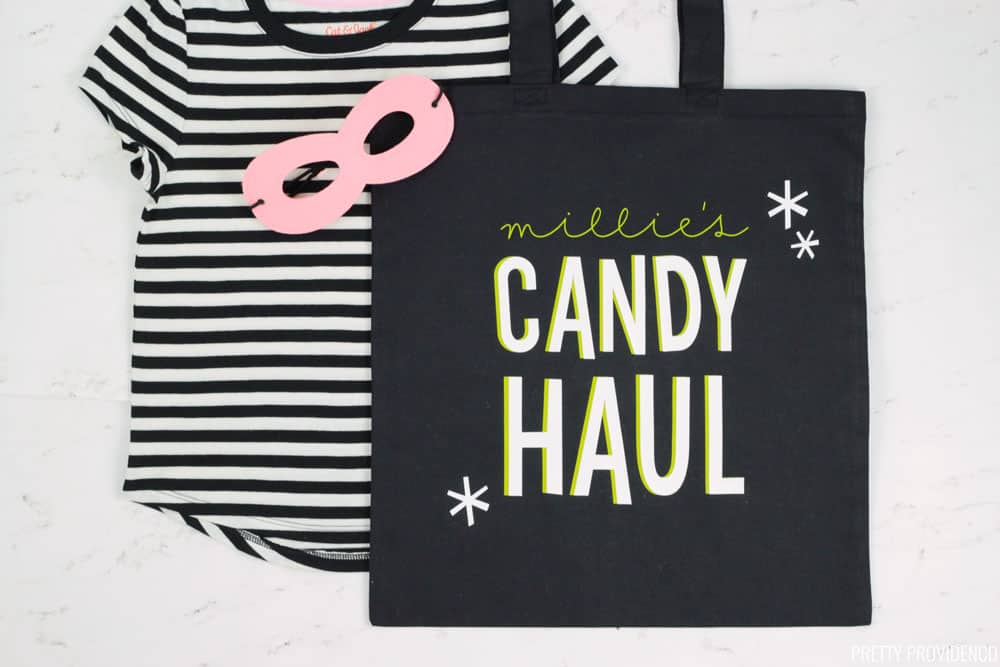
The first one has a retro feel. Candy Haul seemed the most fitting phrase to have on a Trick or Treat bag.
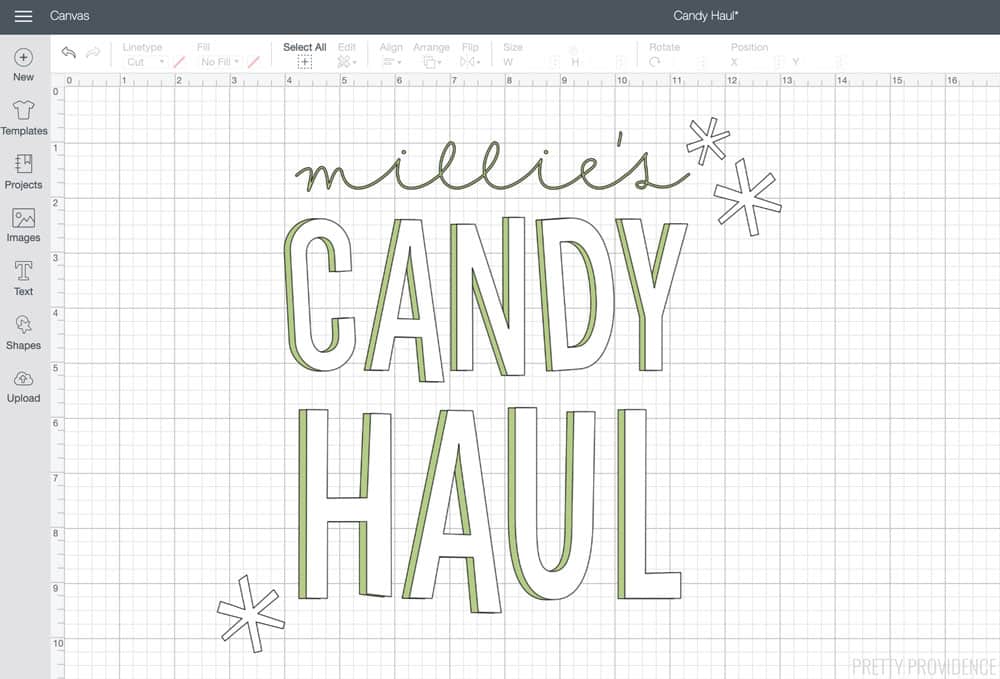
If you want to make this bag, here is the Candy Haul design in Cricut Design Space. Once you have it loaded, click 'customize' and change the name at the top from 'millie' to whatever name you want. The font I used for the name is called 'yours truly.'
The Everyday Iron On colors I used on this bag are Avocado and White.
(Find the rest of the tutorial below!)
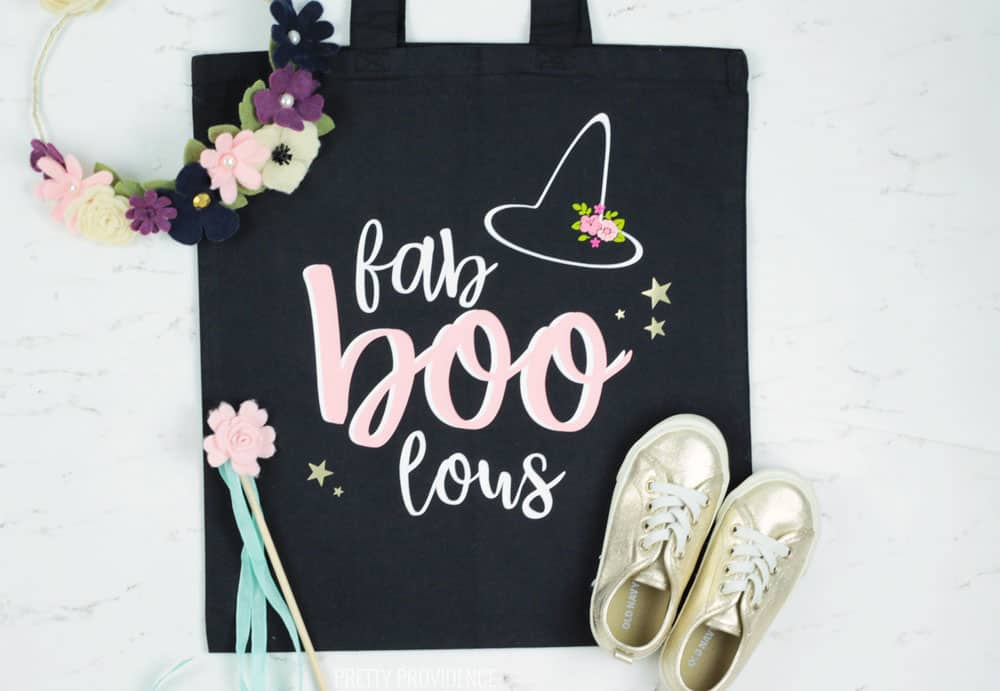
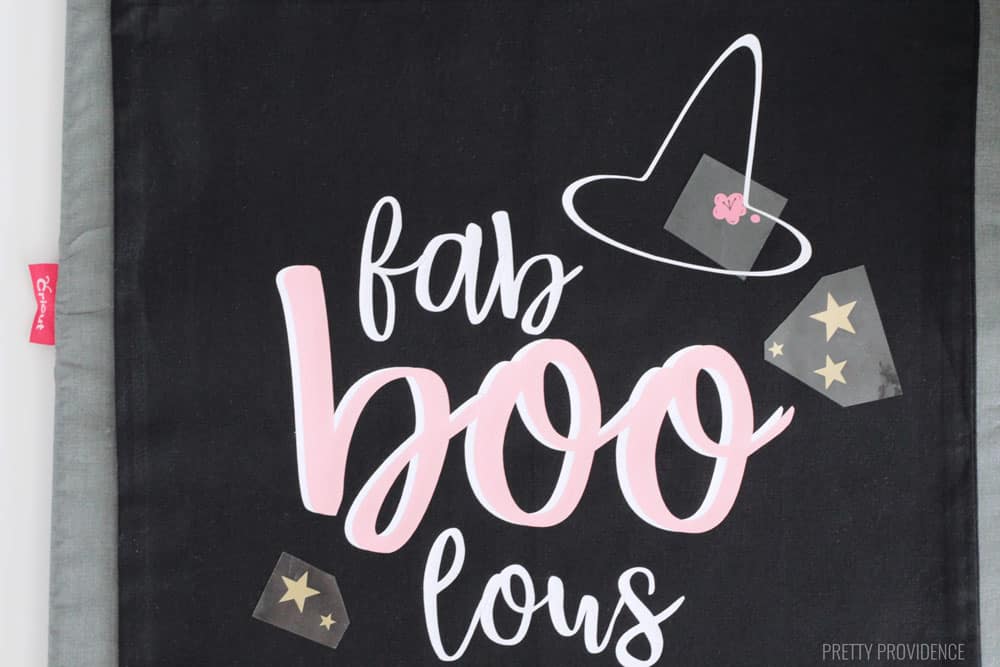
Fab Boo Lous
The next one is Fab Boo Lous! I thought a floral witch hat would be so cute and wow, now I want to make a real one! How cute would that be!?
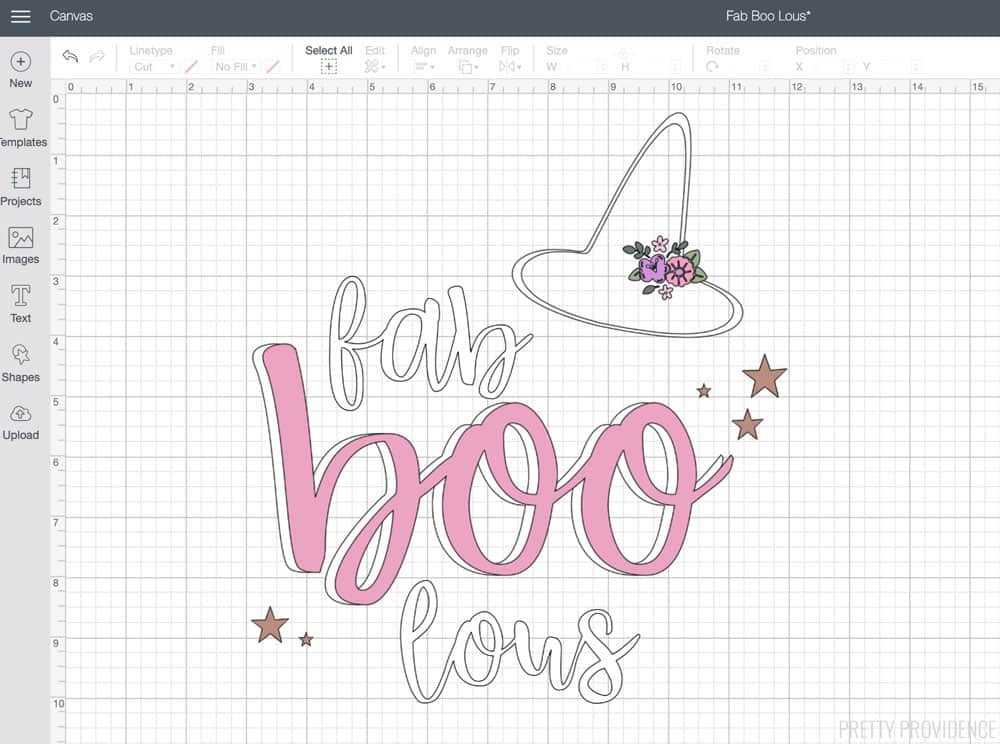
If you want to make this bag, here is the Fab-Boo-Lous design in Cricut Design Space.
For this bag I used Everyday Iron On in Petal, White, Gold, Avocado, Party Pink and Blush. It sounds like a lot but for the flowers, this a good way to use up any tiny scraps you have!
Creepin' It Real
Next I had to make a pun. It was necessary. Anyway, whoever gets to use this bag will be Creepin' it Real!
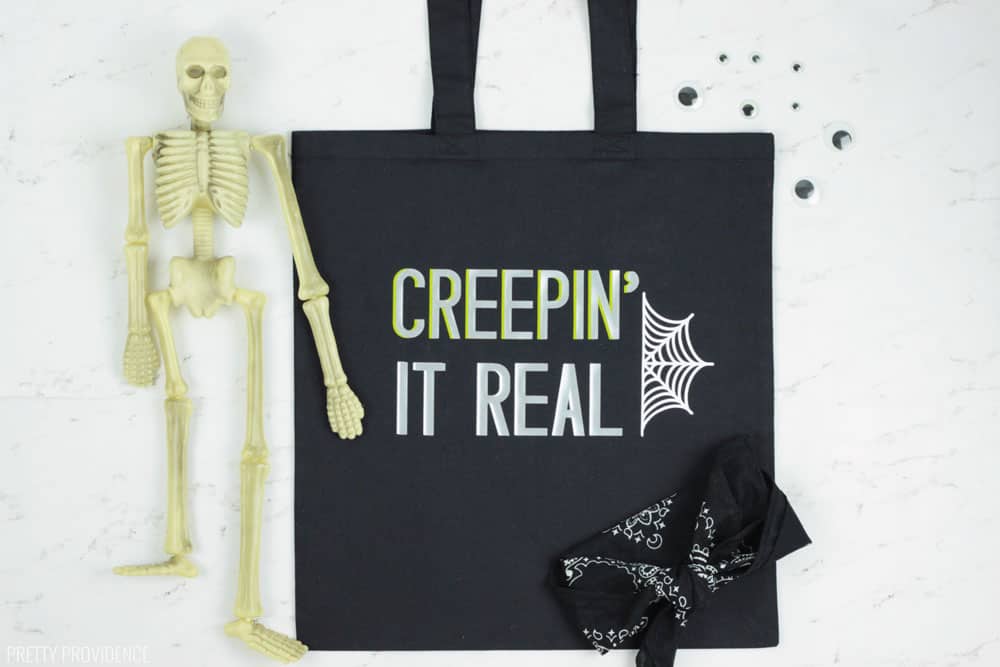
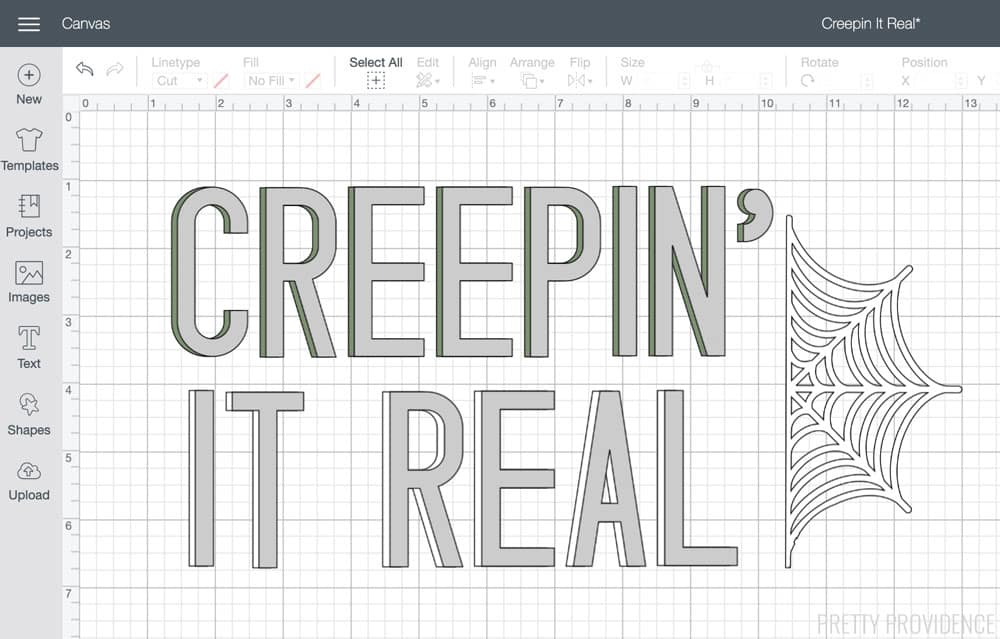
Here is the Creepin' It Real design in Cricut Design Space.
I used Everyday Iron On in Avocado, Silver and White for this bag.
How to Make DIY Trick or Treat Bags
Tools & Materials Needed
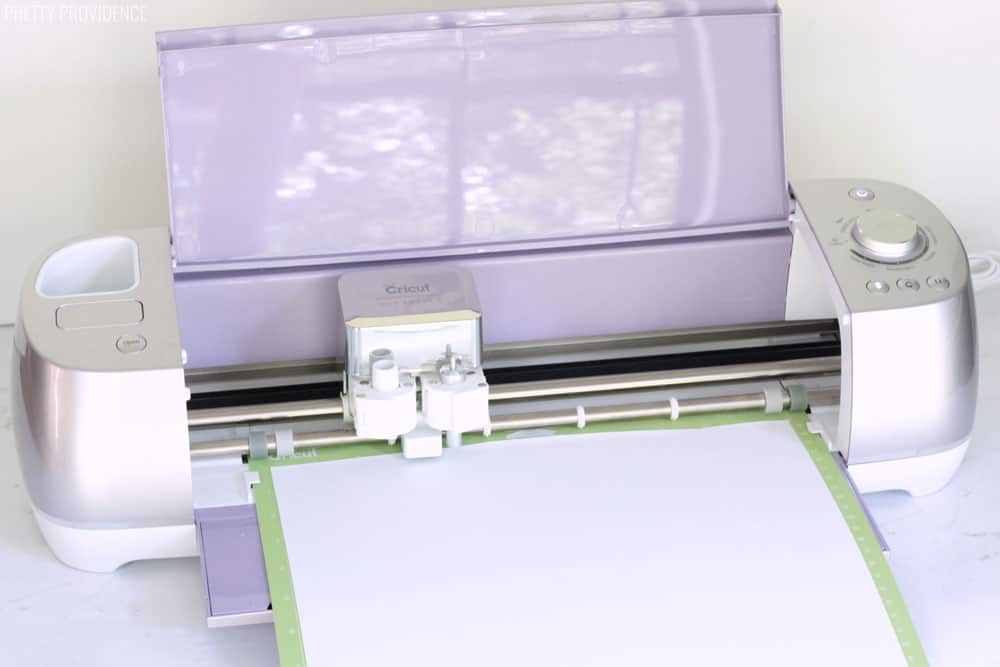
Cricut Explore Air 2 or other Cricut Machine
Everyday Iron-On
StandardGrip Mat
Basic Tool Set
Plain Black Canvas Tote Bags
Instructions
How to Cut Iron-On Designs
- Open the image of your choice onto a Cricut Design Space canvas and size it to your liking.
- Add your kid's name above or below the design if you want to customize it further.
- Turn the dial on your Cricut to Iron-on, or choose Iron-On from the materials drop down menu.
- Place Iron-On Vinyl shiny side down on your mat.
- If you are using multiple colors, cut each piece of iron-on to the size you will need before you begin cutting.
- Make sure the mirror is ON.
- Click 'Continue'
- Load the mat and click 'Go' (the button is a little Cricut logo.)
- After the cut is done, remove the extra iron-on around the edges. Use a weeding tool to take out the little pieces.
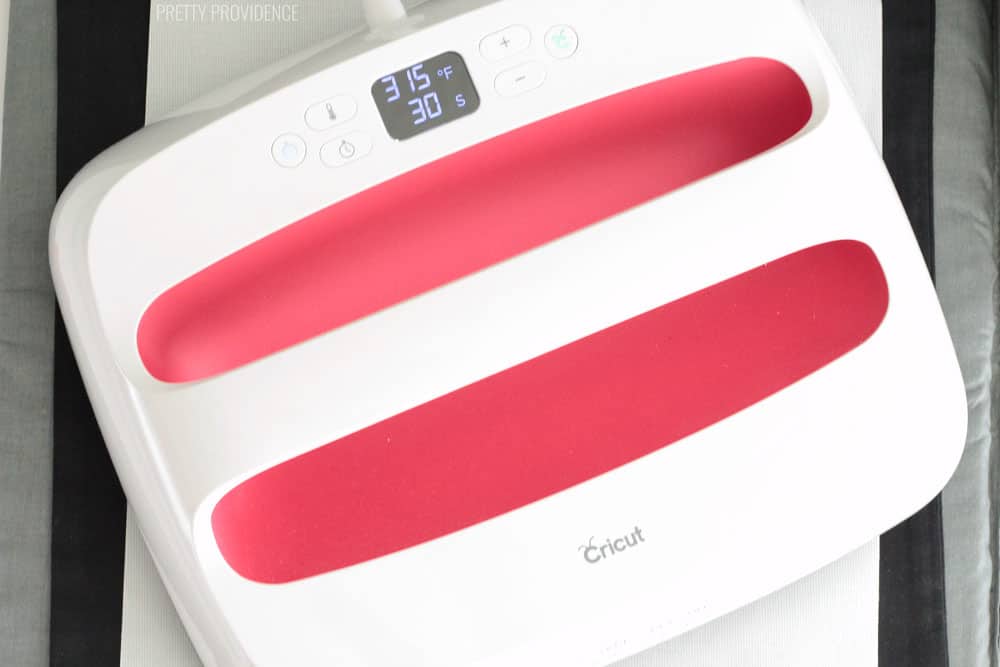
How to Apply Iron-On to Tote Bags
You might also want to check out this post: Everything you Need to Know about the EasyPress 2.
Materials Needed
EasyPress 2
EasyPress Mat
Iron-On Protective Sheet
You can also use an iron if you don't have an EasyPress 2!
Iron layers one at a time
Heat EasyPress 2 to 315. Heat a regular iron to the cotton/linen setting and make sure steam is turned off.
Carefully iron each piece on, starting with the bottom layer. You can add some pieces at the same time as long as they don't overlap.
Once you have ironed on the first layer, you will need to use an Iron-On protective sheet to protect your design while you add more layers over the top of it.
I love how these bags turned out, now I just need to decide what we will dress up as! My toddler wants to wear one of the Princess costumes I made last year, so at least that one is easy!

If you make these or anything inspired by our posts, please tag us on Instagram: @prettyprovidenceblog! We absolutely love to see what y'all are making!
Happy crafting!


hello, thank you for these wonderfully creative designs! When I click on the design link a new page loads asking me to download or open Cricuit design space. I choose open as I have the program already installed on my PC. Once design space opens up nothing happens. I'm unable to find the design template.
What am I doing wrong? Can you help>