Personalized Backpacks and Lunch Gear - Back to School with Cricut
If you are looking for an easy way to personalize backpacks and all your kids' school gear, you're in the right place. With vinyl, iron-on and the Cricut you can personalize and label ALL THE THINGS!
I can't believe we're just a couple weeks away from school starting again! I am excited and so are my kids! We have had a great summer but we all love the routine of the school year.
One of the things I love most about back-to-school time is getting new school supplies and personalizing them.
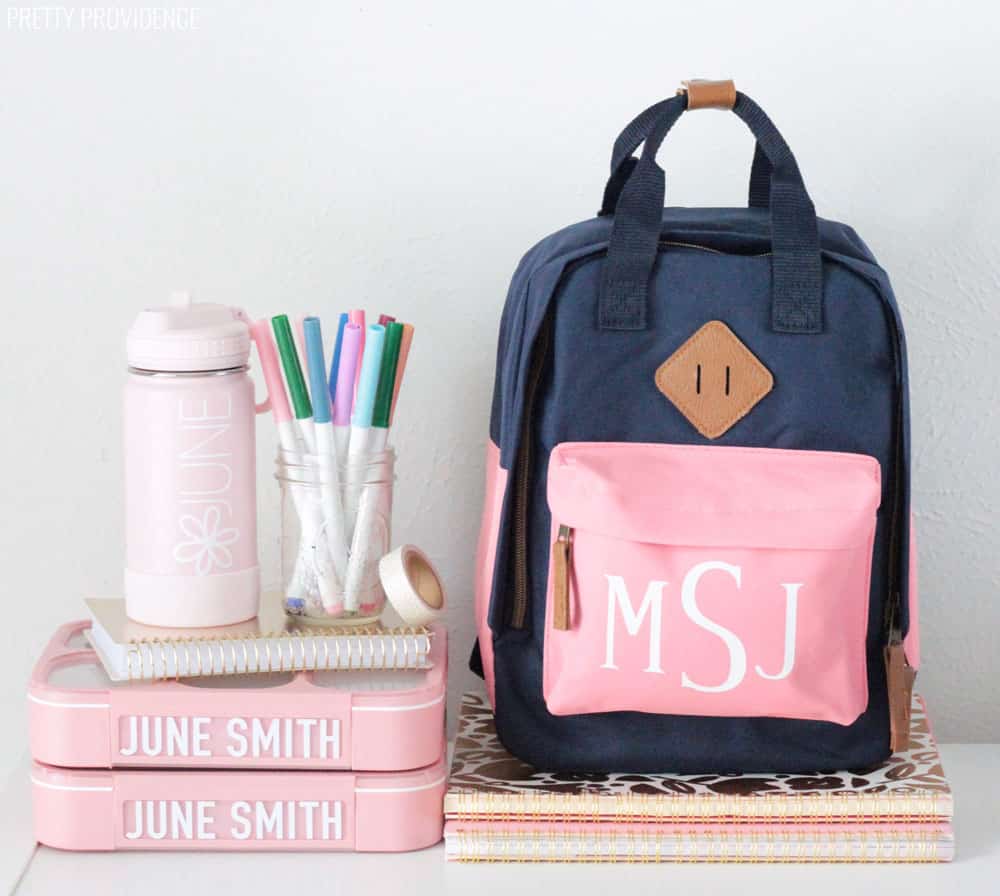
I wanted personalize backpacks with monograms this year. Personalizing is my jam, ever since I fell in love with my Cricut I've done all kinds of projects. I had never tried adding iron-on to backpack before this but it worked really well! I also needed to add waterproof labels to lunch boxes and water bottles for my girls to take to pre-school.
If these are projects you want to do too, here are the full tutorials for how I did this using the Cricut Maker.
Before you start designing, check out this post on Cricut Fonts! It has everything you need to know about using Cricut Fonts in Design Space, with lists of my favorite cursive fonts, bold fonts and font pairings!
You might also want to check out this post: Everything you Need to Know about the Cricut EasyPress 2.
DIY Waterproof Labels for Lunch Boxes and Water Bottles
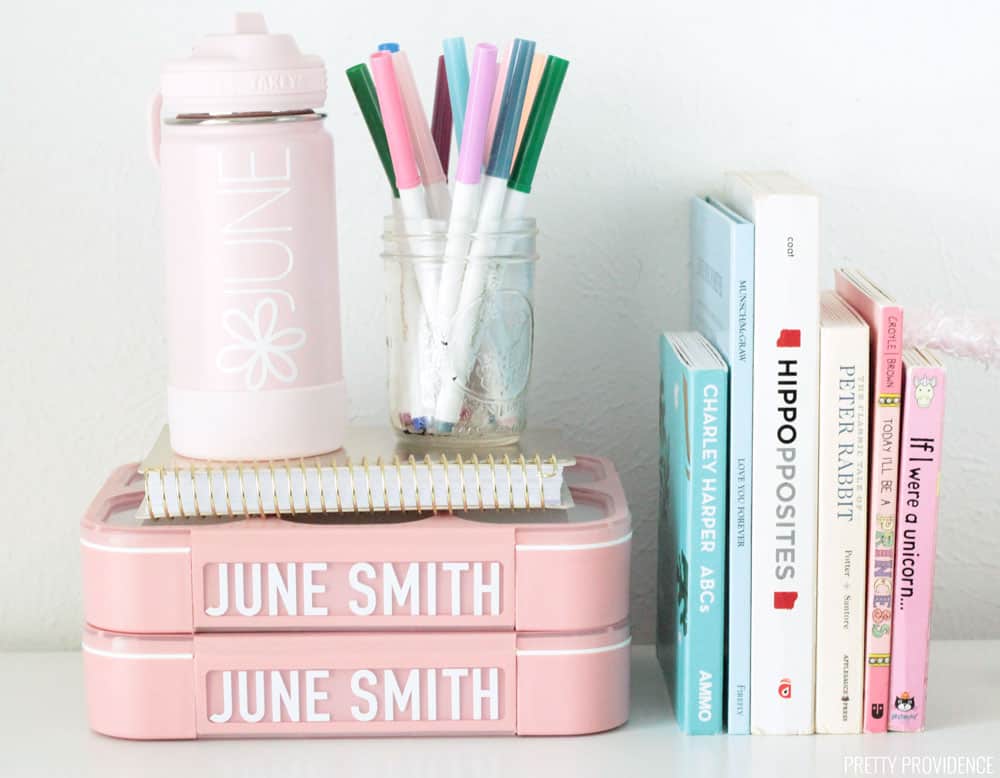
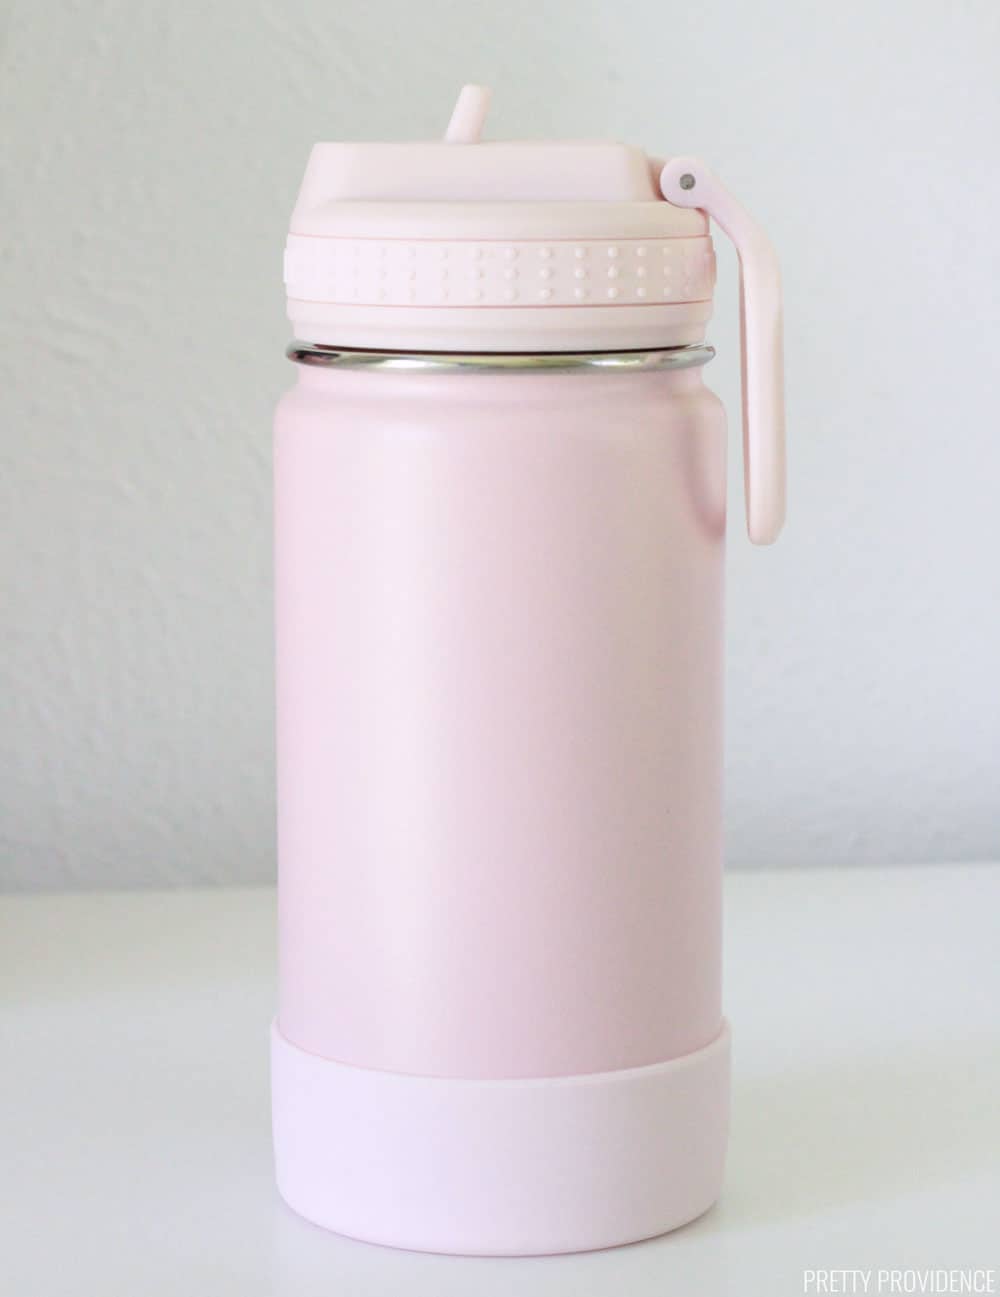
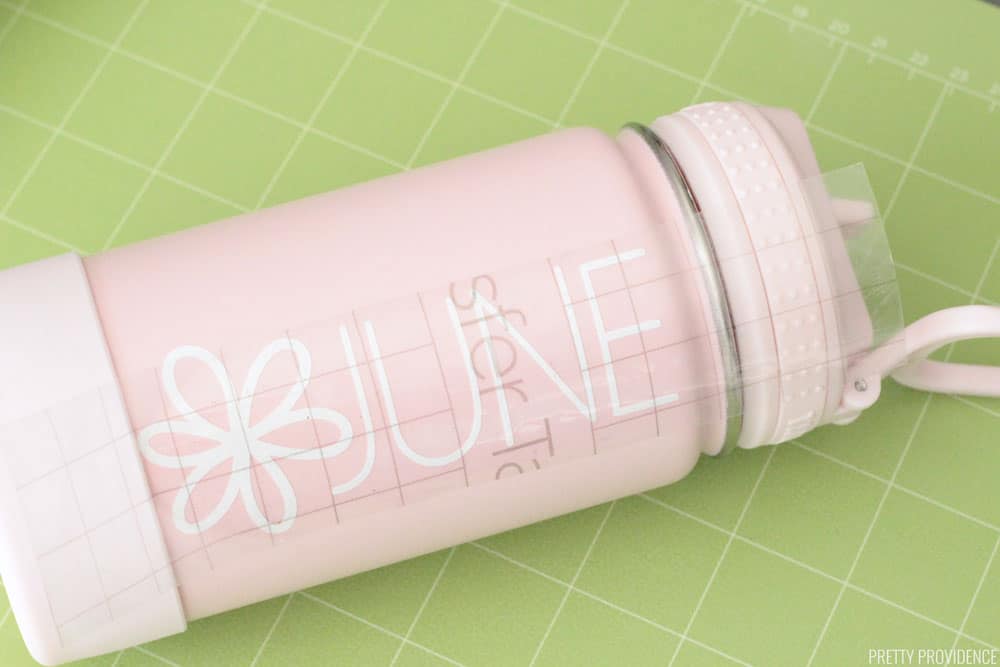
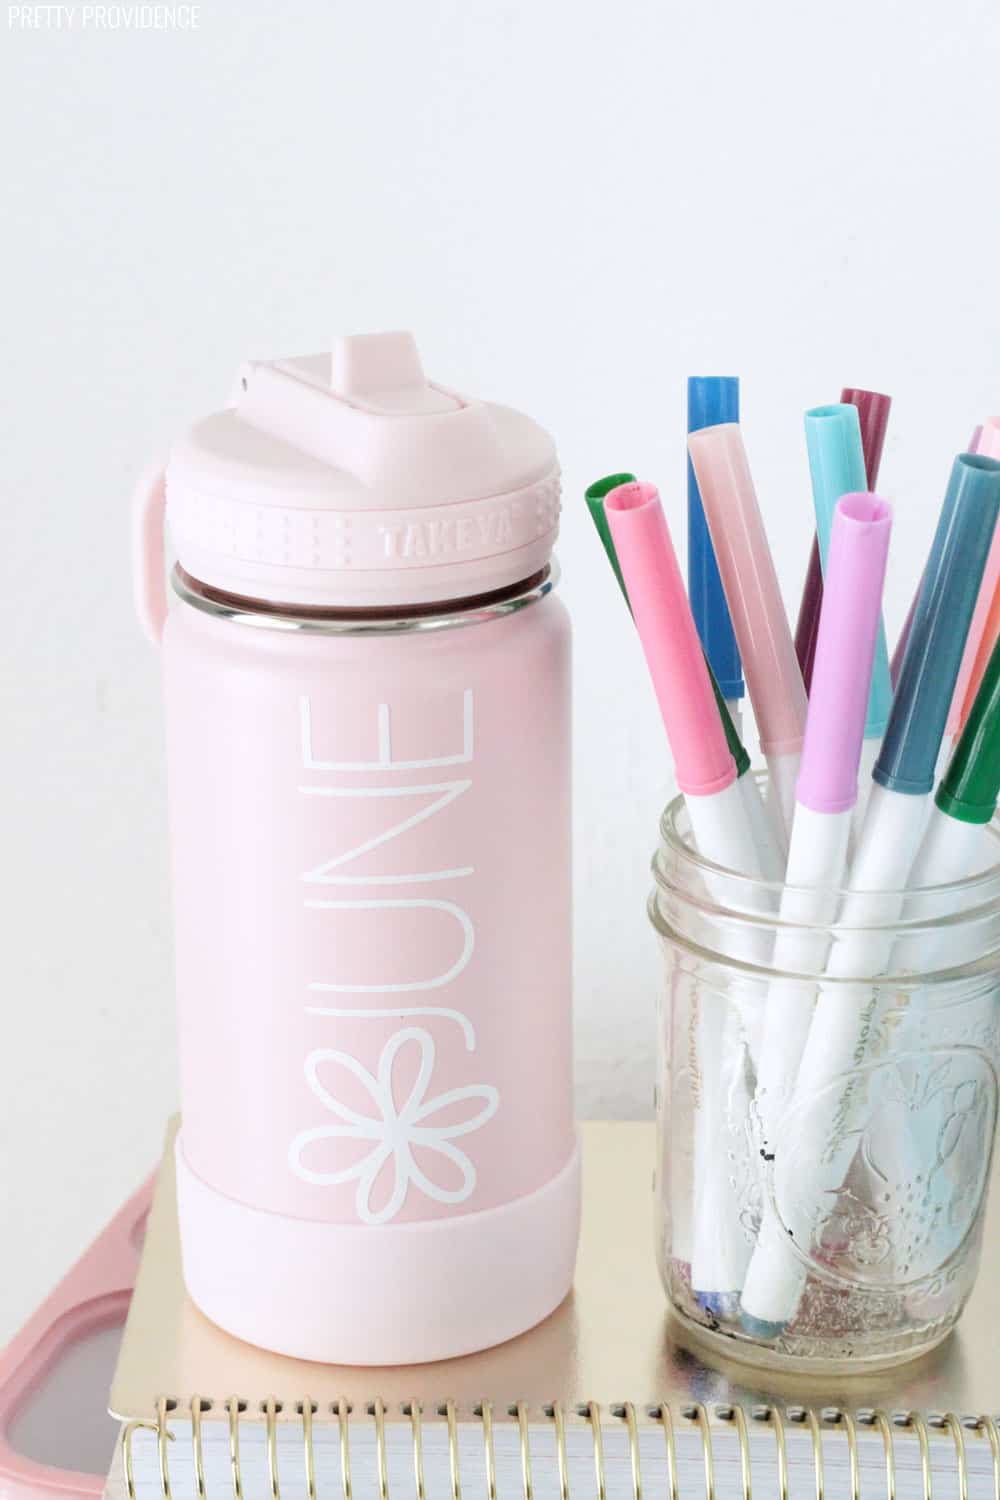
I always use Premium Permanent Vinyl to put names on my kids' water bottles.
These are the water bottles my girls use daily. I added their names to them last year with this vinyl, and it is dishwasher safe! I have put them through the dishwasher multiple times a week, and the vinyl is still looking great today. This stuff is basically bulletproof.
So, I decided to do the same thing this year using this water bottle.
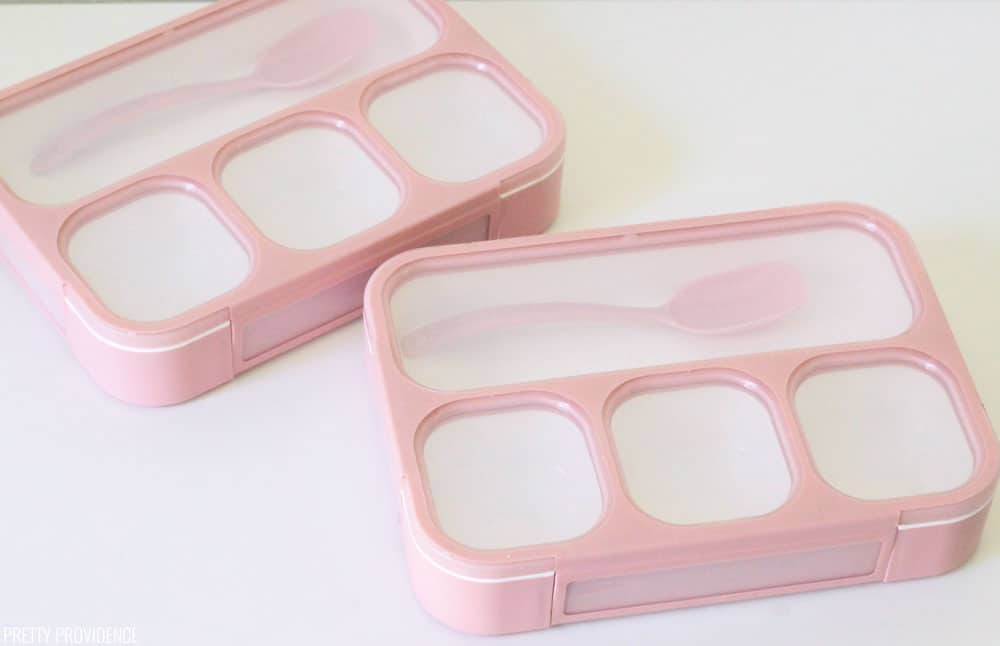
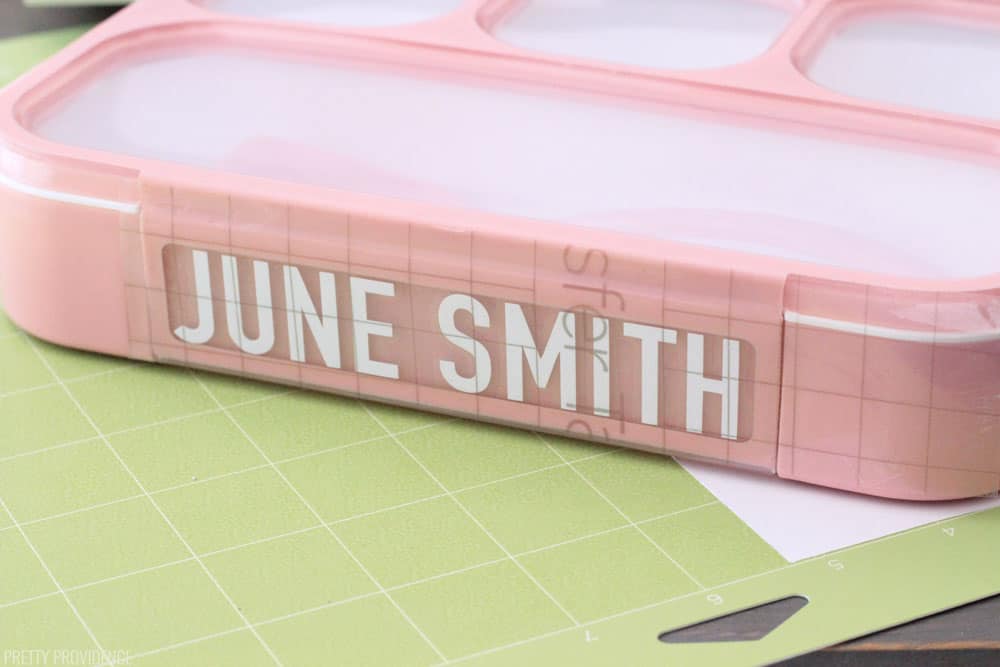
My girls love pink! I was excited to find pink bento lunch boxes that are close to the same color as the water bottle, and I put their names on the side of those as well.
How to Cut and Apply Vinyl Labels
Materials:
- Bento Lunch Box
- Water Bottle
- Cricut Maker or other Cricut Machine
- StandardGrip Mats
- Transfer Tape
Instructions:
Open Cricut Design Space and design a label.
For this I recommend going with a basic, bold font. Something like Cricut Sans, DIN 1451, or Poker Night -which is what I used for these lunch boxes.
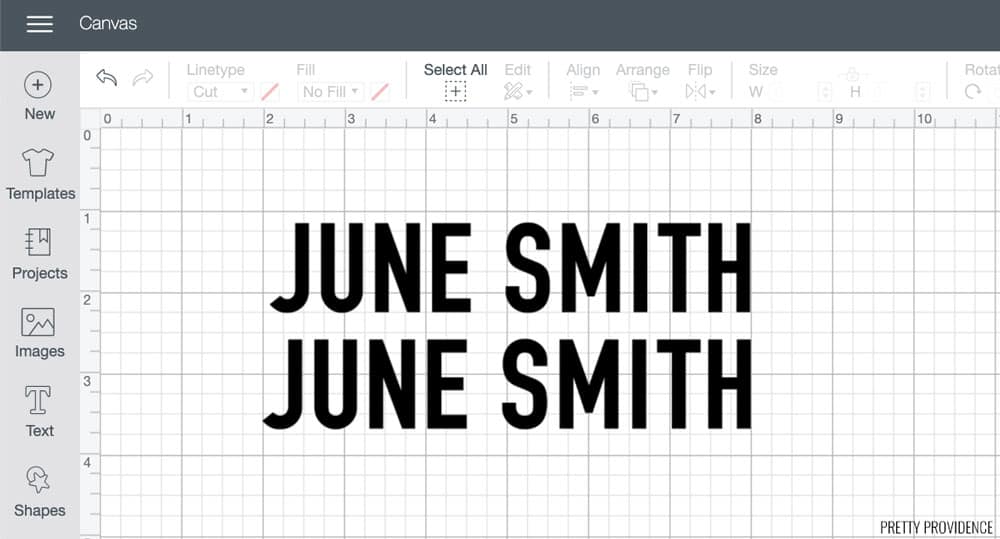
Measure the area on the lunch box that you want to label, and size labels accordingly in Design Space. Make sure your letters are grouped and attached.
Cut a piece of permanent vinyl to size and place it grid side down on a StandardGrip mat. Load the mat into the machine.
Click 'Make it' and then you will see this preview screen. Arrange the design on the mat to fit within your cut piece of vinyl.
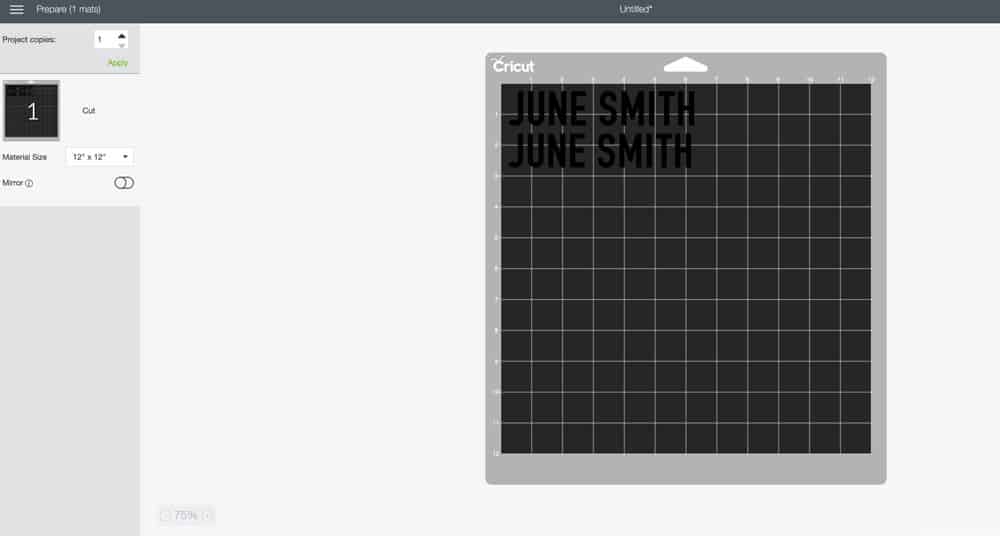
Click 'GO' and cut the design.
Weed excess vinyl from around the edges and inside the letters. Then, cut a piece of transfer tape to fit the label.
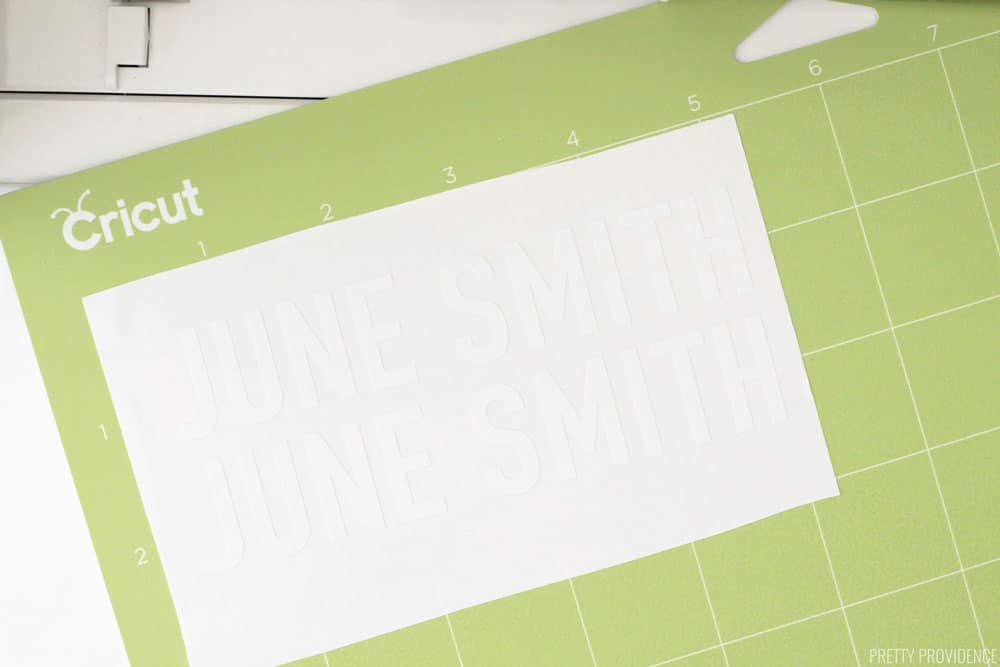
Place transfer tape sticky side down on the label. Burnish and make sure the transfer tape is fully stuck to the label.
If you're new to using transfer tape, read this in-depth tutorial for using Cricut transfer tape.
Peel the transfer tape up carefully and make sure all of your letters are coming up with it.
Place label on the lunch box and burnish. Carefully peel the transfer tape off of the label diagonally.
Follow the same steps to label a water bottle. For the water bottle I thought it would be cute to add a flower. The font I used is called Dear John.
Would you look at how cute that turned out. I'm in love.
Okay, next up on the list of school supplies we need to personalize - the backpack!
Easy DIY Personalized Backpack
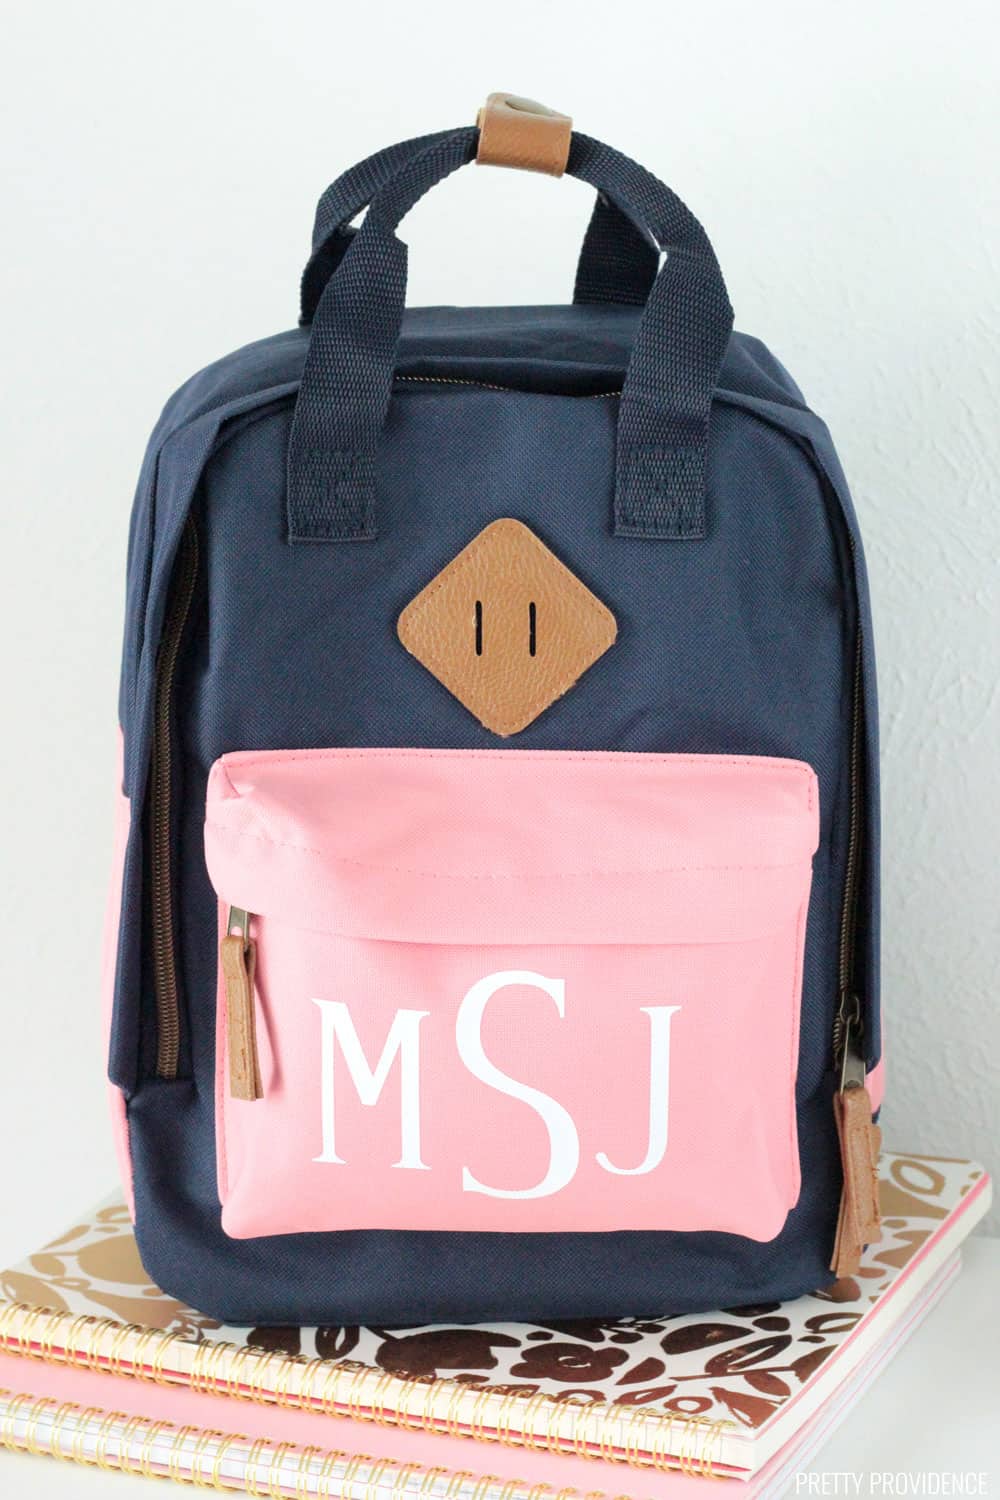
I used Iron-On to personalize my kids' backpacks with monograms. Cricut iron-on is amazing quality and I've used it to make t-shirts, socks, tote bags, everything. I figured it would work great on a backpack too!
Cricut even has a StrongBond™ Guarantee. If you use their Iron-On as directed, you'll be completely satisfied with the results. If not, they'll replace it for free!
Materials:
- Backpack
- Iron-On
- Cricut Maker or other Cricut Machine
- StandardGrip Mats
- EasyPress 2 or Iron
Instructions:
First, create a monogram in Design Space.
This font is called 'High Jump' and it is one of my favorite Cricut fonts to use for monograms. I share a few other monogram font ideas in this post.
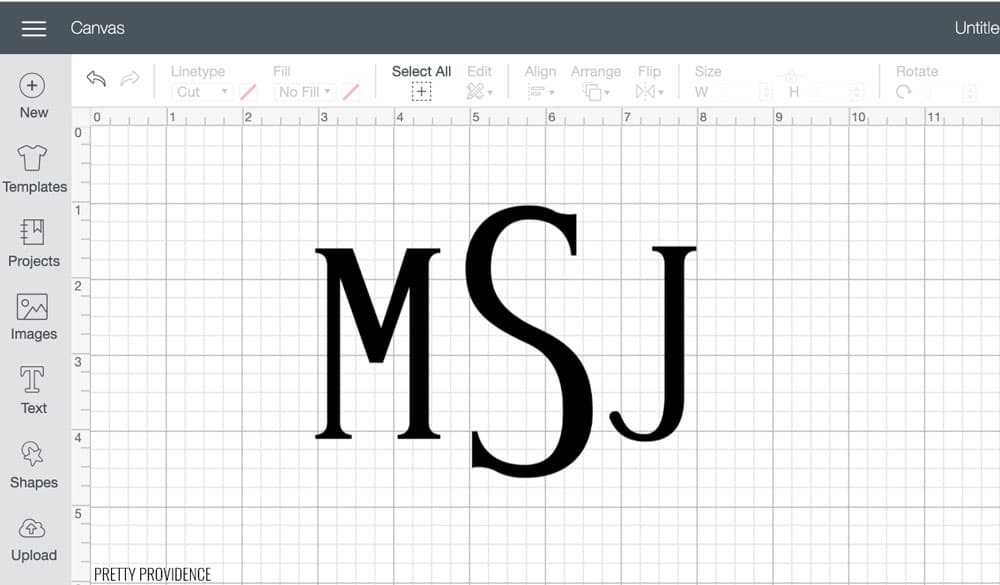
Once the monogram is sized and spaced how you want it on your Design Space canvas, click 'group' and then 'attach.'
Make sure to measure the surface of your backpack that you want the monogram to fit on and size the design accordingly.
Cut a piece of iron-on to size and place it shiny side down on a StandardGrip mat.
Click 'Make it' and then you will see this screen. Select 'Mirror'
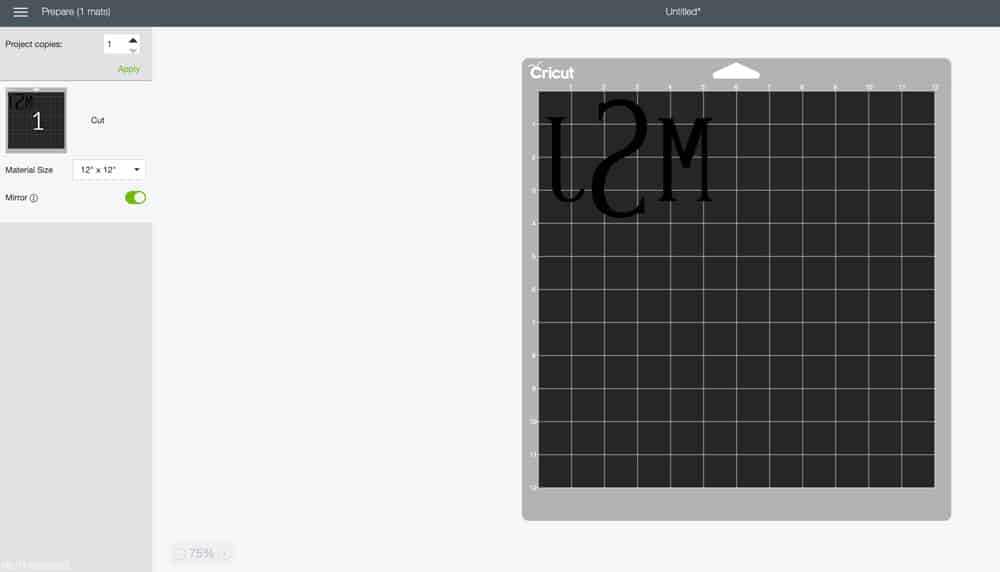
Load mat into the Cricut and when the little Cricut icon flashes, click it to begin cutting.
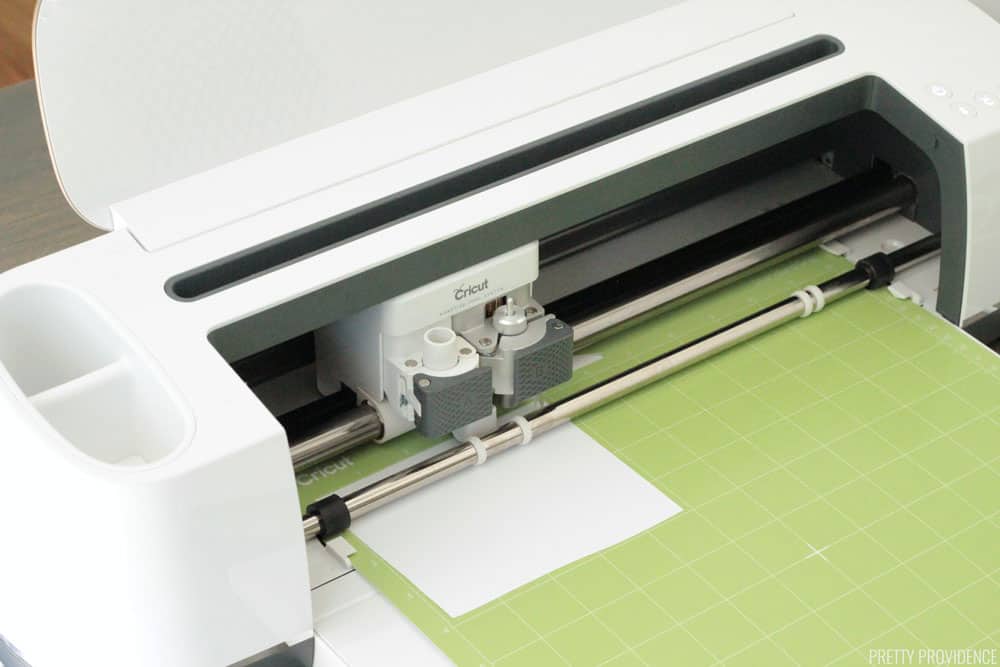
Remove iron-on from the mat and weed.
How to Apply Iron On to Personalize a Backpack
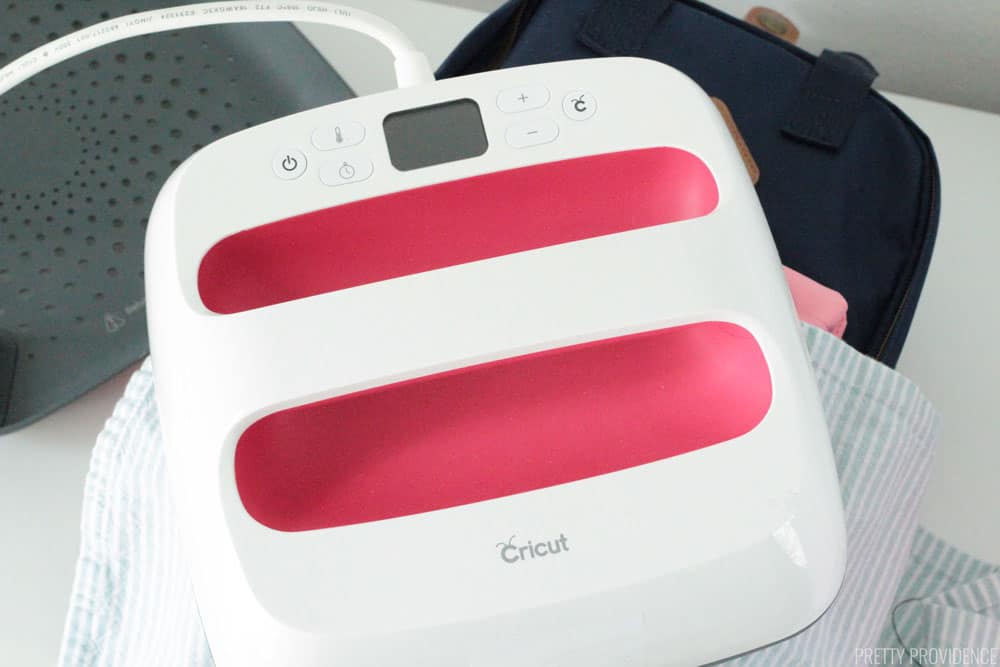
First, heat an EasyPress 2 to 315 degrees (or an iron to its hottest setting) while you weed the design.
If you're using an iron, make sure steam is turned off.
Now, cover the backpack with a thin fabric, like a tea towel. Now you can press the design with heat for about 60 seconds. Check under the towel as you go to make sure you aren't melting anything.
Wait for it to cool a little bit, just til it's warm and then peel it.
Ta da! Can you even deal with this color-coordinated personalized backpack and lunch gear? I can't.
And, if you're wondering...
What kind of backpacks can be personalized with Iron-On?
This backpack is made of a Polyester Cotton blend. You have to be careful (with anything polyester) not to melt it with the heat press.
Cotton and canvas backpacks are ideal for iron-on projects. I chose the Poly blend bag because it is easier to clean!
So, okay, thank you for your time. That's it for today! What school supplies should I personalize next? I'm thinking notebooks. Yes, notebooks are always a good idea.
Printable Instructions

DIY Monogrammed Backpack
Equipment
- StandardGrip Mats
- EasyPress Mini or Iron
- Cricut Maker (or any Cricut Machine)
Materials
- Backpack
- Everyday Iron-On
Instructions
DESIGN
- First, create a monogram in Design Space.
- This font is called 'High Jump' and it is one of my favorite Cricut fonts to use for monograms. More monogram font ideas in this post.
- Once the monogram is sized and spaced how you want it on your Design Space canvas, click 'group' and then 'attach.'
- Make sure to measure the surface of your backpack that you want the monogram to fit on and size the design accordingly.
CUT IRON-ON
- Cut a piece of iron-on to size and place it shiny side down on a StandardGrip mat.
- Click 'Make it' and then you will see this screen. Select 'Mirror'
- Load mat into the Cricut and when the little Cricut icon flashes, click it to begin cutting.
- Remove iron-on from the mat and weed.
APPLY IRON ON TO BACKPACK
- First, heat an EasyPress Mini to 315 degrees (or an iron to its hottest setting) while you weed the design.
- If you're using an iron, make sure steam is turned off.
- Now, cover the backpack with a thin fabric, like a tea towel. Now you can press the design with heat for about 60 seconds. Check under the towel as you go to make sure you aren't melting anything.
- Wait for it to cool a little bit, just til it's warm and then peel it.
Notes
- Cricut has a StrongBond™ Guarantee. If you use their Iron-On as directed, you'll be completely satisfied with the results. If not, they'll replace it for free!
- This backpack is made of a Polyester Cotton blend. You have to be careful (with anything polyester) not to melt it with the heat press.
- Cotton and canvas backpacks are ideal for iron-on projects. I chose the Poly blend bag because it is easier to clean!


