How to personalize a cup or tumbler with vinyl. Follow this complete tutorial for DIY vinyl tumbler decals with all the tips and tricks. Personalized tumblers make great gifts and they are so easy to make!
For years I've been adding personal designs to my tumblers with vinyl and my Cricut machine.
This is detailed tutorial, where I will share all the tips and tricks I've learned along the way! You can use this tutorial to personalize anything - a Yeti, Stanley Cup, Hydroflask, mug, glass jar, plastic water bottle, etc.
*This post contains affiliate links.
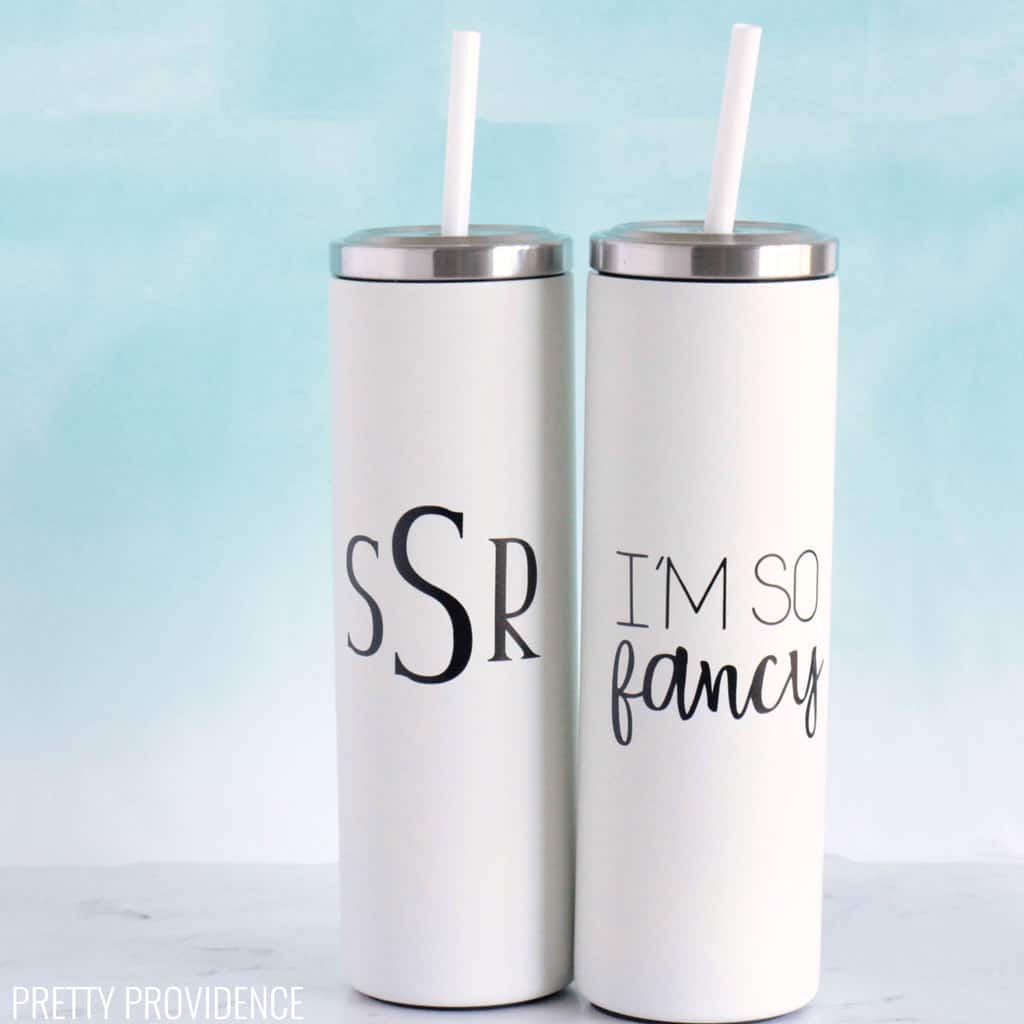
Personalized Tumblers
I love making personalized cups. There is something so fun about having a monogram, nickname, or favorite team on your drink!
Song lyrics are fun too. I have probably made 50 different tumbler decals over the past few years, some for myself and many to give as gifts. Somehow I never get sick of it!
Tips & Tricks
Before you start designing, you may want to read Everything You Need to Know about Cricut Fonts – a post I wrote detailing my favorite Cricut fonts, tips and tricks for using them, and some of the best font combinations you can put together!
The Best Vinyl for Cups
I use Cricut Permanent Vinyl to personalize tumbler cups. It comes in so many colors.
The vinyl cups last and stay looking great, even with everyday use and washing over and over in the dishwasher.
We use it to label our kids' water bottles and lunchboxes, make teacher gifts, and label bins and containers in our house. Jessica made a really cool vinyl cup recently with all kinds of stickers to represent her favorite things!
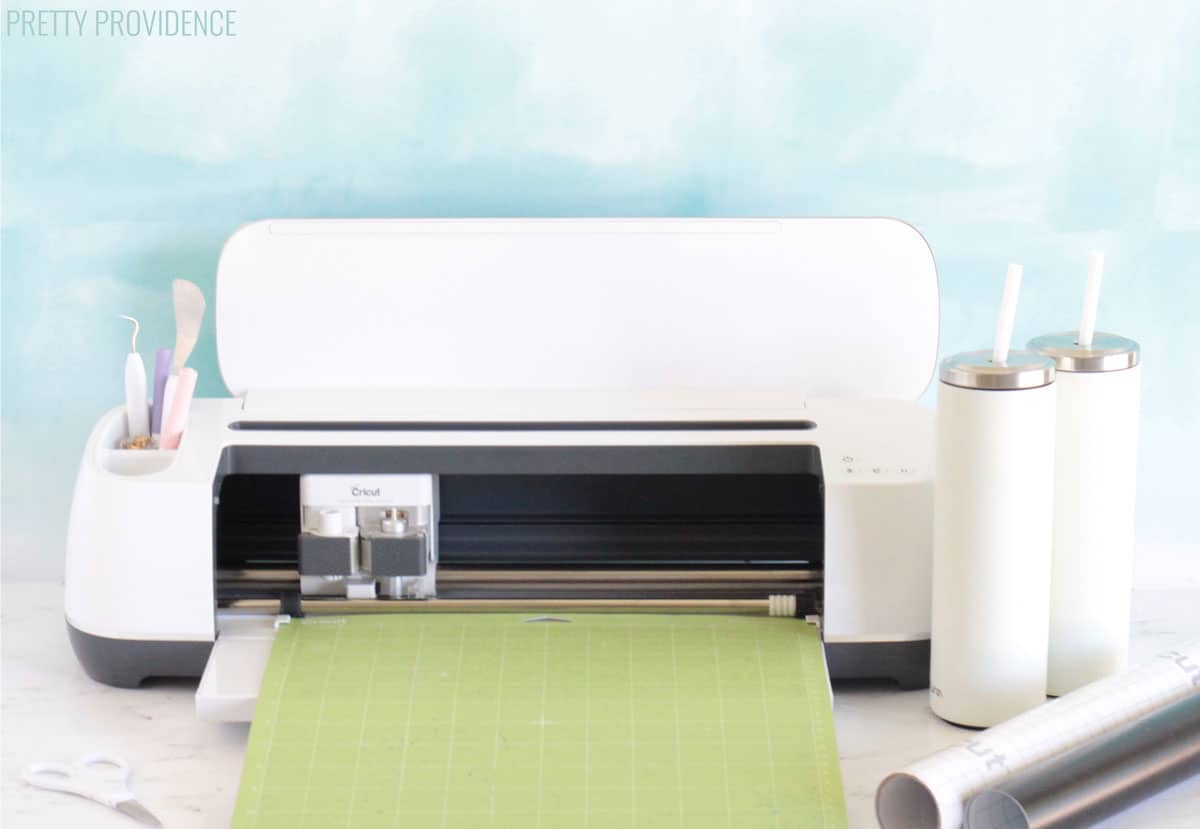
Materials Needed:
The tumblers I used for this tutorial are these Skinny Cups from Amazon.
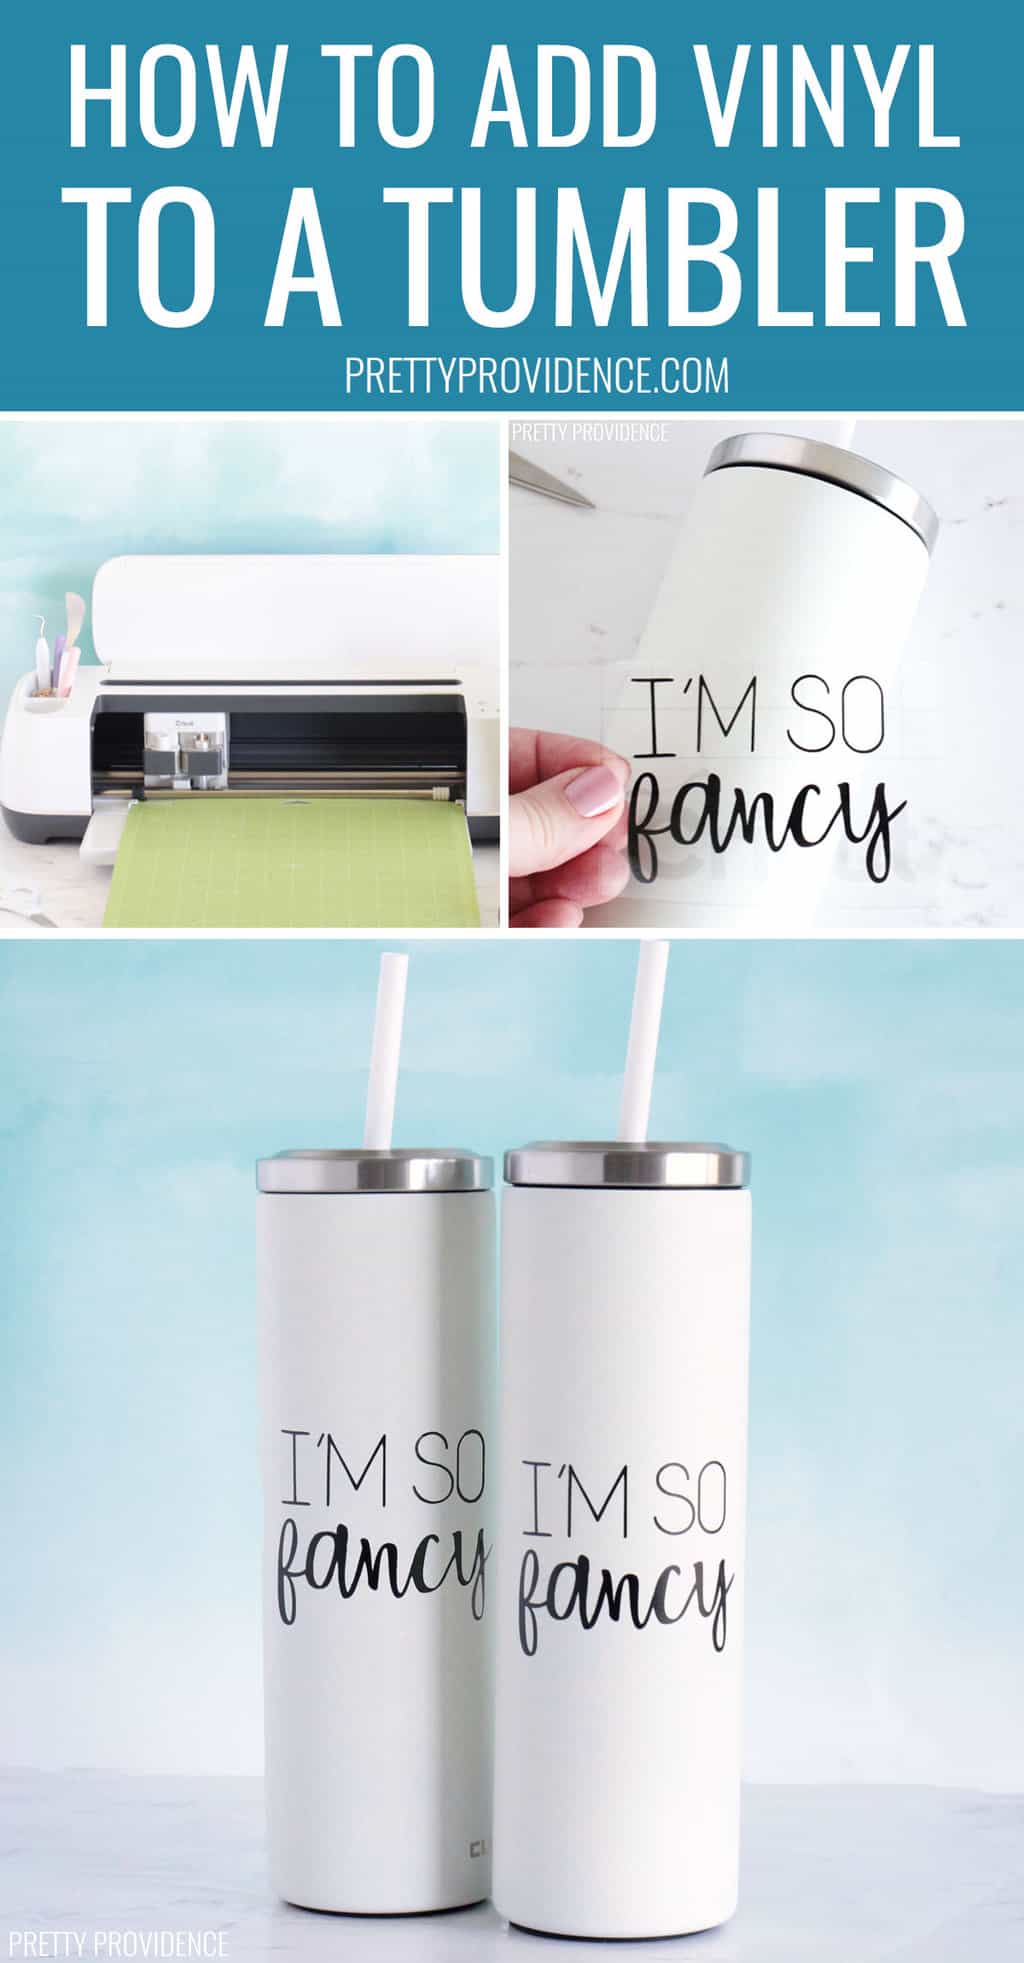
How To Make Tumblers:
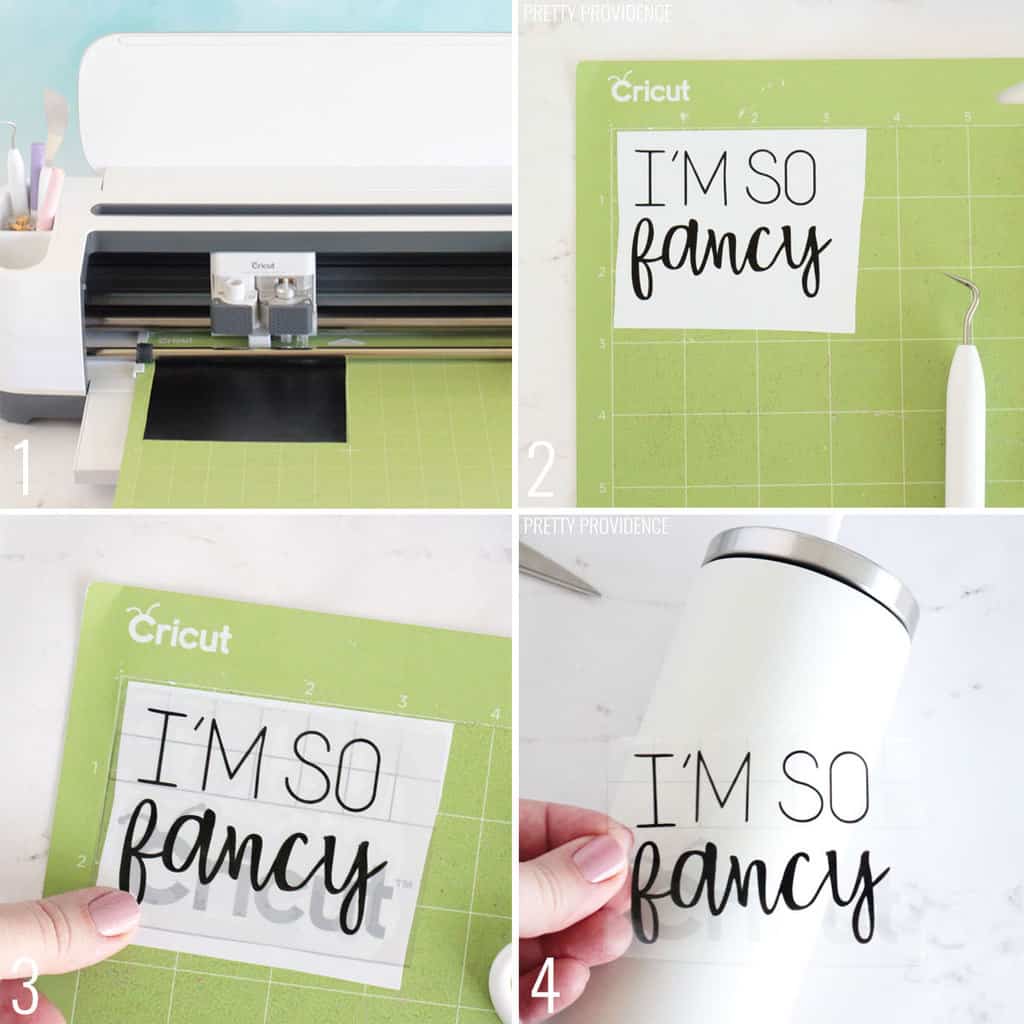
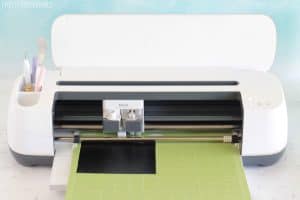
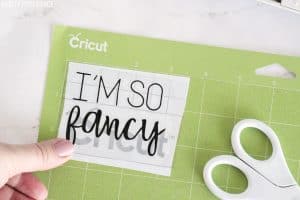
- Cut vinyl design with Cricut machine.
- Weed excess vinyl from around the outsides and the insides of the design.
- Put transfer tape down onto the design and burnish (A.K.A. rub) with your thumb or the back of a weeding tool. Make sure it is good and stuck.
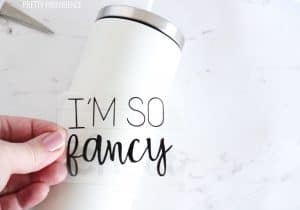
- Pick up transfer tape and make sure the whole tumbler decal is stuck to it. Position it over the cup where you want to apply it, then press the design and transfer tape down to stick it on.
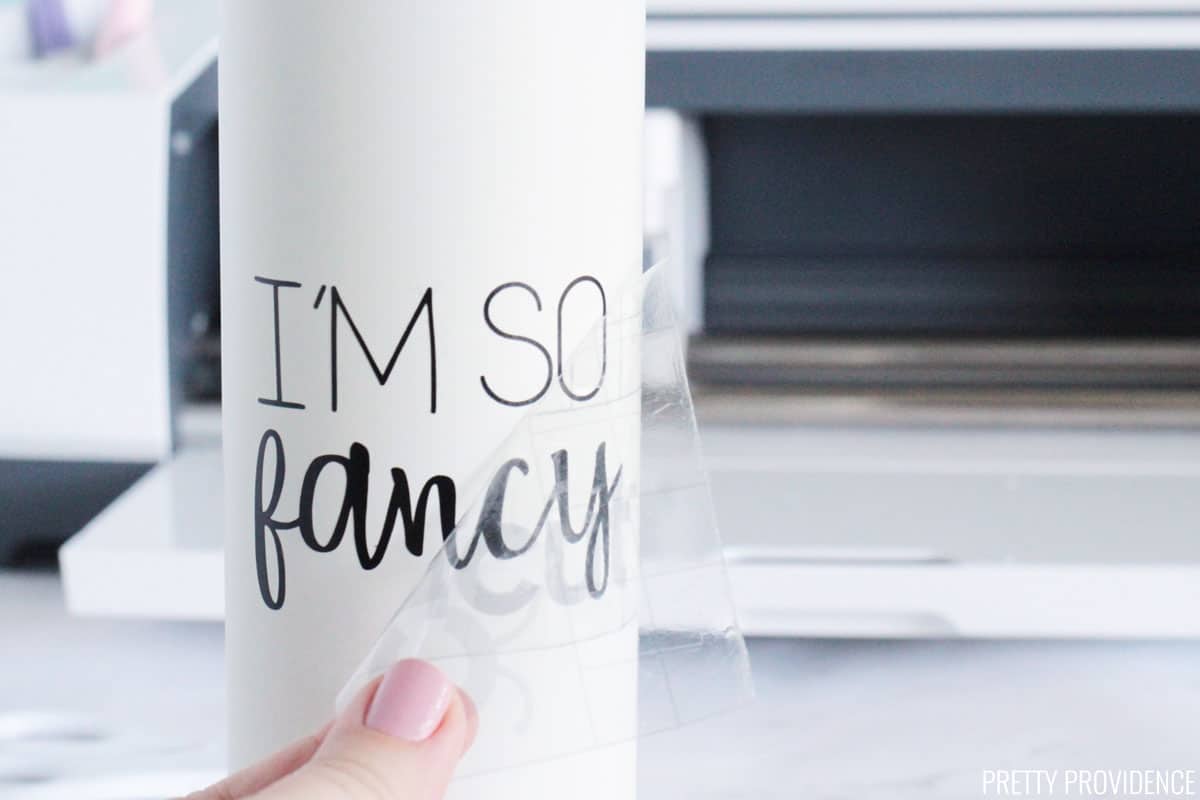
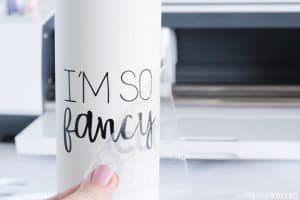
Remove (below) transfer tape slowly, pull diagonally from one corner. If any of the design starts coming up with the transfer tape, press it back down, burnish more, and try again.
Tumbler Decal Pro Tips
Stainless steel cups, like Yeti brand or Hydroflask should be hand-washed with hot, soapy water. You can wash them in the dishwasher, but they might be discolored or damaged over time.
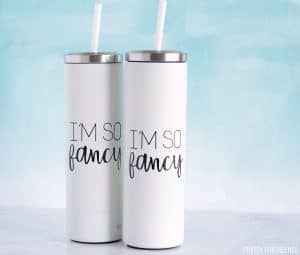
Ta da! I hope you have fun making your own personalized Yeti cups!

More Crafts from Pretty Providence
More Favorites from Pretty Providence:
If you use this tutorial, we'd LOVE if you leave us a comment and positive review! Also -- tag us on instagram @prettyprovidenceblog so we can see what you're making!
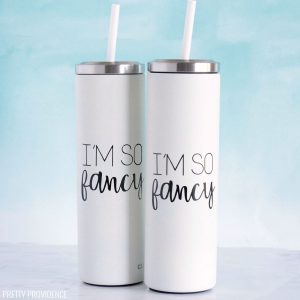
Vinyl Tumbler Decal
Video
Equipment
- Cricut Machine
- Standard Grip Mat (green)
- Weeding Tool
Materials
- 1 Stainless Steel Tumbler with Straw
- Cricut Permanent Vinyl
- Cricut Transfer Tape
Instructions
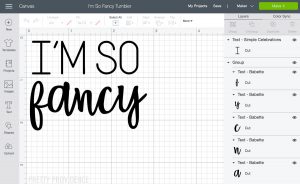
- Open design in Cricut Design Space and size it to fit your cup. Make sure your design is 'attached. 'Weld' if you are using cursive letters. Click 'make it.'

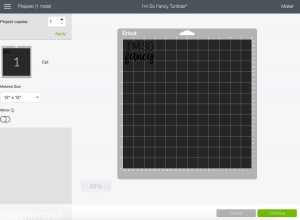
- Select 'vinyl' from the materials list if you are using a Cricut Maker. If using an Explore machine choose 'vinyl' using the dial on the machine. Check to make sure that the fine point blade is loaded in your machine. Choose 'continue.'

- Cut a piece of vinyl to the size needed for your decal, leaving a centimeter extra on the sides. Put the vinyl onto your green mat. Follow the prompts in Design Space to cut the vinyl.

- Cut vinyl.

- Weed extra vinyl from around the words and inside the letters using a weeding tool.
- Cut a piece of transfer tape and press it down onto the vinyl design. Burnish the transfer tape. (Burnishing: Rub back and forth over the tape with your thumb or the back of a weeding tool until it is good and stuck.)Slowly pick up the transfer tape and if any of the letters aren't coming up with it, put the tape back down and burnish again.
- Place the design with transfer tape onto the tumbler and burnish with your thumb.

- Pull transfer tape off of the design slowly, diagonally from one corner.
- Done! Now you have a cute, personalized tumbler decal!


Notes
- Permanent vinyl is the best kind of vinyl to use for tumbler cups.
- Cricut Permanent vinyl will last really well.
- You can put this vinyl through the dishwasher but stainless steel tumblers hold up better if you hand-wash them.
Do you have more questions about Cricut or a desire for more in depth tutorials like this? Check out this amazing course!
Click here to check it out! Or just go to our Cricut project gallery to see ALL of our Cricut projects and tutorials!


Diane V
I made these for my son's friend's graduation gifts and everyone loved them!! Thank you for sharing such great instructions, so easy!
Kristyn
My girls are all over this!! Thanks for the tips!! Love my machine!
Layla
Such a fun craft! We used this for our teacher appreciation even.
Sha
This is so easy to follow! Showed it to my friend and we made it together, we had so much fun! It turned out so cute and adorable!
Kristen
These decals worked great and now my water bottle is so nicely decorated.
Buy Usa Proxies
Appreciating the time and energy you put into your site and detailed information you present. It's great to come across a blog every once in a while that isn't the same outdated rehashed information. Wonderful read! I've saved your site and I'm adding your RSS feeds to my Google account.
Lauren
Hi! I hope you can help. I just decorated a tumbler for the first time with permanent vinyl and I can easily feel the vinyl when I rub my fingers over the tumbler. They basically feel like stickers. Is this normal? I'm worried that they will easily peel if/when it gets wet, or even with normal daily use. I appreciate your feedback! Thanks so much.
Jessica
Yes this is normal! They don't sink in or anything. If you used permanent vinyl it should be strong enough to withstand washing etc.
Ginny
What is best way to do a print and cut to put on a tumbler?
Sarah
Hey, I think if you want to do print then cut on a tumbler, you will want to use a printable sticker paper, and then put something over that to seal it so it doesn't get ruined by water. With that said, I haven't done that before, we usually use permanent vinyl to make our decals.
Karla
My daughter bought a tumbler from hobby lobby. The outside has textured glitter. Would she be able to decorate it and if so what with please?
Jessica
Texture definitely is not ideal for vinyl application. She could try using permanent vinyl still, but it would not last as long.
Aleo
What do you recommend? Matte or Glossy Vinyl for these kinds of surfaces?
Sarah
I prefer matte but I think either kind works!
nancy bass
How do you get the size of decals for different sizes and types of cups? Is there a best way or rule of thumb or a type of chart.
Sarah
That's a good question. There might be a chart somewhere, but I usually just measure the cup and decide while I'm looking at it.
Lynnette Beste
I just used your template to make a tumbler for myself. Thanks for the instructions. It made it so simple, and it looks so great. It made me feel successful! Thank you so much.
Laura Reese
I have needed this tutorial for so long! Made the process so easy.
Trang
I secretly love to label everything so this how-to is perfect for me!
Lily
I love this idea, I have been looking for a way to customize a friends tumbler this will make a great gift; thank you for the simple step-by-step instructions.